- Support Home
- Knowledge Base
- Campaigns And Activities
- Content
- Asset Library
Related articles
Need some help?
If you have questions or can't find what you're looking for, we're here for you.
Taguchi Support is available Monday to Friday, 9am - 5:30pm AEDT.
Create New TicketTaguchi Certified Training
Join our free and live online training sessions. You'll benefit from a better understanding of the platform's features and functionality. Learn from the experts, it's a great place to start!
View CoursesAPI Version 4
Did you know Taguchi has an API that supports all of the functionality provided by the admin interface and more?
Explore API Documentation
Thanks for your feedback!
Asset Library
The asset library is a centralised place to create and edit dynamic assets. Dynamic assets are image/s that can be modified and targeted. Modifying the asset is to edit the values within the image, such as changing the title and adjusting the price. Targeting an asset is only displaying to a particular audience, for example only subscribers in Victoria or New South Wales.
Having the asset library reduces the amount of steps required to implement asset changes in your organisation. Instead of having to change each individual asset, all instances of the asset can be manipulated in one location, allowing for more efficient and easier asset management. The ability to target and customize the dynamic assets in the asset library, refines your email personalisation and gets you closer to your recipients.
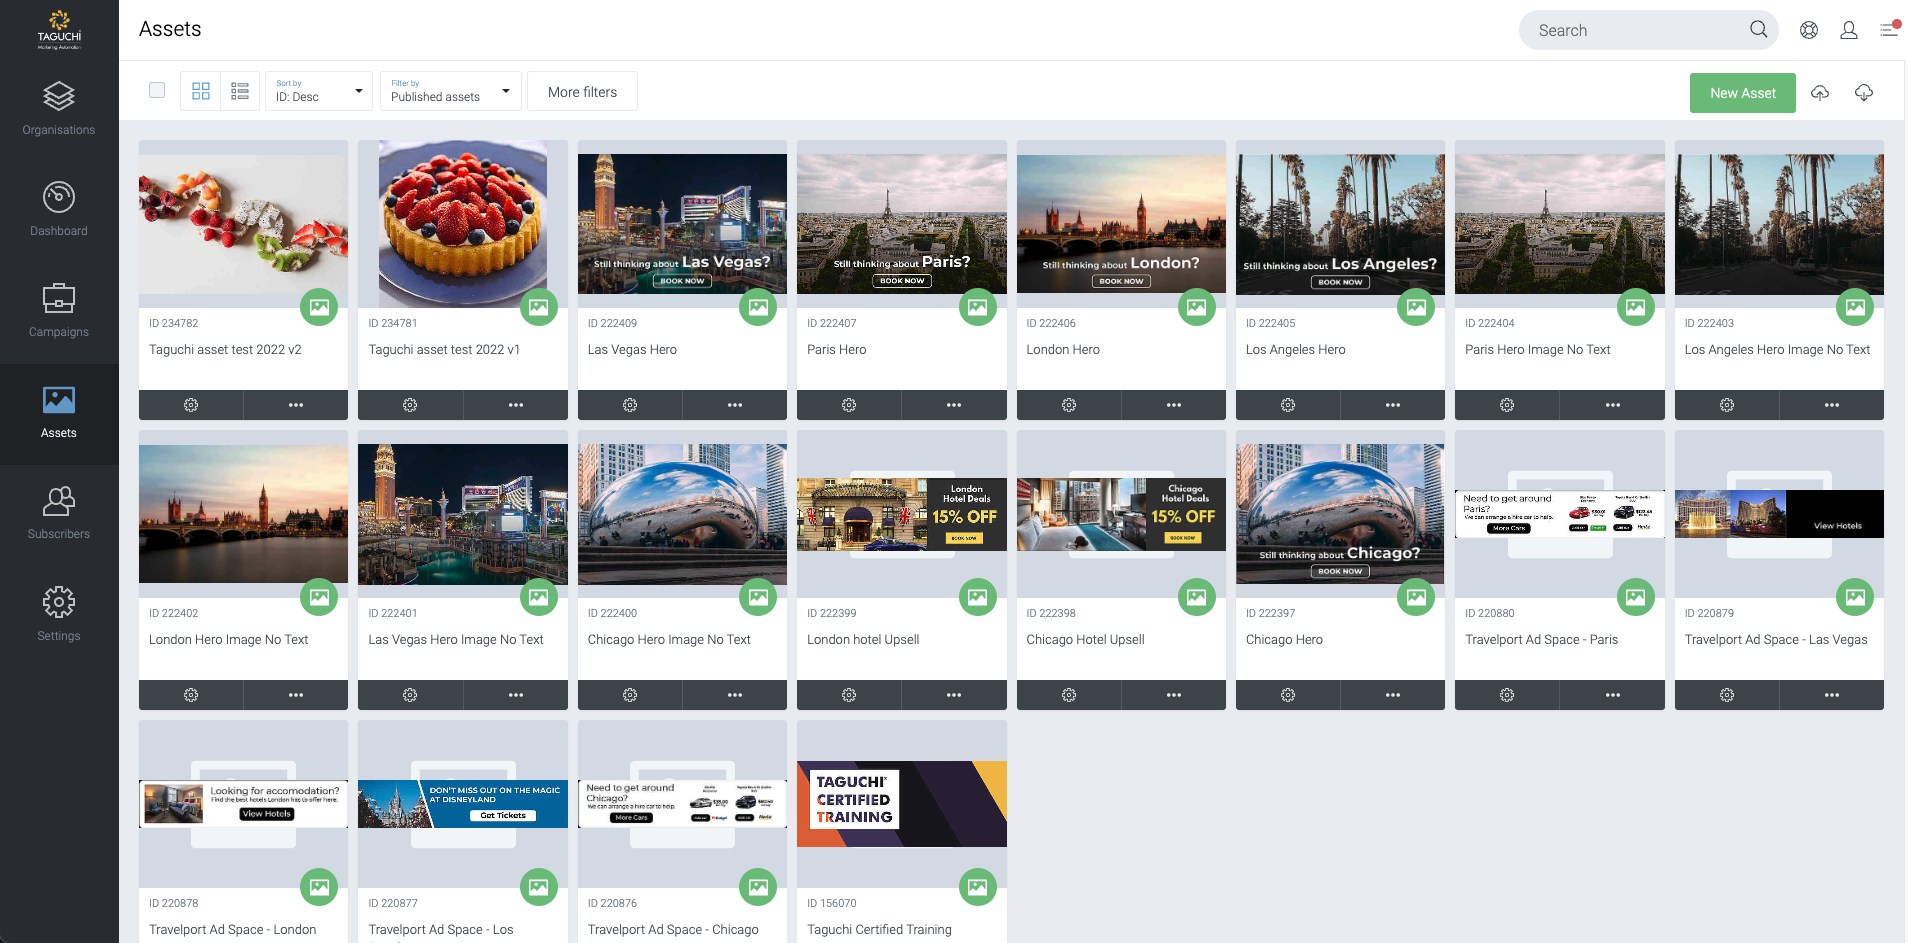
This is what it looks like:
To setup the asset library for your organisation there are a couple of things that need to be setup by Taguchi first:
- A basic image asset template
- Adding a dynamic asset block to the eDM template
Once this has been setup, to add an asset simply select New Asset in the top right hand corner of the screen. This will open up the Asset Setup page, from here select the template you want to use from the drop-down menu. Each template will contain different functionalities and custom fields depending on what has been setup, however, the basic image template will look something like this:
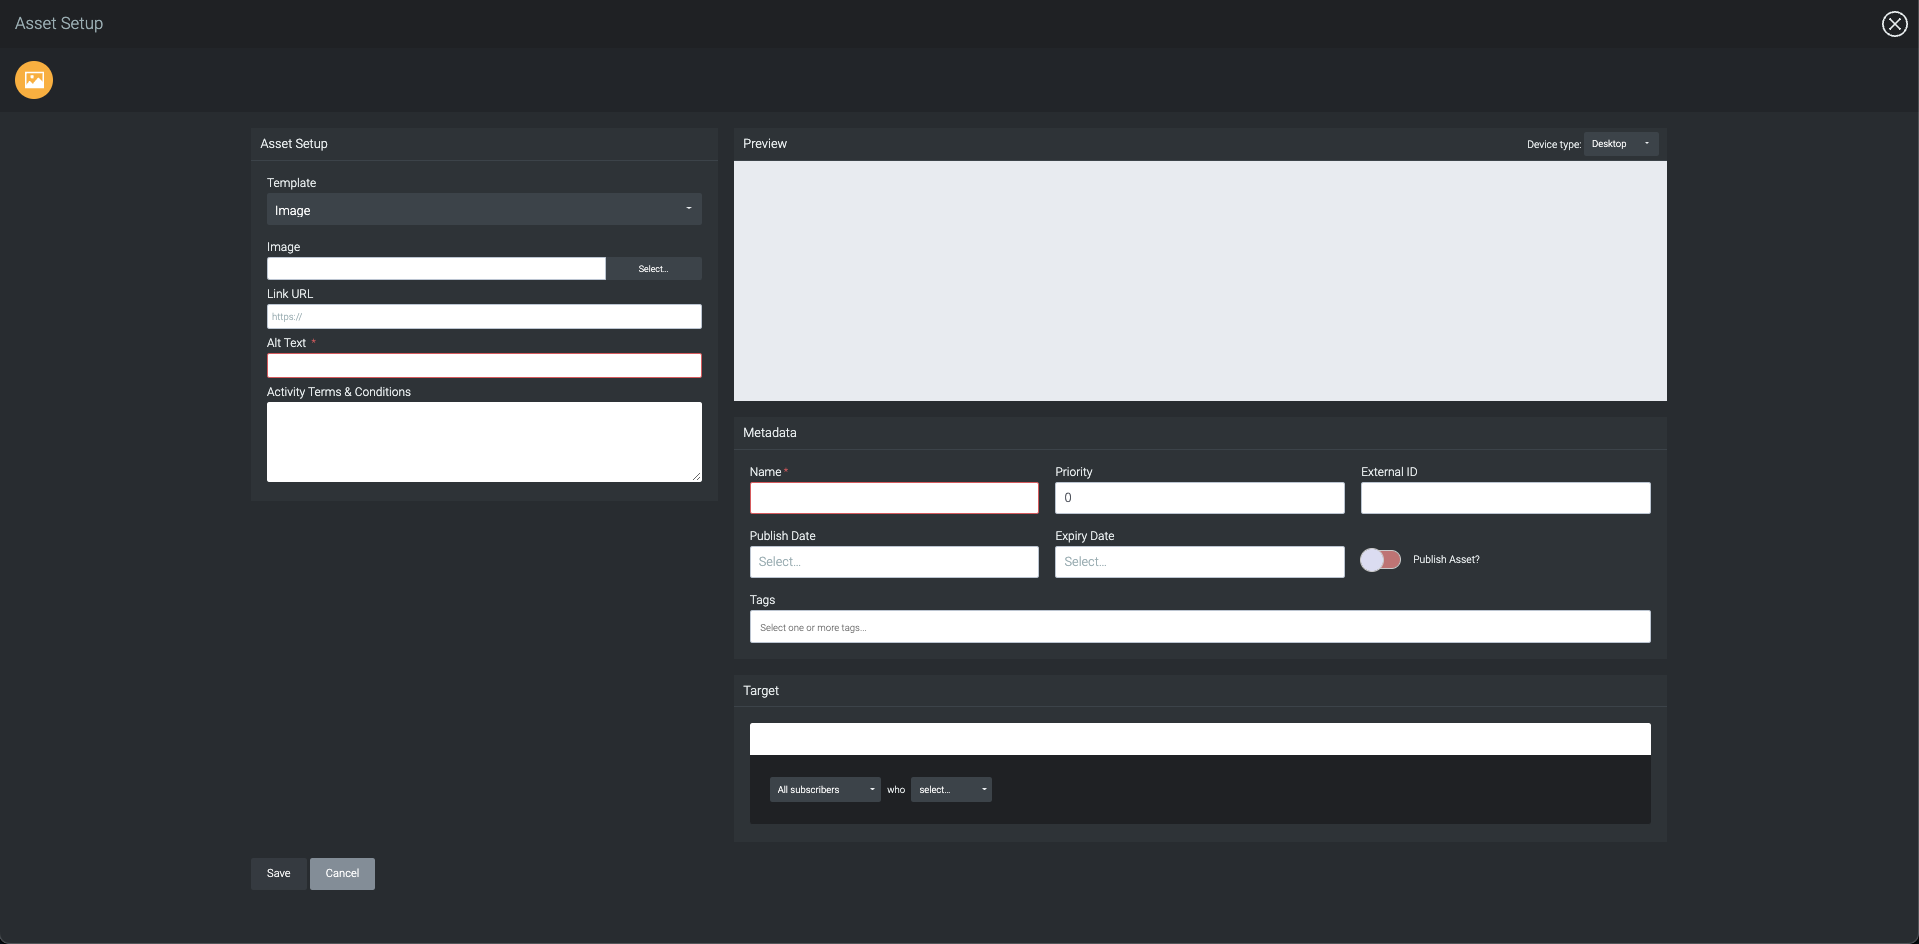
The Asset Setup section is where you upload your image, configure the Link URL, Alt Text and so on. The Metadata section is where you describe important information about the asset, this is what will allow you to pull the asset into the activity. This includes the Name, External ID, tags and so on. At the bottom of the screen is the Target Expression builder, this lets you create an expression that filters who can and cannot view the dynamic asset.
To use the asset in an email activity open up the activity editor and scroll down to the content menu, select the add item drop down menu, and choose dynamic asset. This will add a dynamic asset block on the left hand side of the screen. Open up the dynamic asset block and add the your asset tag into the Required tags text box. Now you have added your dynamic asset into the email.
If you have multiple assets that you want to add to the asset library, you can utilize the bulk upload function. Next to the New Asset is a button called Upload Assets. Note that you will need to upload this using a csv file. You can also download all of the assets by selecting Download Assets button in the top right hand corner, this will generate a csv file containing all of the assets in the library.
When you have a large amount of assets, or want to view a specific type of asset you can use the sort by and filter by options at the top of the asset library. This allows you to sort the assets alphabetically or ID and whether they are published, archived or both. If you select More filters you also have the option to search for specific assets by either ID, name, external ID or tag.
If you're keen on incorporating dynamic asset display on your website or native app, check out the article on Website personalization. It demonstrates how these assets, when combined with Taguchi’s standard web tracking code, not only help identify subscribers on your site but also showcase content tailored to their preferences.
If you require a specific asset or have certain layout requirements please contact Taguchi support support@taguchi.com.au to arrange this.