- Support Home
- Knowledge Base
- Campaigns And Activities
- Proofing
- Email Proofs
Related articles
Need some help?
If you have questions or can't find what you're looking for, we're here for you.
Taguchi Support is available Monday to Friday, 9am - 5:30pm AEDT.
Create New TicketTaguchi Certified Training
Join our free and live online training sessions. You'll benefit from a better understanding of the platform's features and functionality. Learn from the experts, it's a great place to start!
View CoursesAPI Version 4
Did you know Taguchi has an API that supports all of the functionality provided by the admin interface and more?
Explore API Documentation
Thanks for your feedback!
Email Proofs
Requirements
A proof list must be set up and have recipients added to it. See setting up a proof list in the Taguchi v4 User Guide.
When an activity is being set up, proof messages can be sent to a designated proof list or your email by clicking the 'Send Proof...' button (shown below).
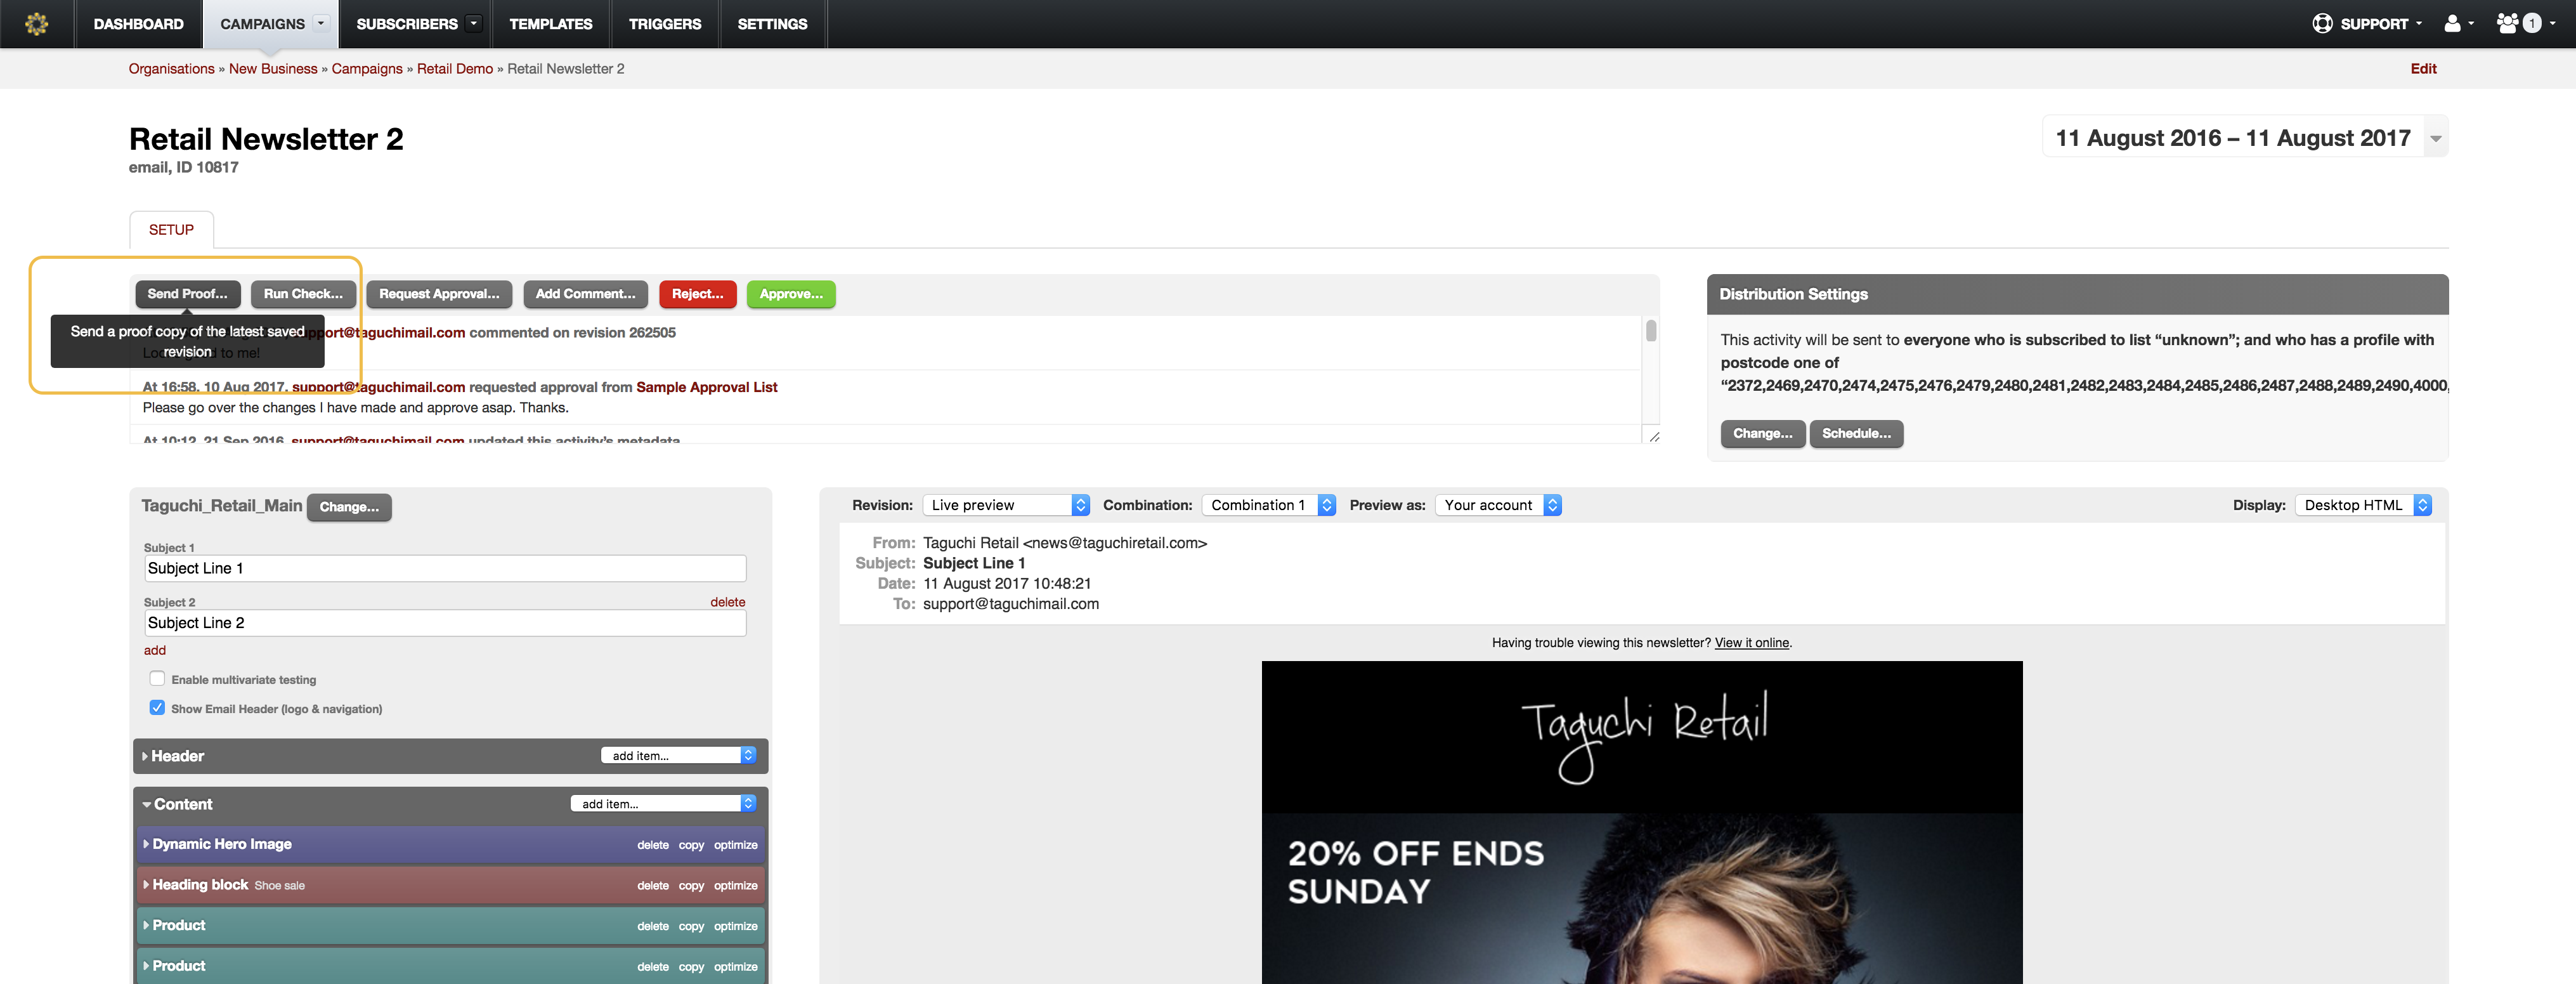
Any comments added by users to the proof list will be displayed in the activity log located at the top of the activity edit interface.
Once an activity’s content has been completed, it must be submitted to a designated approval list. Approval requests can be sent using the drop-down menu immediately above the preview pane.
Like Proof messages, approval requests are identified by a marker at the start of the subject line (‘[Approval Required]’) and a header at the top of the email content. The approval header indicates the target lists and views selected for the message (if the activity type is broadcast email or broadcast SMS), and provides three actions:
- approve
- reject (with reason)
- add comment
A message must be approved by at least one member of an Approval list, and not rejected by any, before it can be sent (or, in the case of a triggered message, before the changes will take effect). Every time the message content, template or target lists/views are changed, the message will lose its approved status, and require re-approval. This ensures that an unapproved message can never be sent.
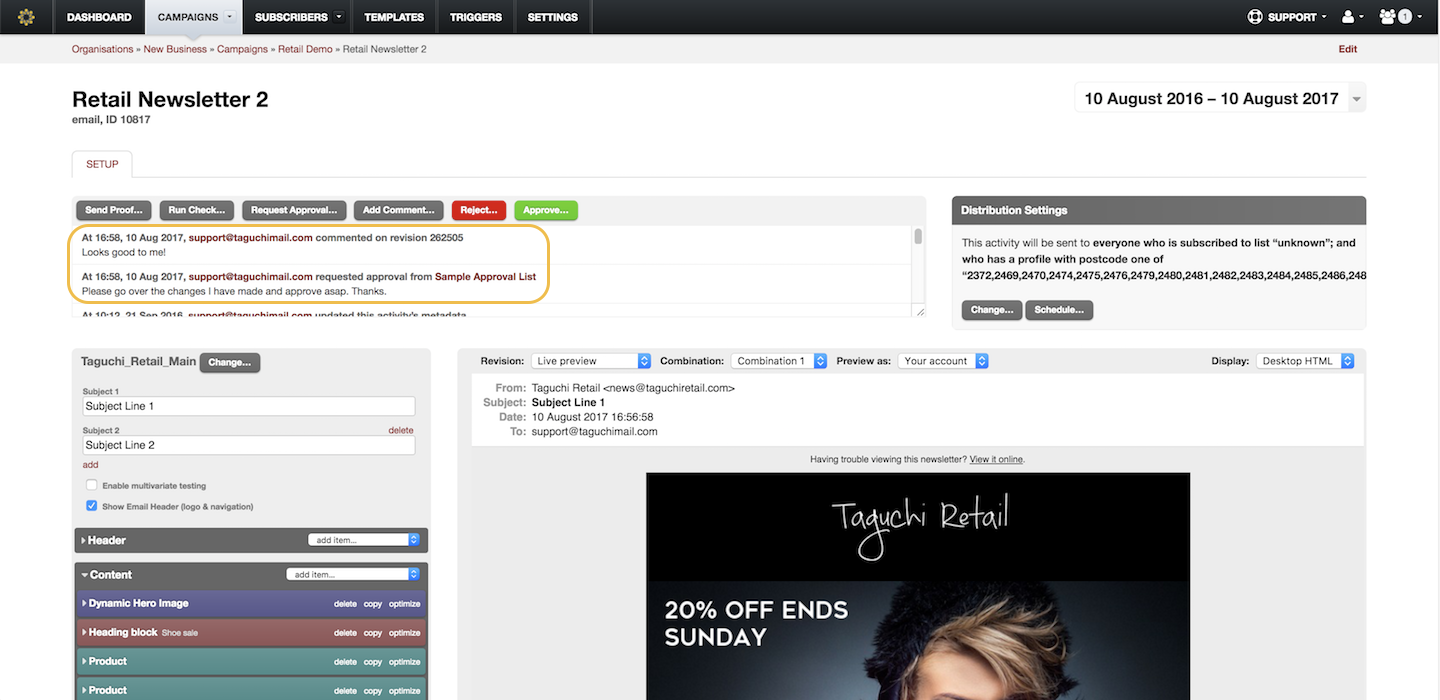
During the edit, proof and approval stages of the activity setup process, all changes made are logged. A list of changes are always visible in the activity log. A sample of this log is similar to the following:

Each version of the message saved is allocated a revision number (at the end of the comment), and listed along with the time at which it was saved.
Before sending a Proof, make sure that you have checked and tested all the links, spelling, images, optimised combinations and subject lines.
Sending a Proof
Click on the grey ‘Send Proof’ button. The following light box appears

Select recipient(s)
You can send the proof to yourself or a designated proof list by checking your email address or selecting a proof list from the dropdown menu below that.
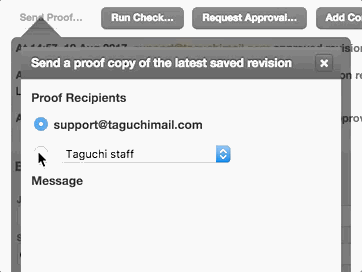
Include a message to be sent with the proof (optional)
Proof Options
- ‘Include live samples’ will send 5 random subscriber samples of the email. This includes any personlisation and conditional content.
- ‘Include Conditional proof matrix’ will send a CSV file of all possible email variations with a link to each activity variation.
- ‘Send response notification to’ will send a notification if a person on a proof list responds with comments to the proof that they have received.
A notification email is sent to the recipient(s) selected in recipient mentioned in step 2. These Proof messages will be identified by a ‘[Proof]’ marker at the start of the subject line, and a header at the top of the email content stating that the message is a proof, and a link inviting recipients to comment.
Requirements
A proof list must be set up and have recipients added to it. See setting up a proof list in the Taguchi v5 User Guide.
When an activity is being set up, proof messages can be sent to a designated proof list or your email by selecting the participant/s and clicking the paper airplane icon (shown below).

Once an activity’s content has been completed, it must be submitted to a designated approval list. Approval requests can be sent using the drop-down menu immediately above the preview pane.
Like Proof messages, approval requests are identified by a marker at the start of the subject line (‘[Approval Required]’) and a header at the top of the email content. The approval header indicates the target lists and views selected for the message (if the activity type is broadcast email or broadcast SMS), and provides three actions:
- approve
- reject (with reason)
- add comment
A message must be approved by at least one member of an Approval list, and not rejected by any, before it can be sent (or, in the case of a triggered message, before the changes will take effect). Every time the message content, template or target lists/views are changed, the message will lose its approved status, and require re-approval. This ensures that an unapproved message can never be sent.
Each version of the message saved is allocated a revision number (at the end of the comment), and listed along with the time at which it was saved.
Before sending a Proof, make sure that you have checked and tested all the links, spelling, images, optimised combinations and subject lines.
Sending a Proof
Select participants(s) you would like to receive the proof.
You can send the proof to yourself or a designated proof list by checking your email address or searching for a proof list by selecting the plus icon.
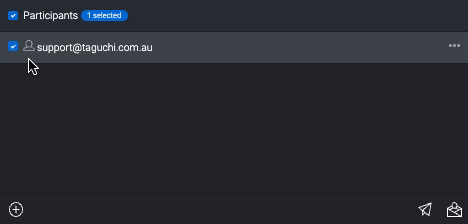
Click on the paper airplane icon to send the proof (or the envelope icon to send live proofs).
Proof Options
- ‘Include live samples’ will send 5 random subscriber samples of the email. This includes any personalization and conditional content.
- ‘Include Conditional proof matrix’ will send a CSV file of all possible email variations with a link to each activity variation.
- ‘Send response notification to’ will send a notification if a person on a proof list responds with comments to the proof that they have received.
- 'Test matrix' allows you to create test profiles for each of the segments you wish to test, and outputs sample eDM's if the profiles fall into the target expression inputted for that activity. Please refer to What is the test matrix and how can I use it? for more informatoin.
The test matrix is only available when "Work Flow" is enabled in your organisation.
A notification email is sent to the recipient(s) selected in recipient mentioned in step 2. These Proof messages will be identified by a ‘[Proof]’ marker at the start of the subject line, and a header at the top of the email content stating that the message is a proof, and a link inviting recipients to comment.