- Support Home
- Knowledge Base
- Integrations
- V5 API PowerBI Endpoint (Authenticated) Integrations
Related articles
Need some help?
If you have questions or can't find what you're looking for, we're here for you.
Taguchi Support is available Monday to Friday, 9am - 5:30pm AEDT.
Create New TicketTaguchi Certified Training
Join our free and live online training sessions. You'll benefit from a better understanding of the platform's features and functionality. Learn from the experts, it's a great place to start!
View CoursesAPI Version 4
Did you know Taguchi has an API that supports all of the functionality provided by the admin interface and more?
Explore API Documentation
Thanks for your feedback!
V5 API PowerBI Endpoint (Authenticated) Integrations
Integrations is not available for Taguchi V4 and is only available in V5.
Please contact Support if you don't know which version of Taguchi you are using.
Taguchi has an API integration which creates a seamless and automated connection between your email marketing database in Taguchi, and your organisation.
This integration means you don't need to manually handle your subscriber data externally between Taguchi and your organisation to achieve the above, reducing the risk of data security issues and not to mention effort.
V5 API PowerBI Endpoint (Authenticated) Integrations
Our simple, self-serve integration tool offers a smart and secure way to manage your integration; without the risk and inefficiencies of manually handling customer data.
Credentials
You will need to setup up one credential before you are able to create an PowerBI integration. The main credential that you would need to set up will be the API token.
Here is more information on setting up the API Token Credentials.
Create Your V5 API PowerBI Endpoint(Authenticated) Integration
New Integration
To create a new integration, ensure that you have the required User Type integration role privileges assigned to you. The 'integration' page is under Settings > Integrations.
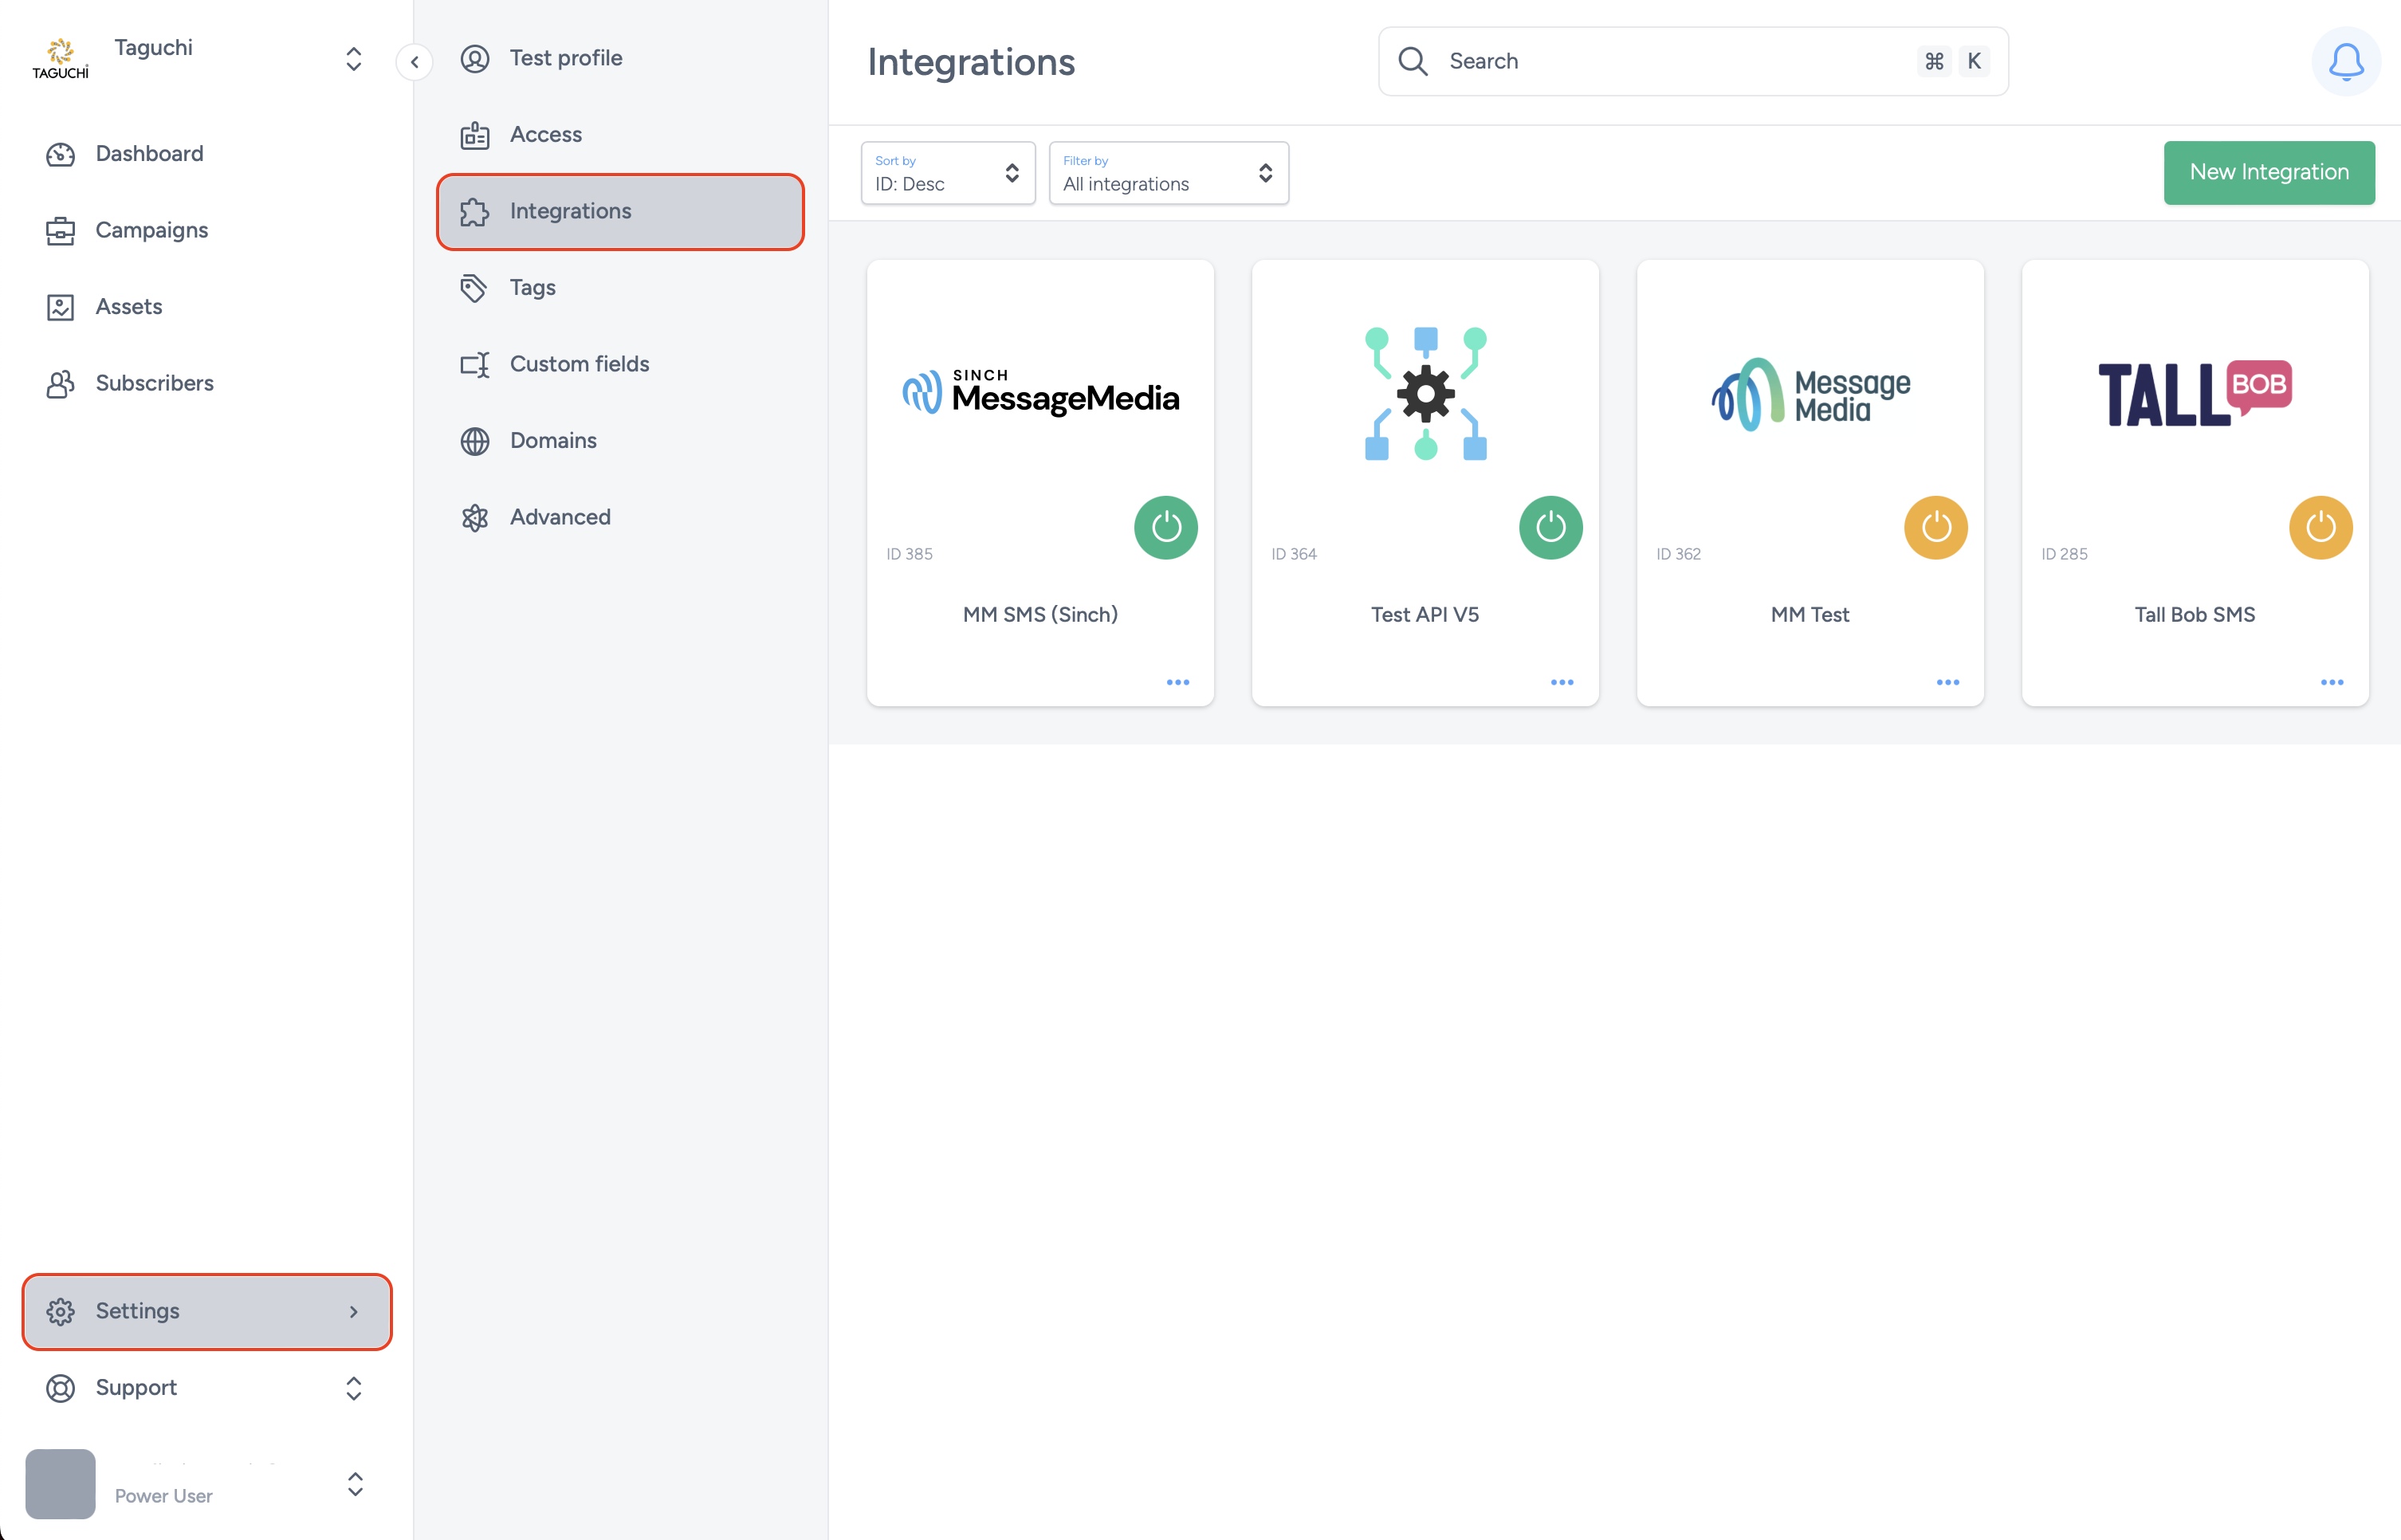
Select ‘New Integration’ and a new screen will popup.

Details
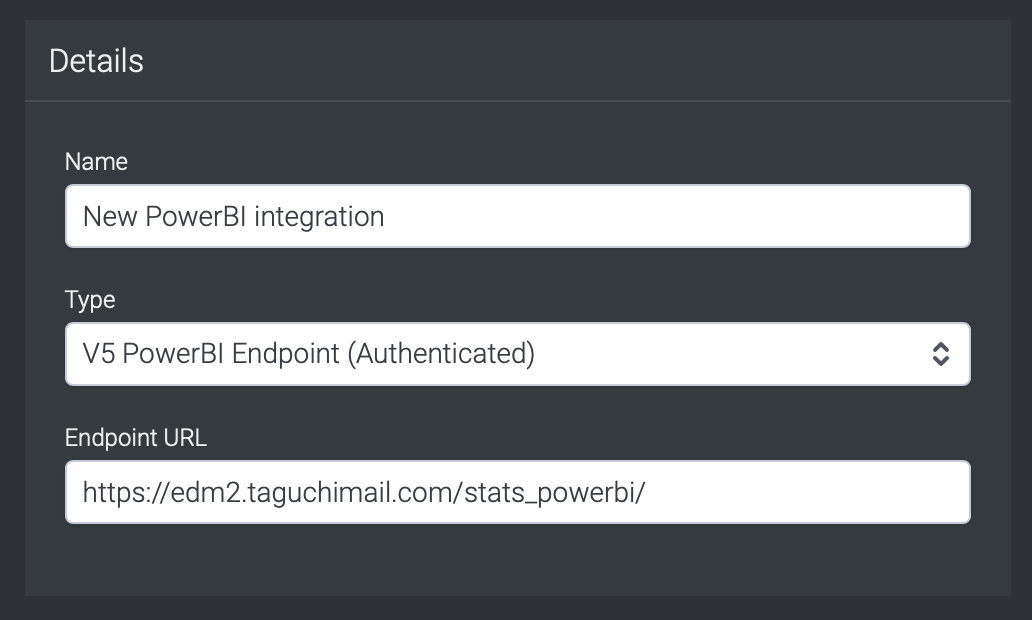
Set the name of the integration.
Under 'Type', select 'V5 PowerBI Endpoint (Authenticated)'.
The PowerBI API endpoint URL is accessed using HTTP requests, and each endpoint has a unique URL. When you create a new endpoint API integration, it will create a new unique endpoint URL for you.
Configuration
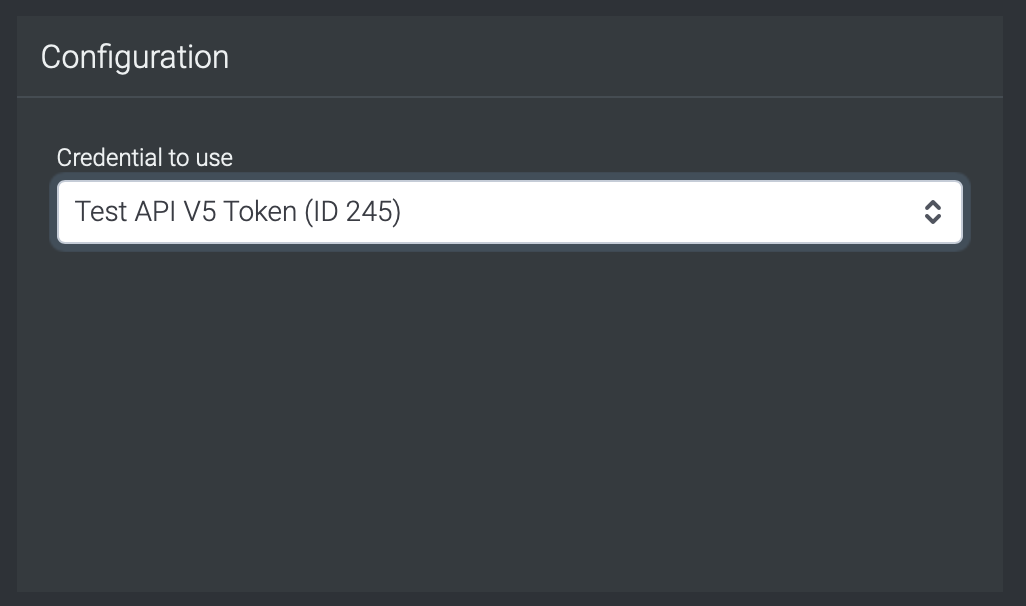
The configuration section only has one option which is the PowerBI API Token credentials which you have created beforehand. Choose the desired credential (API Token) to use that you have set up in the credential page.
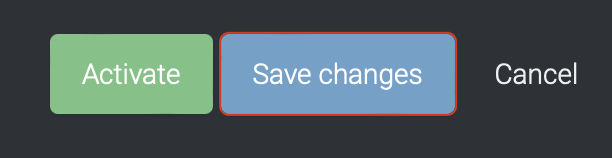
Save Changes and Activate
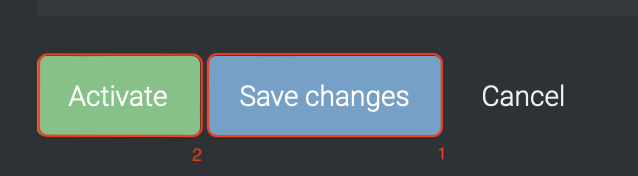
Once you have added your Details, Configuration and Target Expression, you will be able to save changes (1) and activate (2) the integration. You can only activate once you have save changes.
Deactivate

To stop the integration, click on Deactivate. This will stop Taguchi and TikTok from sharing data.
Active Integration
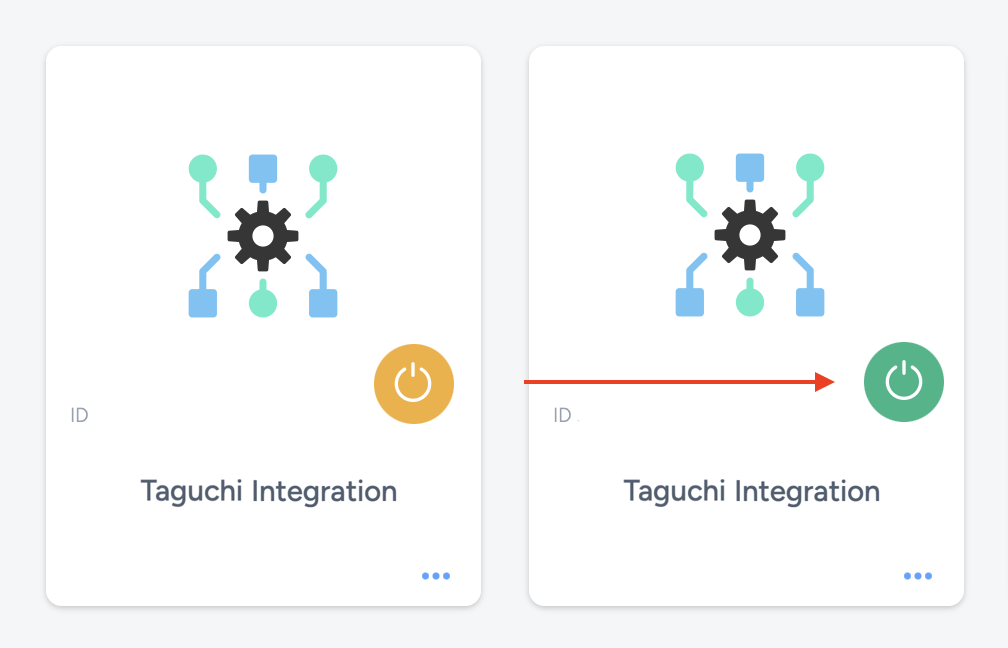
Once the integration has been saved and activated, the on/off icon of the integration card will change from yellow (Off) to green (On) which indicates that it is now activated.
Update Integration

If you want to update your Integration, you will be able to make the changes while it is activated or deactivated. Once the changes have been made, you will be able to update the integration by clicking on 'Save changes'. The Integration will be updated immediately.
If you are having trouble with this integration, please contact Taguchi Support for assistance.