- Support Home
- Knowledge Base
- Campaigns And Activities
- Content Segmentation
- How do I add segments and target content to specific subscribers?
Related articles
Need some help?
If you have questions or can't find what you're looking for, we're here for you.
Taguchi Support is available Monday to Friday, 9am - 5:30pm AEDT.
Create New TicketTaguchi Certified Training
Join our free and live online training sessions. You'll benefit from a better understanding of the platform's features and functionality. Plus with Taguchi Certified Rewards, every session you attend, you're not just learning - you're earning your way to some fantastic rewards.
About Taguchi Certified RewardsAPI Version 5
Did you know Taguchi has an API that supports all of the functionality provided by the admin interface and more?
Explore API Documentation
Thanks for your feedback!
How do I add segments and target content to specific subscribers?
Creating A New Segment
Multiple segments can be added to each activity and adding a new segment is simple.
To demonstrate the steps of content segmentation we will set up an example where we will display different hero banners to subscribers who have different points (Bronze Scoop Members, Silver Scoop Members, Gold Scoop Members, Not Scoop Member) and different branches (East Brisbane, Surry Hills, Richmond).
We will set up 7 different segments and define the targeting for each.
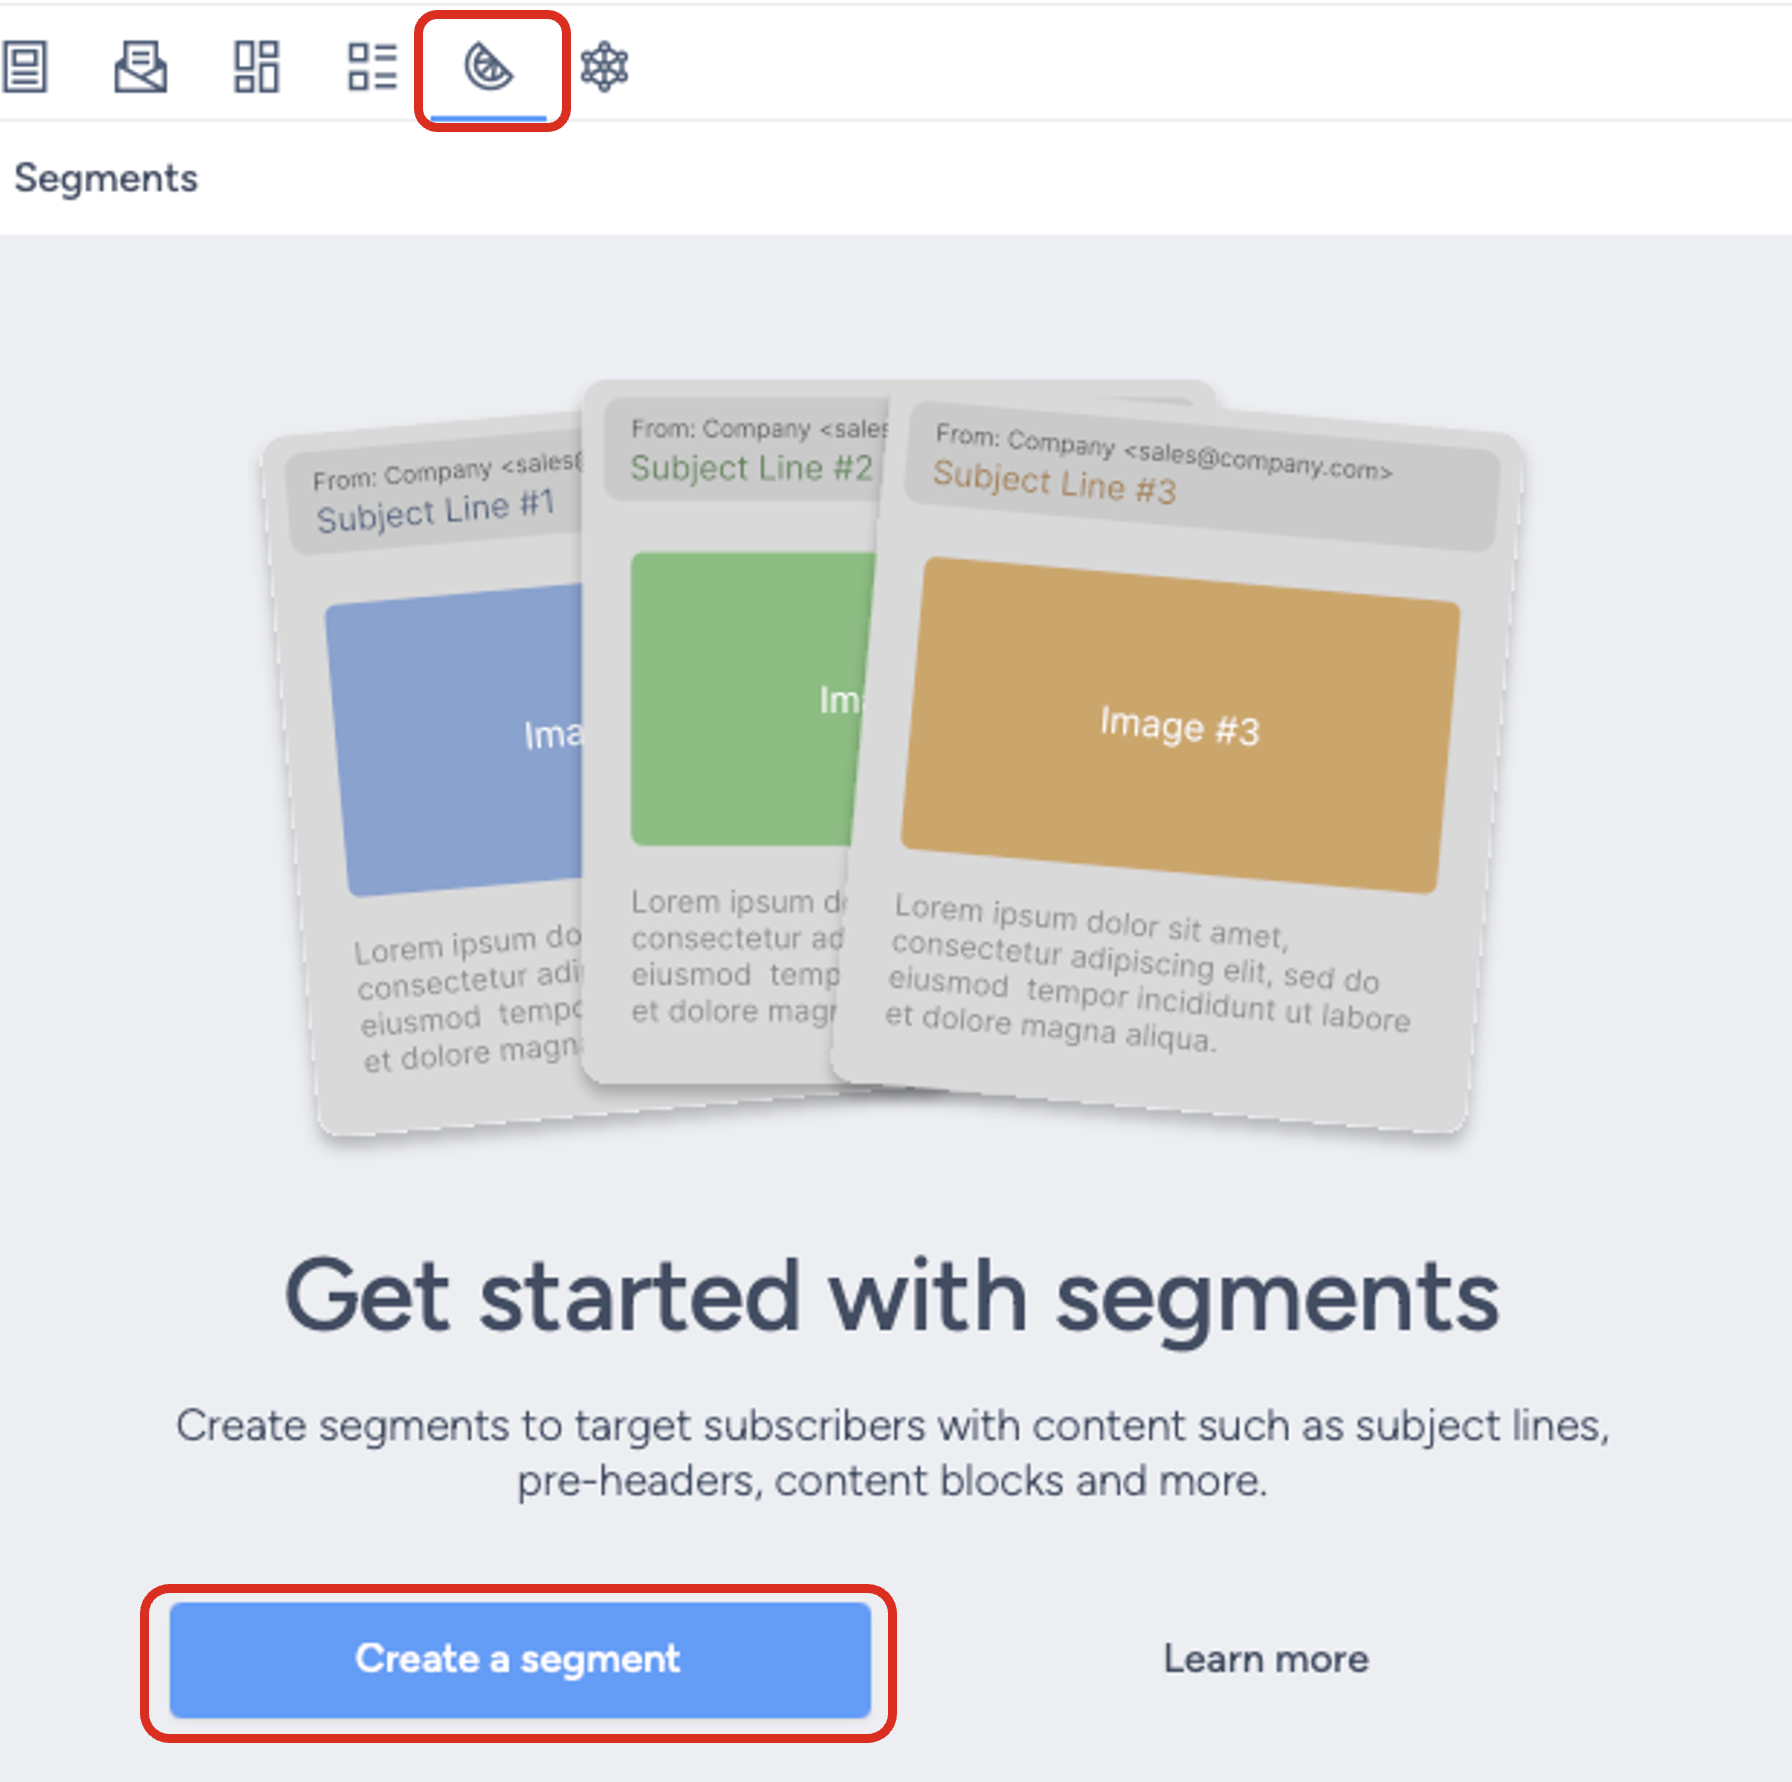
Locate the ‘Segments’ tab in the activity editor and click on the blue ‘Create a Segment' button.
If the Segmentation tool is not available on your template, please contact Taguchi Support for more information on how it can be added.
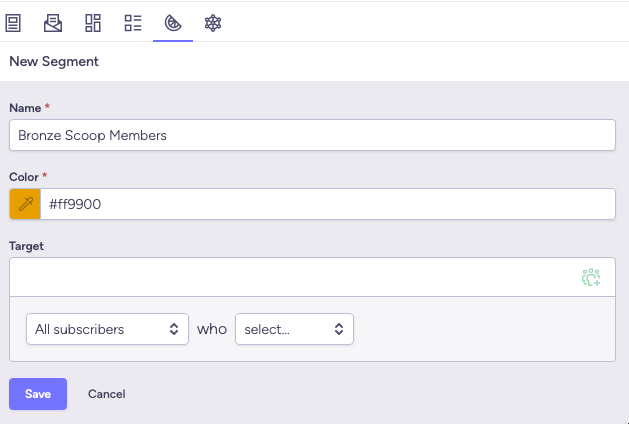
A 'New Segment' will appear. This is where you can populate:
- Segment name
- Segment color
- Segment target
Note: the segment name needs to be unique to that particular activity. Having duplicate segment names will cause conflicts.
Defining The Targeting Rules For Your Segments
Once you've added a Segment you can now define the targeting rules for each of your segments using our Target Expression Engine.
Note: at this point we have assumed you have already set up or will be setting up your main targeting rules for your email and have set up all your content, so we won't be going through these steps.

For this example, we'll be using a Custom Field to target Bronze Scoop Members who have less than 2,500 Scoop Points.
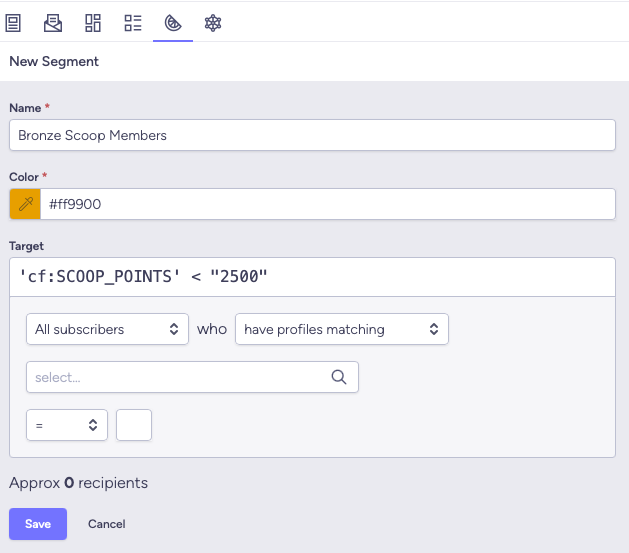
Once you have defined your segment targeting, click Save.
Assigning a segment to a content block
- Go to the Content Tab, then select your Content Block, and click the Segment Icon.
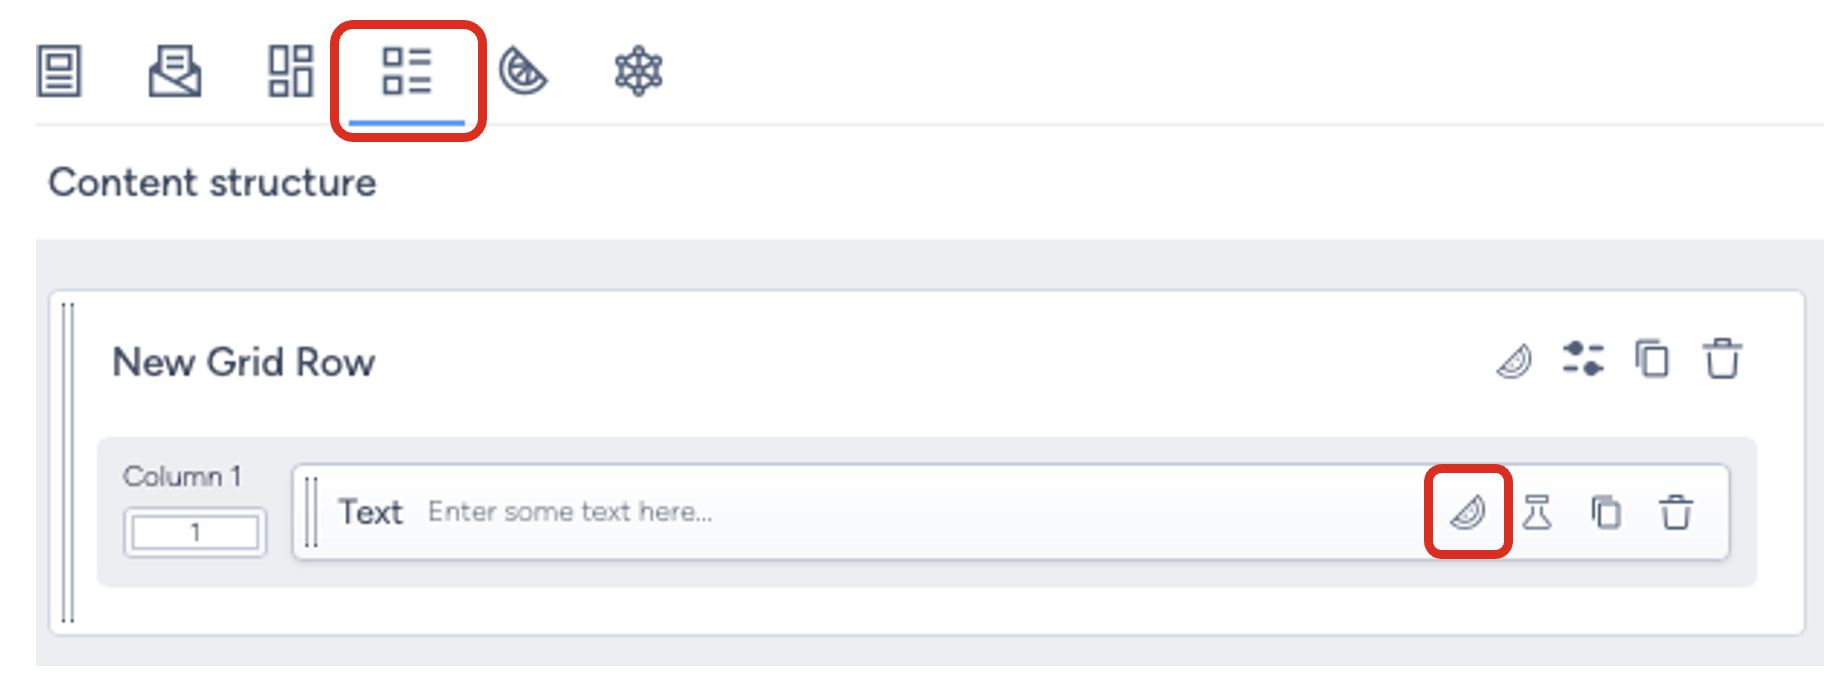
- A section will open u with all of the available Segments you can choose from. Choose the newly created Bronze Scoop Members segment.
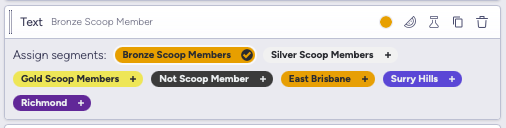
An applied Segment will have a check icon beside them.
Adding fallback content
If a subscriber does not meet the conditions of the segment/s that has been set up, then content will not be displayed within the email. Therefore, you may need to include a fallback.
For example, if you have set up one segment to display a hero banner specifically to subscribers that has Scoop Points less than 2,500 or a segment that targets anyone with points, you will need to set up fallback content and segment that displays and targets everyone else. If you don't, subscribers that don't have any points will receive an email with no hero banner.
To do this, you'll need to set up another segment that targets those who don't meet the criteria for the first segment.
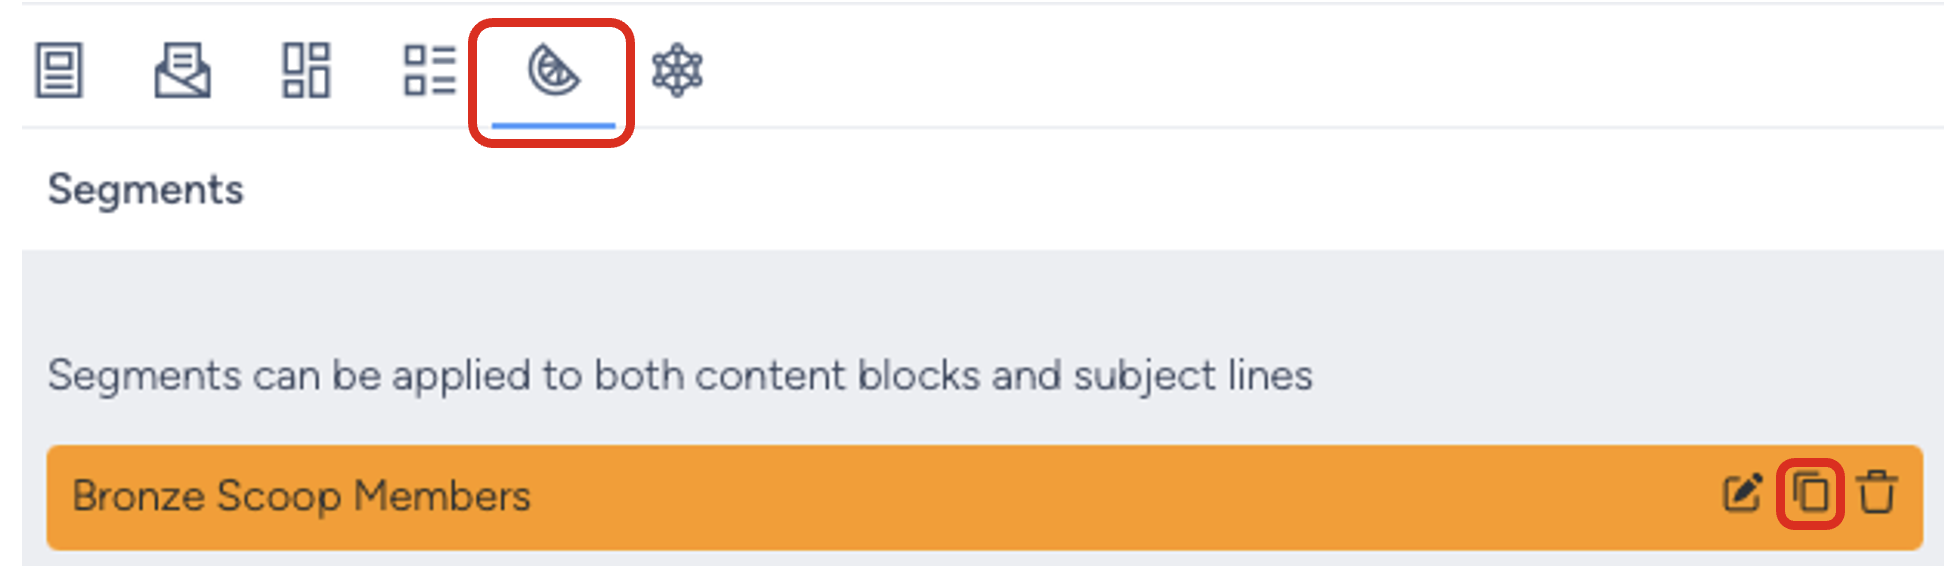
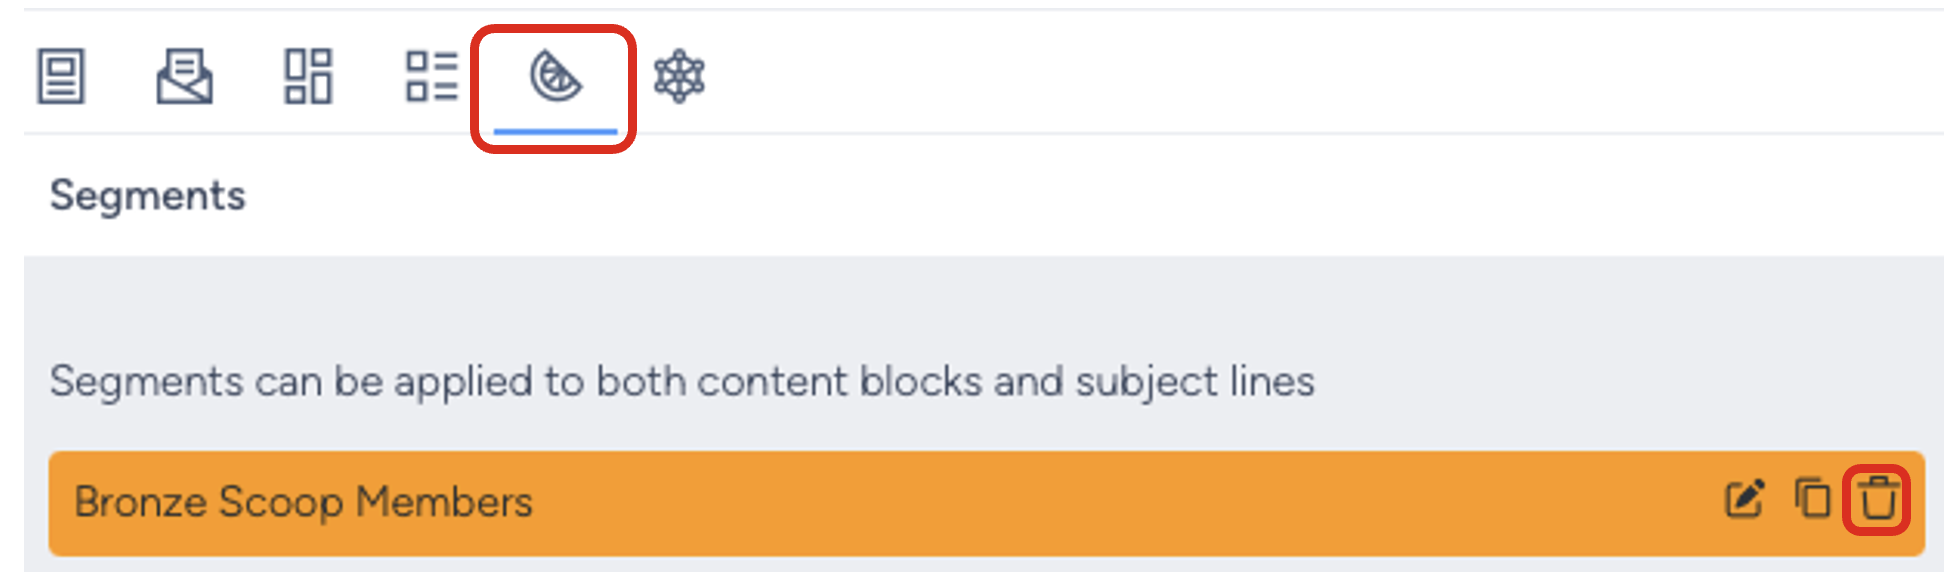
Duplicating and Deleting Segments
Segments can be duplicated by clicking on the copy icon or deleted by clicking on the trash icon:
Copy
Delete
Testing Segments
Once you have set up your segments and restricted your content blocks, you are now ready to test.
You'll need to ensure the intended content will be displayed to the correct subscriber. For this example, we have set up different hero banners to subscribers who have different points (Bronze Scoop Members, Silver Scoop Members, Gold Scoop Members, Not Scoop Member) and different branches (East Brisbane, Surry Hills, Richmond).
Each of the above states will be linked to a specific hero banner in the email.
It's important to note that because we are not covering all branches and points number, we need to create the segment Not Scoop Member as a fallback. This will be displayed where a subscribers is not yet a Scoop Member.
Using The Activity Preview
Click on the segment dropdown menu just above the live preview and select the segment you want to check:
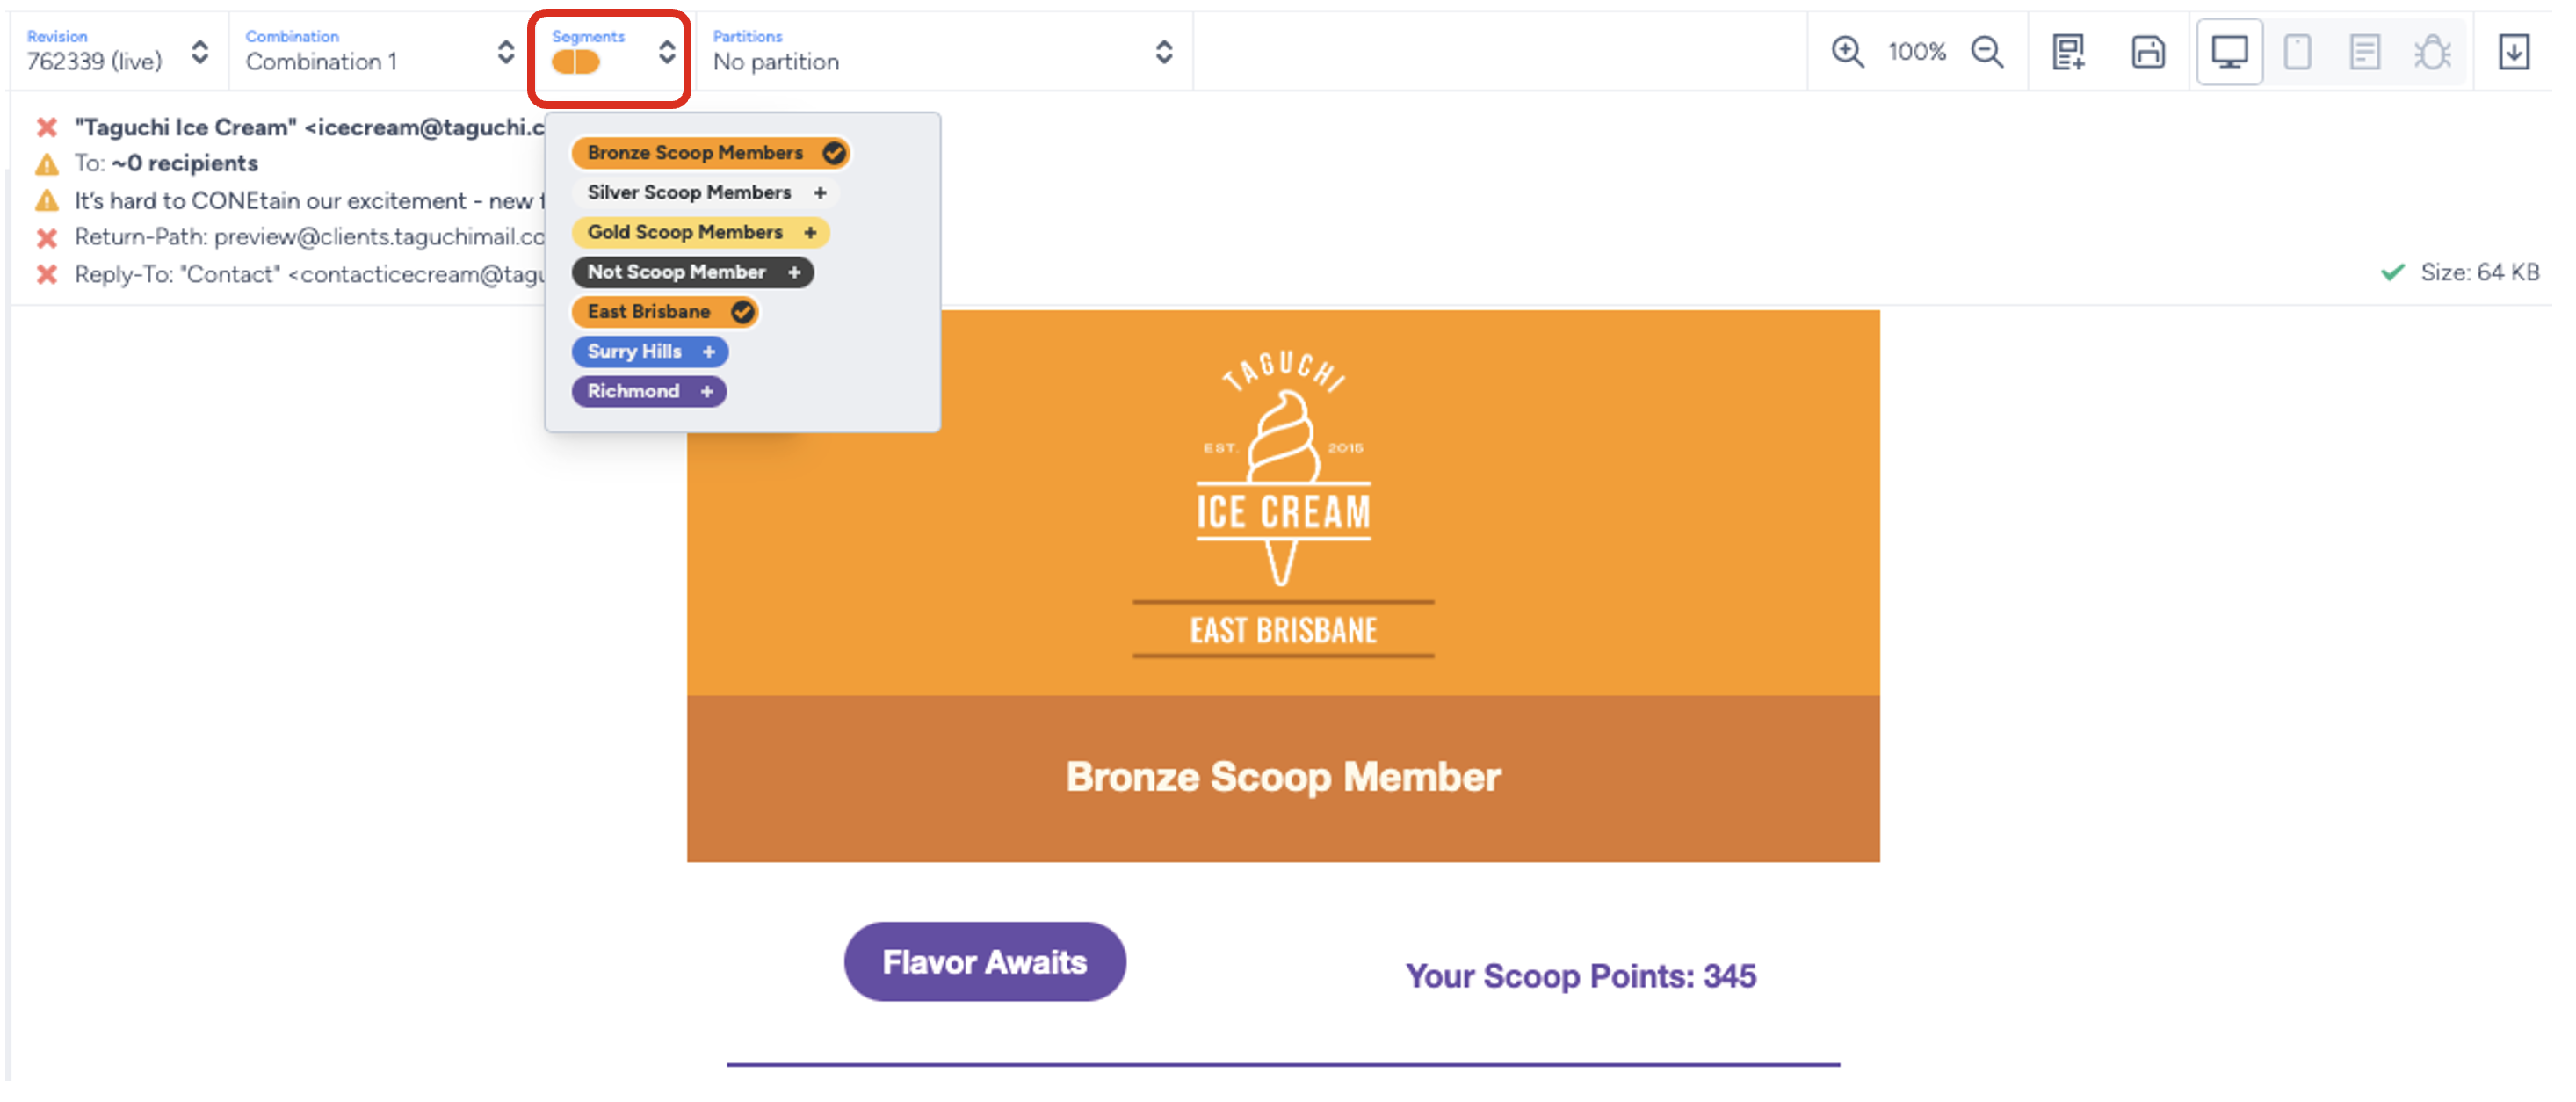
As shown above, you will see that the segment Bronze Scoop Members and the branch East Brisbane has been selected and a sample hero image applicable to that Scoop Member and Branch is displayed in the email preview.
Each segment on the Activity Preview area are color coded and can be used to mix and match the segments to see the outcome in the email preview
Live Sample Proofs
Live sample proofs will allow you to test that your segments have been mapped to and display the correct content according to a subscriber's profile.
As per our example, if we generate a set of live sample proofs and one of the sample emails contains the Bronze Scoop Members specific content, we can look up the corresponding subscriber profile to confirm whether their custom field value is suffice for Bronze Scoop Members or not. If the points are sufficient, then we know we have set up the targeting for the segment correctly and correctly mapped the Bronze Scoop Members segment to the Bronze Scoop Members content.
Once you've defined your segments and linked the content, send a proof and include live samples. See the different proof options in our 'Email Proofs' article.
You should receive random subscriber samples of the email (up to 5) that meet your segment criteria (and the main targeting criteria of the email).
We validate that the correct content is being displayed to each subscriber by sending live sample proofs and checking the recipients profile in each to make sure their value of the State field matches the content in the sample email.
In our example, we are checking that each live sample proof recipient is getting the correct state based content based on their profile:
The example below shows the customer who is a Gold Scoop Member and from Richmond Branch.

Activity Check
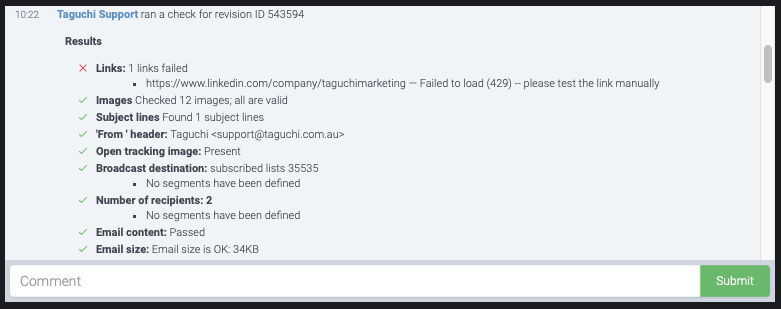
To see a breakdown of the number of recipients who will receive each of the segments you have set up, run an activity check.
Activity checks are a great way of validating broadcast lists and numbers, data selection criteria, and segmentation numbers. In an example below, the activity check allows us to check the number of subscribers per segment:
Test Matrix
Another way of testing segments is by using the Test Matrix. When testing and proofing activities, it is sometimes insightful to see all the outputs of segments which are accounted for in the build process. This function is useful when you want to see sample emails of specific profiles
Segment Reporting
Once your segmented activity has been sent, you can view how each segment performed. Segment reporting allows you to compare engagement metrics across your different segments, helping you understand which content resonated most with each audience group.
To learn how to view and interpret segment performance data, see our Segment Performance Reporting article.