- Support Home
- Knowledge Base
- Getting Started
- Activity Trigger / Webform Set Up Using V5 API
Related articles
Need some help?
If you have questions or can't find what you're looking for, we're here for you.
Taguchi Support is available Monday to Friday, 9am - 5:30pm AEDT.
Create New TicketTaguchi Certified Training
Join our free and live online training sessions. You'll benefit from a better understanding of the platform's features and functionality. Plus with Taguchi Certified Rewards, every session you attend, you're not just learning - you're earning your way to some fantastic rewards.
About Taguchi Certified RewardsAPI Version 5
Did you know Taguchi has an API that supports all of the functionality provided by the admin interface and more?
Explore API Documentation
Thanks for your feedback!
Activity Trigger / Webform Set Up Using V5 API
Webform Trigger Set Up
A how to guide
Overview
In Taguchi, users can create webforms which trigger an activity when submitted. These activities are configured using our V5 API which means that they are sent immediately after submission. To set this up you will need 3 key components:
An integration
A webform
A trigger activity
Integration
For each webform trigger activity you will need to create an integration in Taguchi. This facilitates the immediacy of the trigger activity being sent to the recipient.
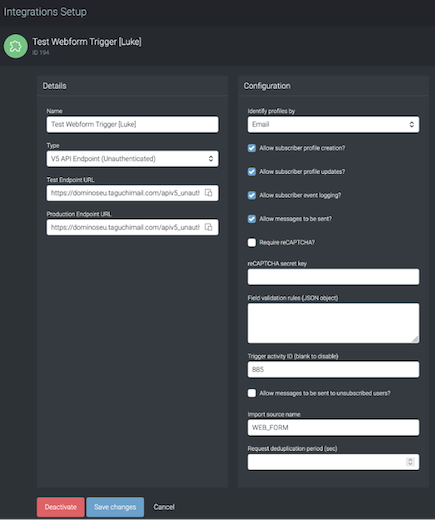
Setting up an integration
Create an integration in Taguchi
Under Details – Type: select V5 API Endpoint (Unauthenticated)
Under Configuration: select the relevant checkboxes for your form.
Enter the desired trigger activity in the the Trigger Activity ID field
Import source name is used to append a SOURCE value to list subscriptions (e.g. DE_SUBSCRIPTION_FORM_JOURNEY, WEB_FORM, Prod_sub_form_GDPR, Prod_preference_center_GDPR)
Webform
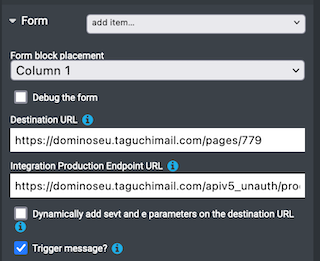
You need to configure your webform to trigger messages after submission. The following setup is required:
Copy and paste the production Endpoint URL from the Integration into the Integration Production Endpoint URL field under the Form Module
Enable the check box Trigger message?
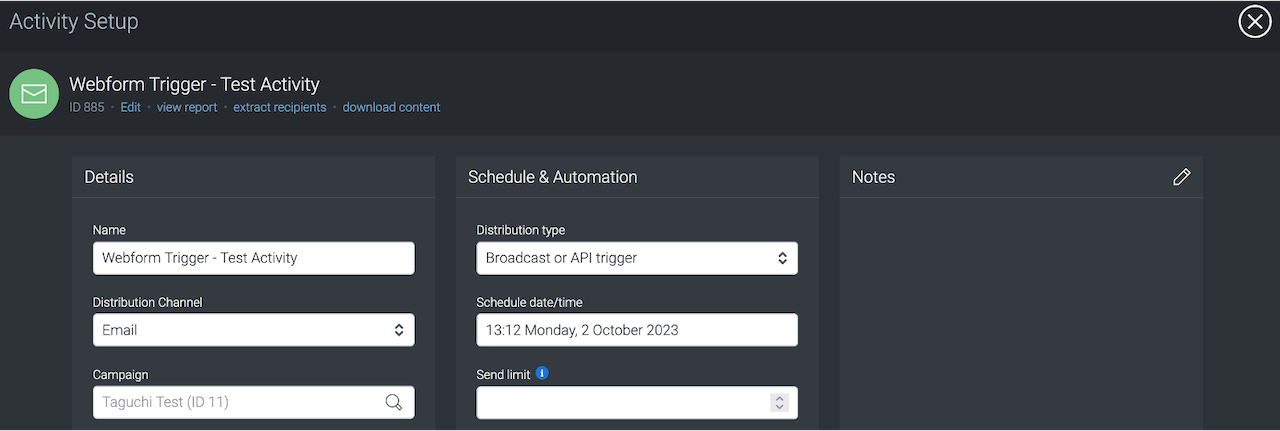
Activity
You will need to create the activity that you want to trigger when the webform is submitted. To set up this up correctly you will need to ensure that Broadcast or API trigger is selected as the Distribution Type. The activity will not require a Target Expression because the API will determine who receives the activity.
You will also need to ensure that the activity is approved and scheduled.