- Support Home
- Knowledge Base
- Integrations
- Export - Amazon S3
Export - Amazon S3
This document explains how to use the Amazon S3 export functionality in Taguchi to export subscriber data to an Amazon S3 bucket.
Overview
The Amazon S3 export integration allows you to export subscriber data and other information from Taguchimail directly to an Amazon S3 bucket. This integration uses the AWS S3 API to securely transfer files to your S3 bucket.
Configuration Requirements
To set up an Amazon S3 export, you need the following:
AWS Credentials
- AWS Key ID
- AWS Secret Key
- The credentials must have write permissions to the target S3 bucket
Target S3 Bucket Information
- Bucket name
- Directory path within the bucket
Setting Up the Integration
1. Create AWS Credentials in Taguchi
First, you need to add your AWS credentials to the system:
- Navigate to the Credentials section in the admin interface
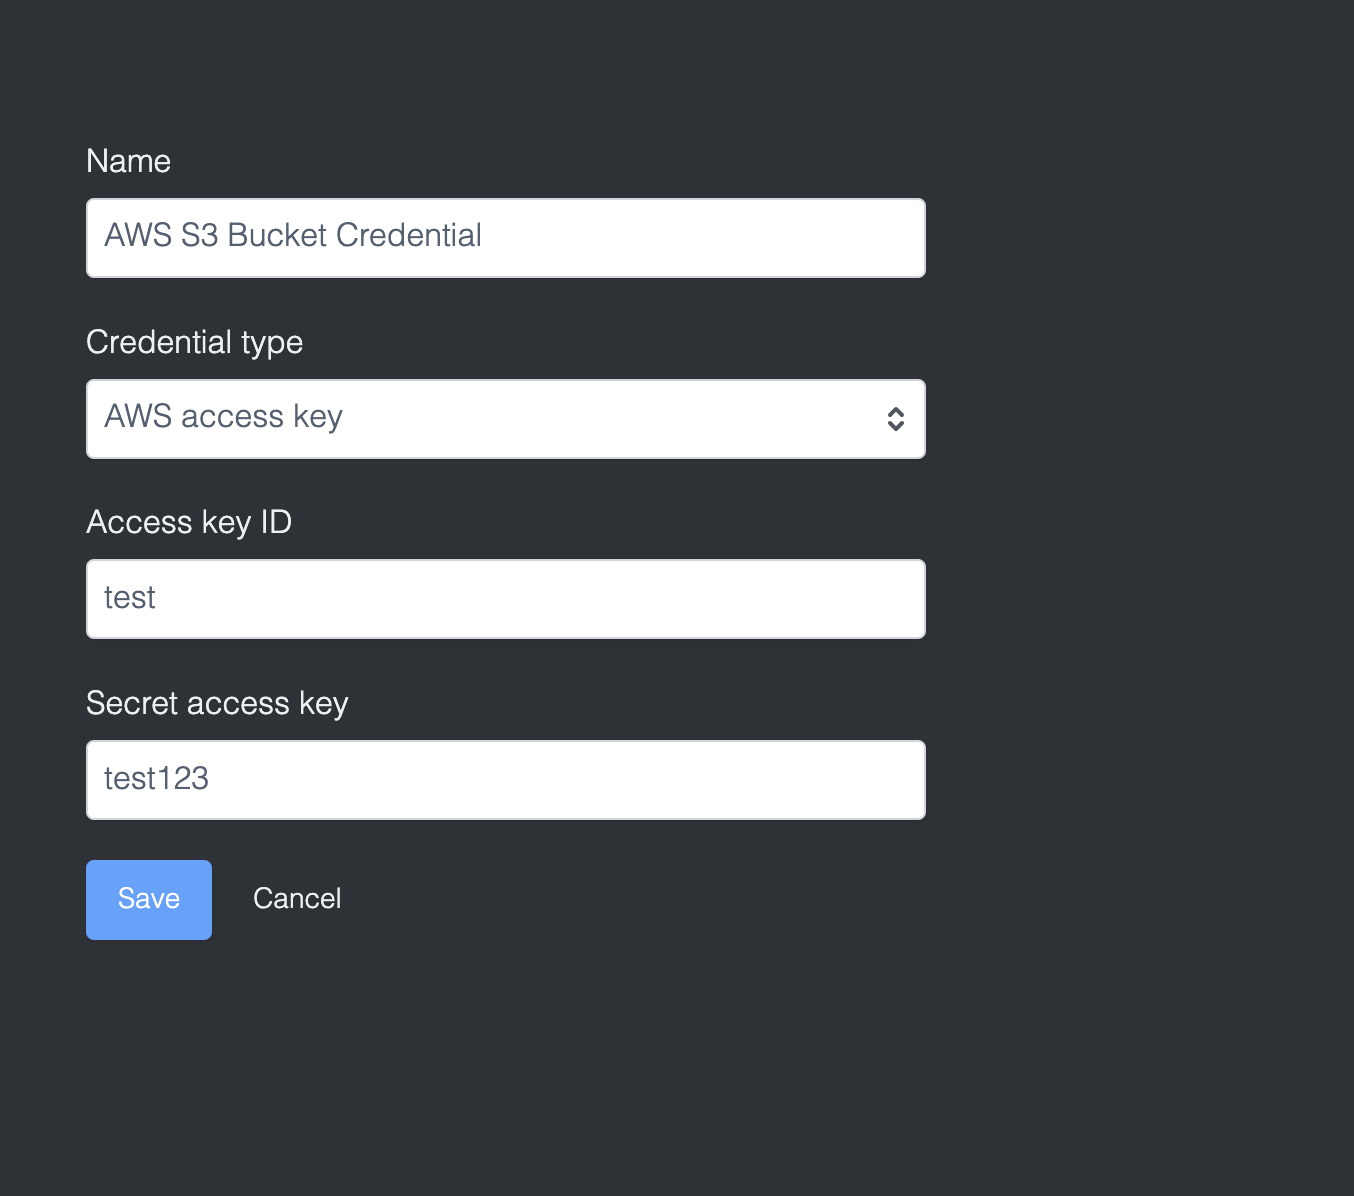
- Select "Add Credential" and choose "AWS Token"
- Enter the following information:
- AWS Key ID: Your AWS access key ID
- AWS Secret: Your AWS secret access key

2. Create the AWS S3 Export Integration
To create a new integration, ensure that you have the required User Type integration role privileges assigned to you.
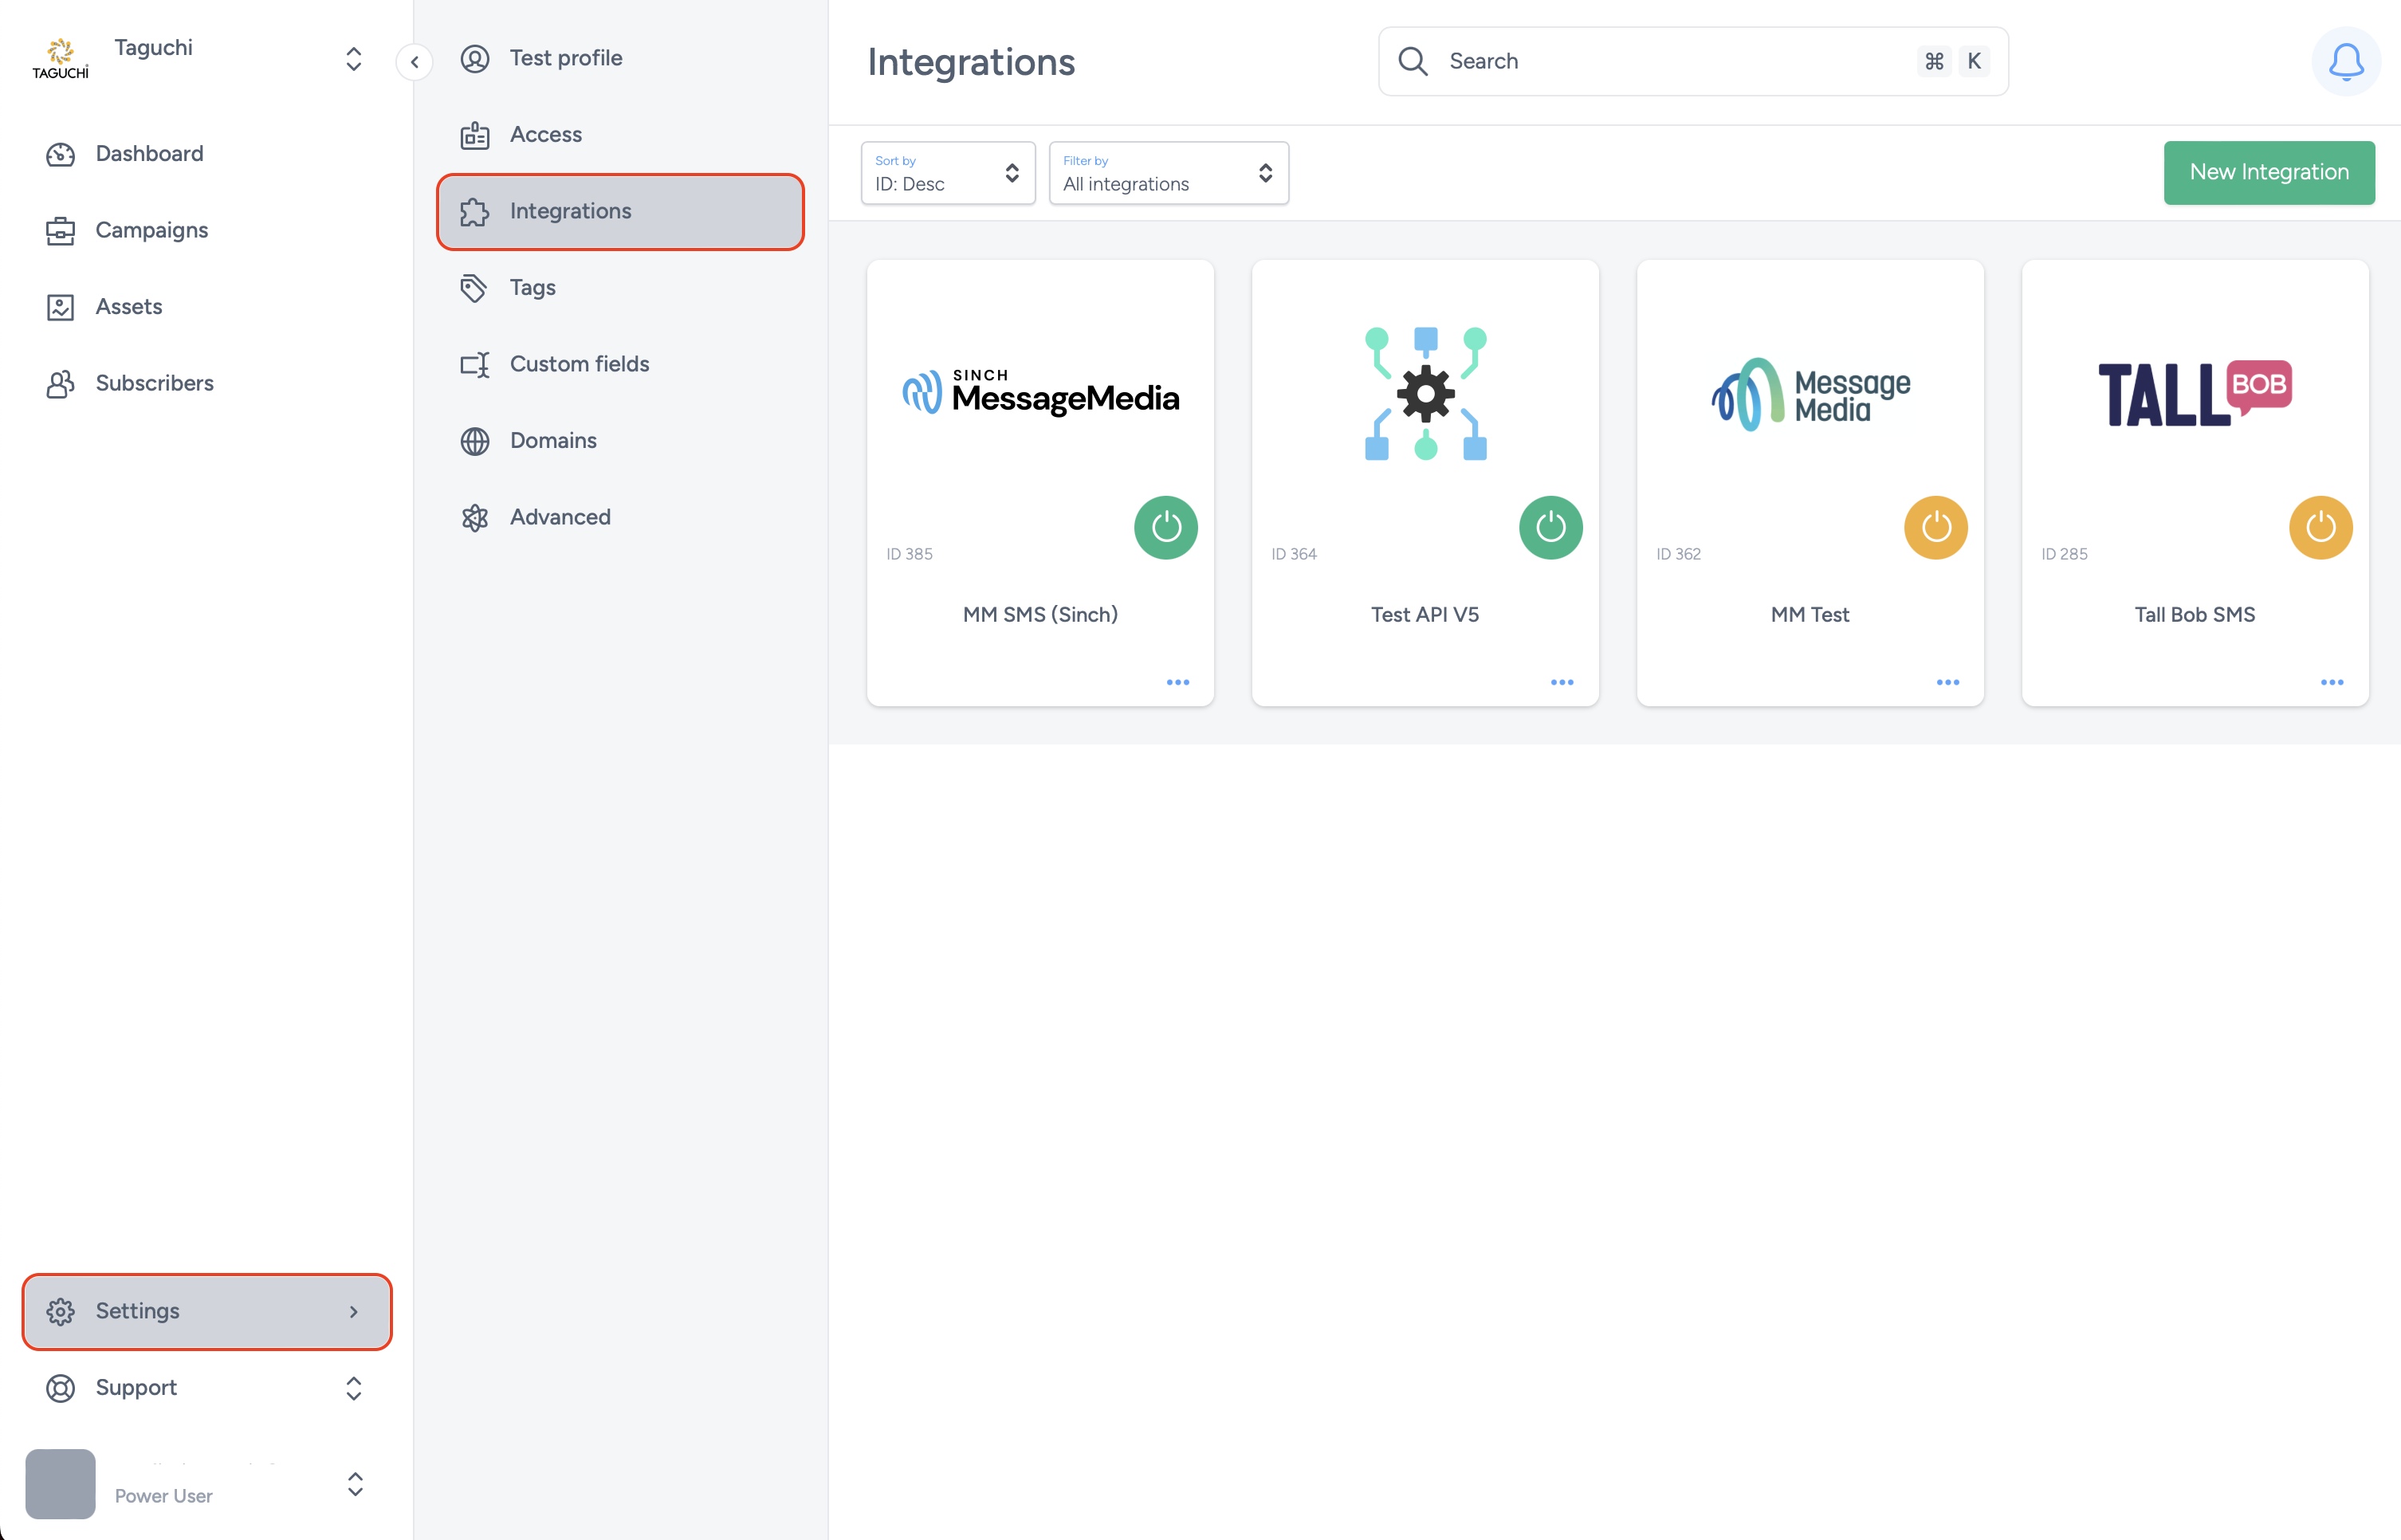
- Navigate to Settings > Integrations.

- Select ‘New Integration’ and a new screen will popup.

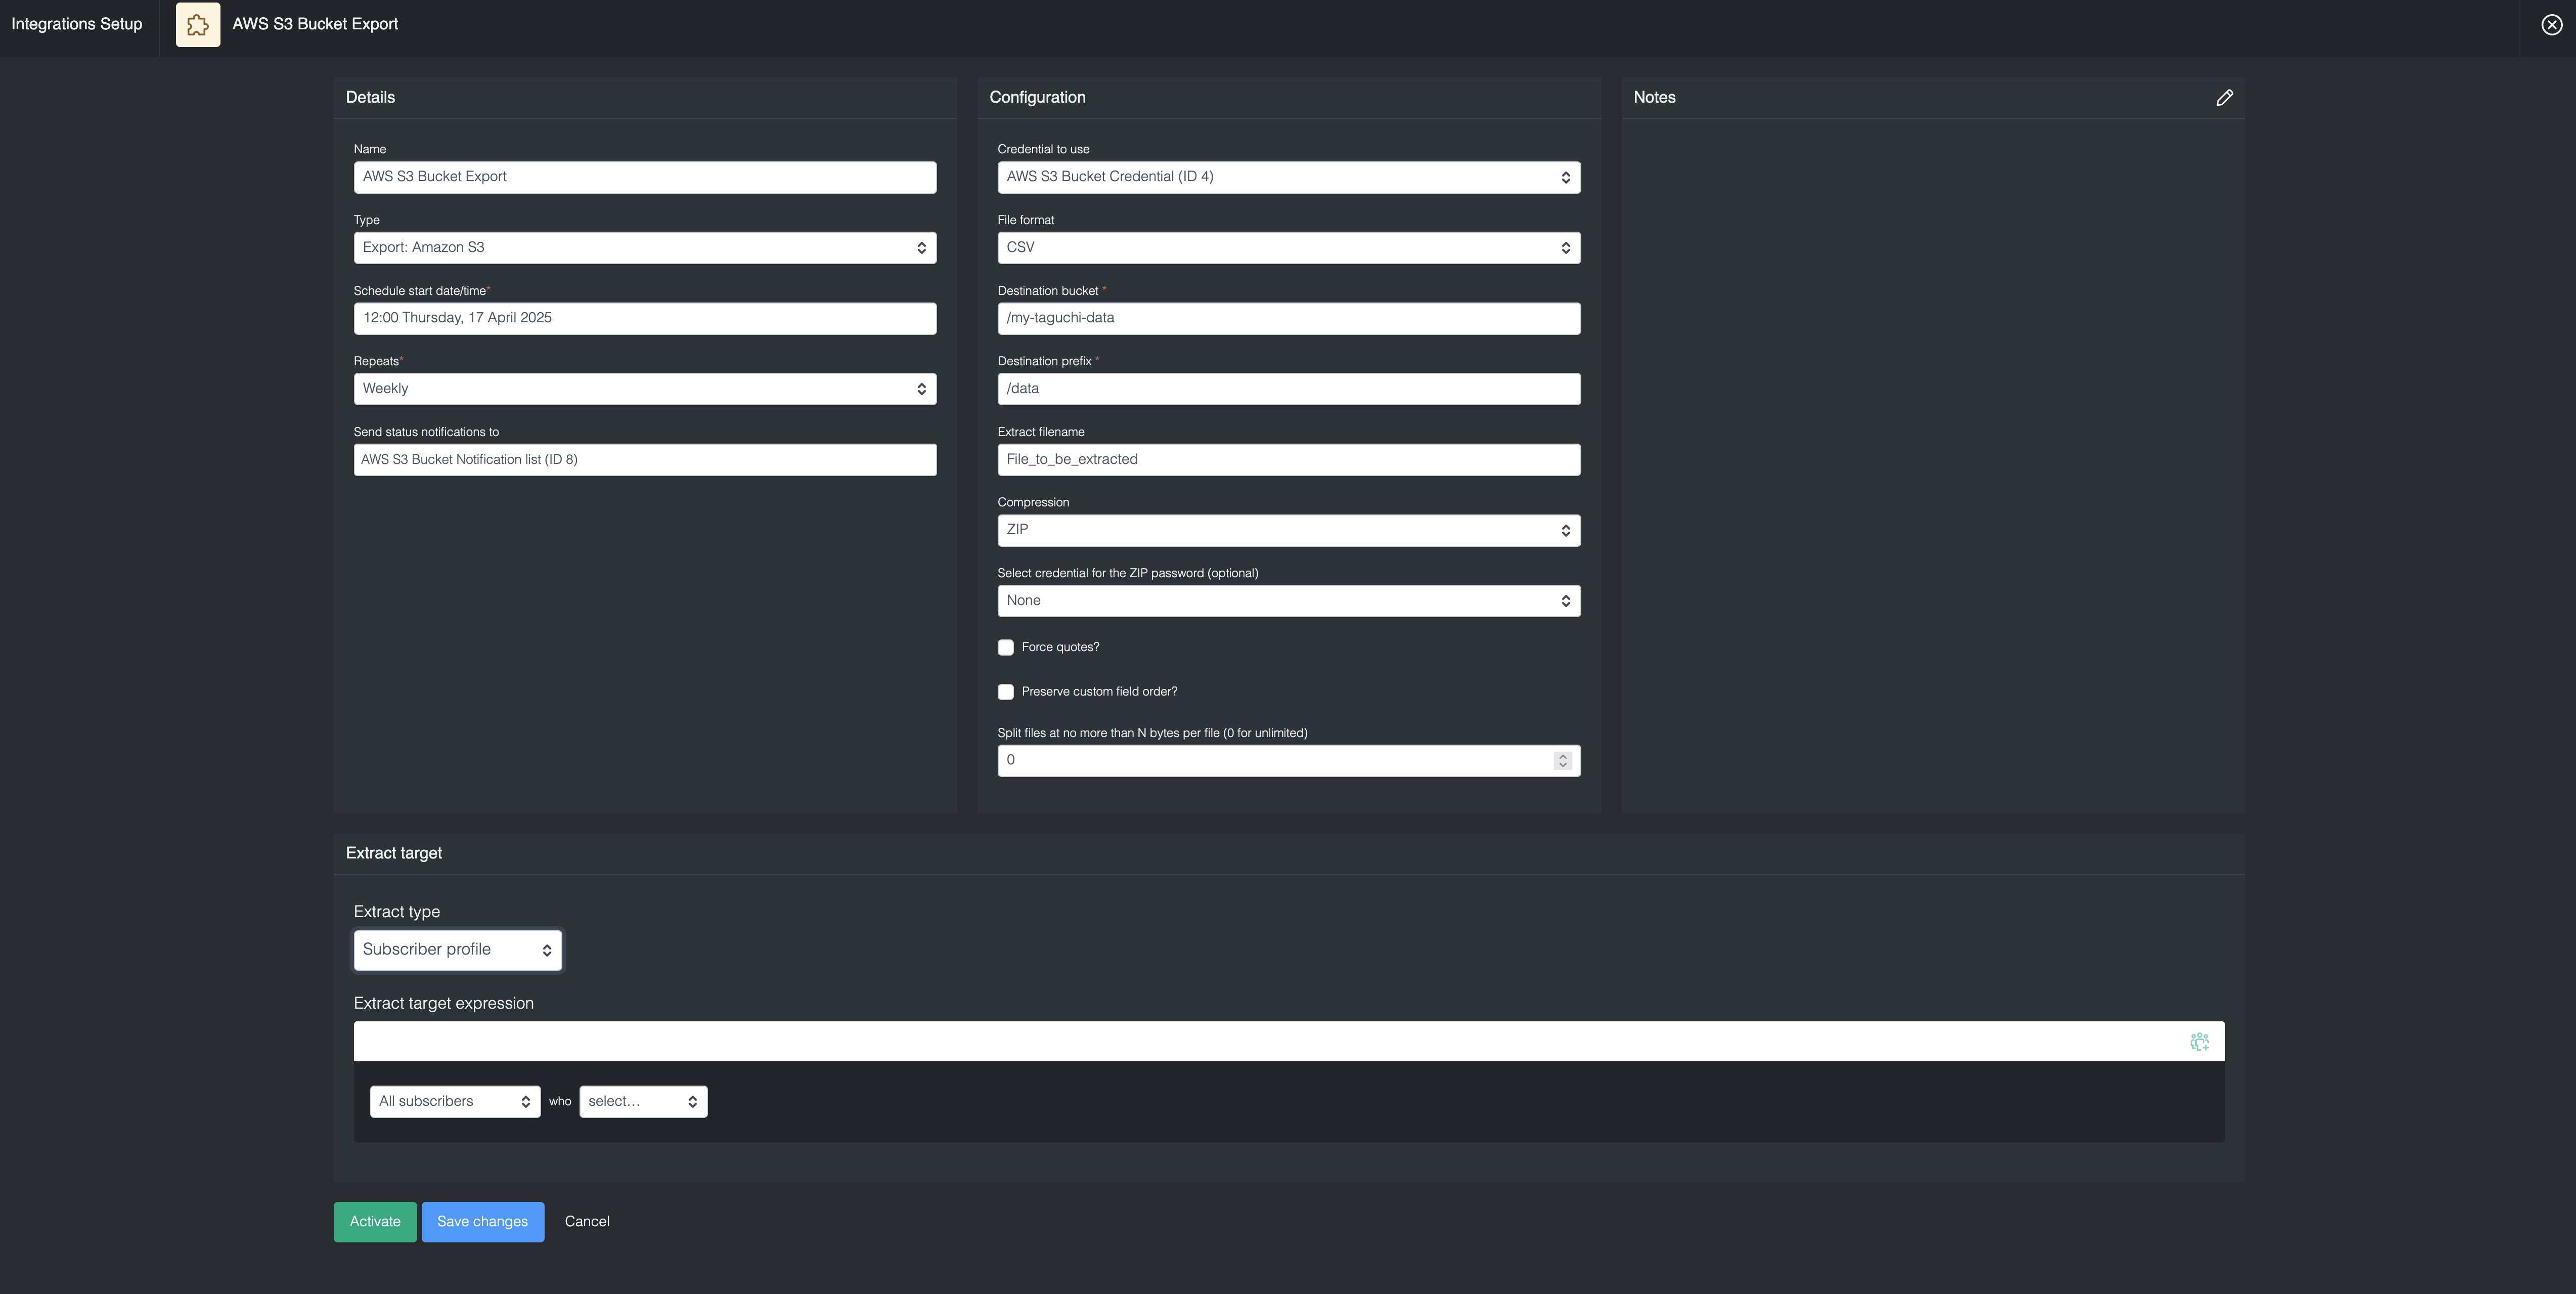
- Configure the following parameters:
- Details:
- Type: Select "Export: Amazon S3"
- Schedule start date/time: Select any time you would prefer the integration to start running
- Repeats: Select the frequency the integration will get triggered and export data to AWS S3 Bucket
- Send status notifications to: Subscriber List to be notified when the integration get triggered each time
- Credential:
- Credential to use: Select the AWS S3 bucket credential you have created in credential setup page
- File Format: CSV (default) or specify another supported format
- Destination Bucket: The name of your S3 bucket
- Destination prefix: The directory path within the S3 bucket where files should be uploaded
- Filename: File name for the exported file
- Compression: (Optional) compression (zip, gz)
- Select credential for the ZIP password: (Optional) password to encrypt the exported file
- Force Quote: (Optional) Force quoting of all fields in CSV files
- Preserve Custom Field Order: (Optional) Maintain the order of custom fields
- Extract Target
- Target Expression to select subscriber profiles to be extracted and export to AWS S3 Bucket
- Details:

Save Changes and Activate

Once you have added your Details, Configuration and Target Expression, you will be able to save changes (1) and activate (2) the integration. You can only activate once you have saved changes.
Deactivate

To stop the integration, click on Deactivate. This will stop Taguchi from exporting data to the S3 bucket.
Active Integration
Once the integration has been saved and activated, the on/off icon of the integration card will change from yellow (Off) to green (On) which indicates that it is now activated.
Update Integration


If you want to update your Integration, you will be able to make the changes while it is activated or deactivated. Once the changes have been made, you will be able to update the integration by clicking on 'Save changes'. The Integration will be updated immediately.
Viewing Logs in the UI
Users can now view detailed integration logs directly in the Taguchi UI to troubleshoot issues.
To access logs:
- Navigate to Settings > Integrations.
- Select the integration you want to review.
- Click on View Status in the top right hand corner to see recent activity, including timestamps, status updates, and error messages (if any).

If an integration fails, checking the logs can help identify issues such as incorrect credentials, invalid audience configurations, or query timeouts.
If you are having trouble with this integration, please contact Taguchi Support for assistance.
