- Support Home
- Knowledge Base
- Integrations
- Facebook Ads Integration
Related articles
Need some help?
If you have questions or can't find what you're looking for, we're here to help.
Taguchi Support is available 24 hours a day, Monday to Friday.
Create New TicketTaguchi Certified Training
Join our free and live online training sessions. You'll benefit from a better understanding of the platform's features and functionality. Plus with Taguchi Certified Rewards, every session you attend, you're not just learning - you're earning your way to some fantastic rewards.
About Taguchi Certified RewardsAPI Version 5
Did you know Taguchi has an API that supports all of the functionality provided by the admin interface and more?
Explore API Documentation
Thanks for your feedback!
Facebook Ads Integration
Taguchi has an API integration with Facebook which creates a seamless and automated connection between your email marketing database in Taguchi, and Facebook Ads.
You can now easily execute multi-channel marketing campaigns, truly leveraging your companies first party data to its full potential. You may choose to suppress your email marketing audience from Facebook ad campaigns, reducing unnecessary impressions and cost. Perhaps you may wish to extend your email marketing efforts into Facebook Ads, amplifying your message via other marketing channels.
The opportunities are endless.
This integration means you don't need to manually handle your subscriber data externally between Taguchi and Facebook to achieve the above, reducing the risk of data security issues and not to mention effort.
Facebook Custom Audiences
Our simple, self-serve integration tool offers a smart and secure way to get the most out of your ad campaigns; without the risk and inefficiencies of manually handling customer data.
Use Cases
Suppression - Send an audience to Facebook to suppress from your paid Facebook campaigns.
Targeting - Target a list of subscribers or a segmented audience based on custom field matching.
Campaign specific targeting - If a subscriber has or has not engaged with your email, SMS or web campaigns, re-target them to amplify your message.
Website tracking - Using Taguchi Web Tracking code, re-target subscribers who have visited any page on your website.
Conversion targeting – Using the transaction data stored in Taguchi, target customers who have purchased a specific product or range in the past who would qualify for a cross sell promotion. Similarly, if they havent purchase a product or range, you can target those people too.
Invalid email - If a profile has an invalid email or no email at all, communicate to them in another way or incentivise them to update their details.
A combination of all of the above.
Instructions
Getting Connected
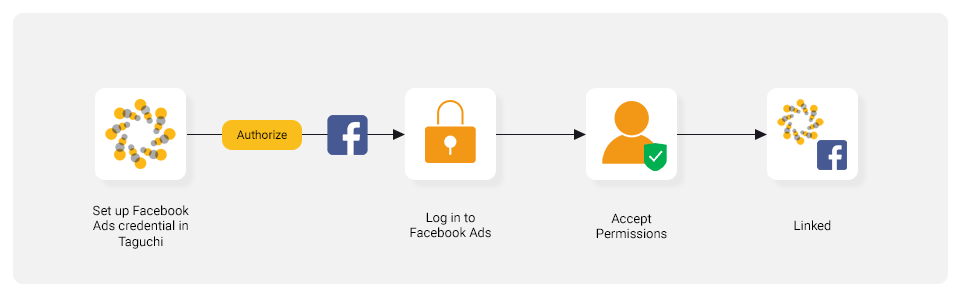
To connect your Taguchi organisation to your Facebook Ad account, the user must:
Have Administrator access to Taguchi; and
Have the appropriate access level on Facebook.
- As an admin of Taguchi, you will see the ’Credentials’ page under Settings > Credentials.
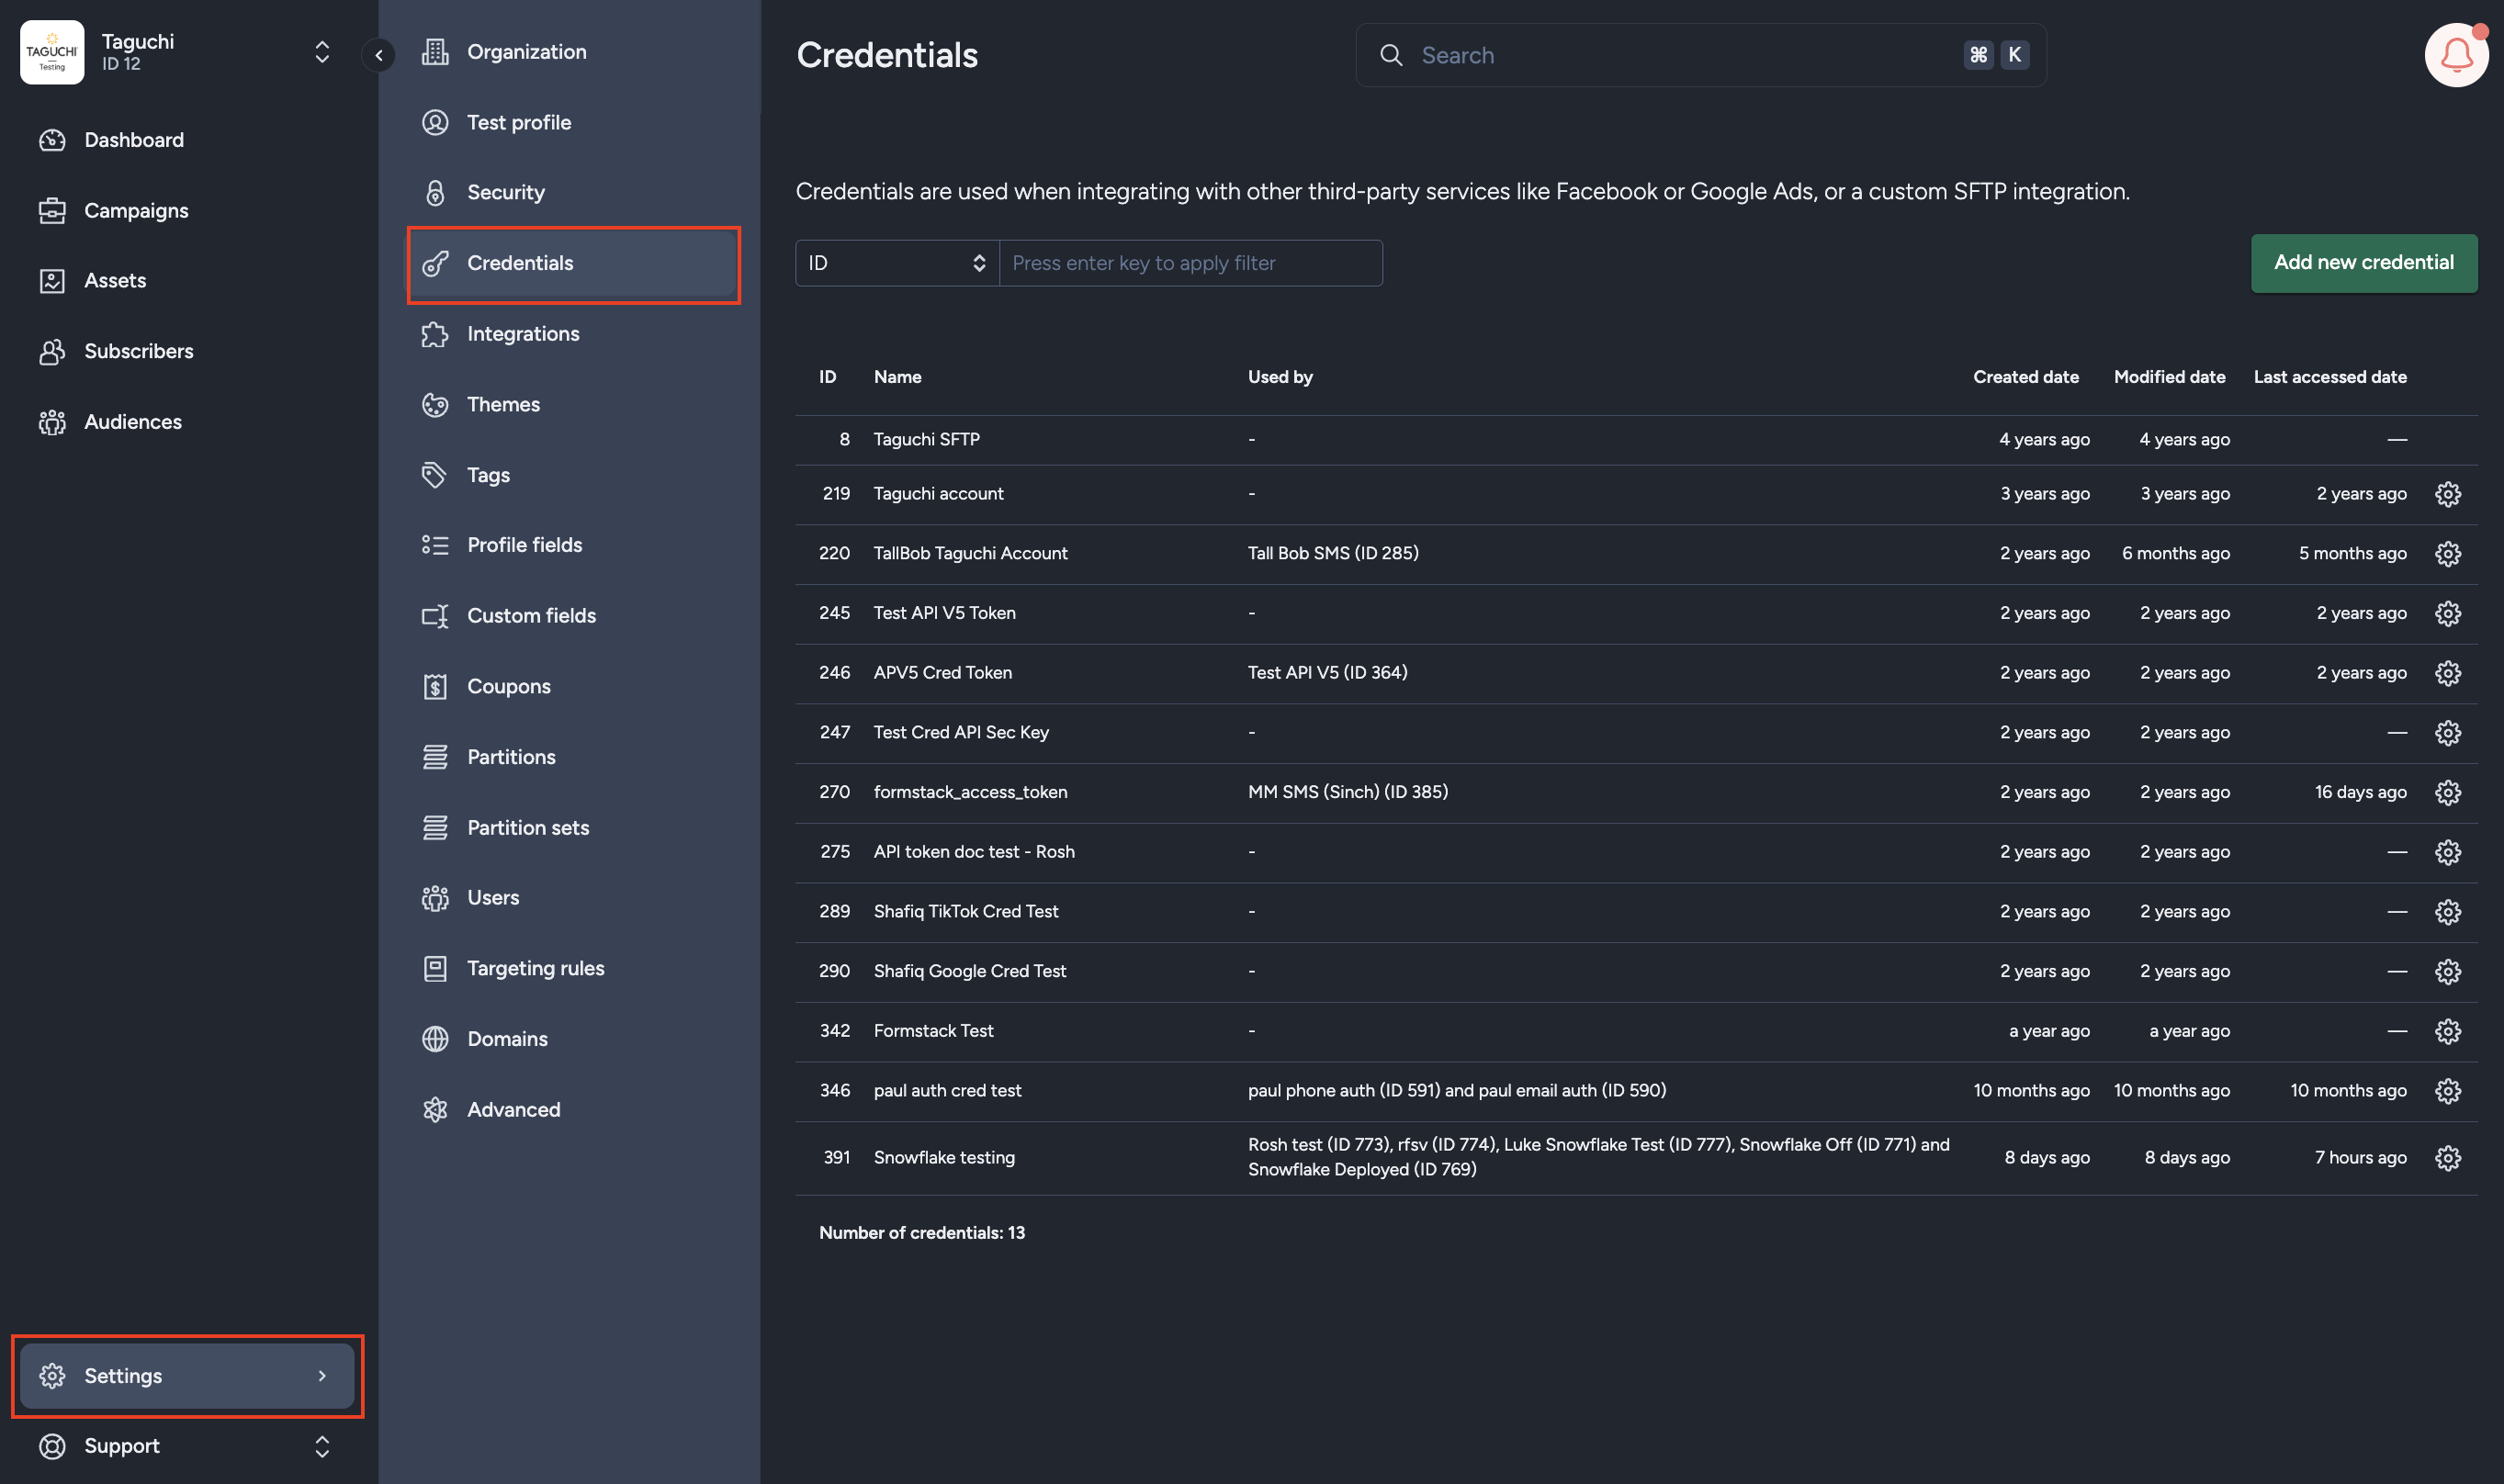
- Select ‘Add new Credential’ and a new screen will pop up.

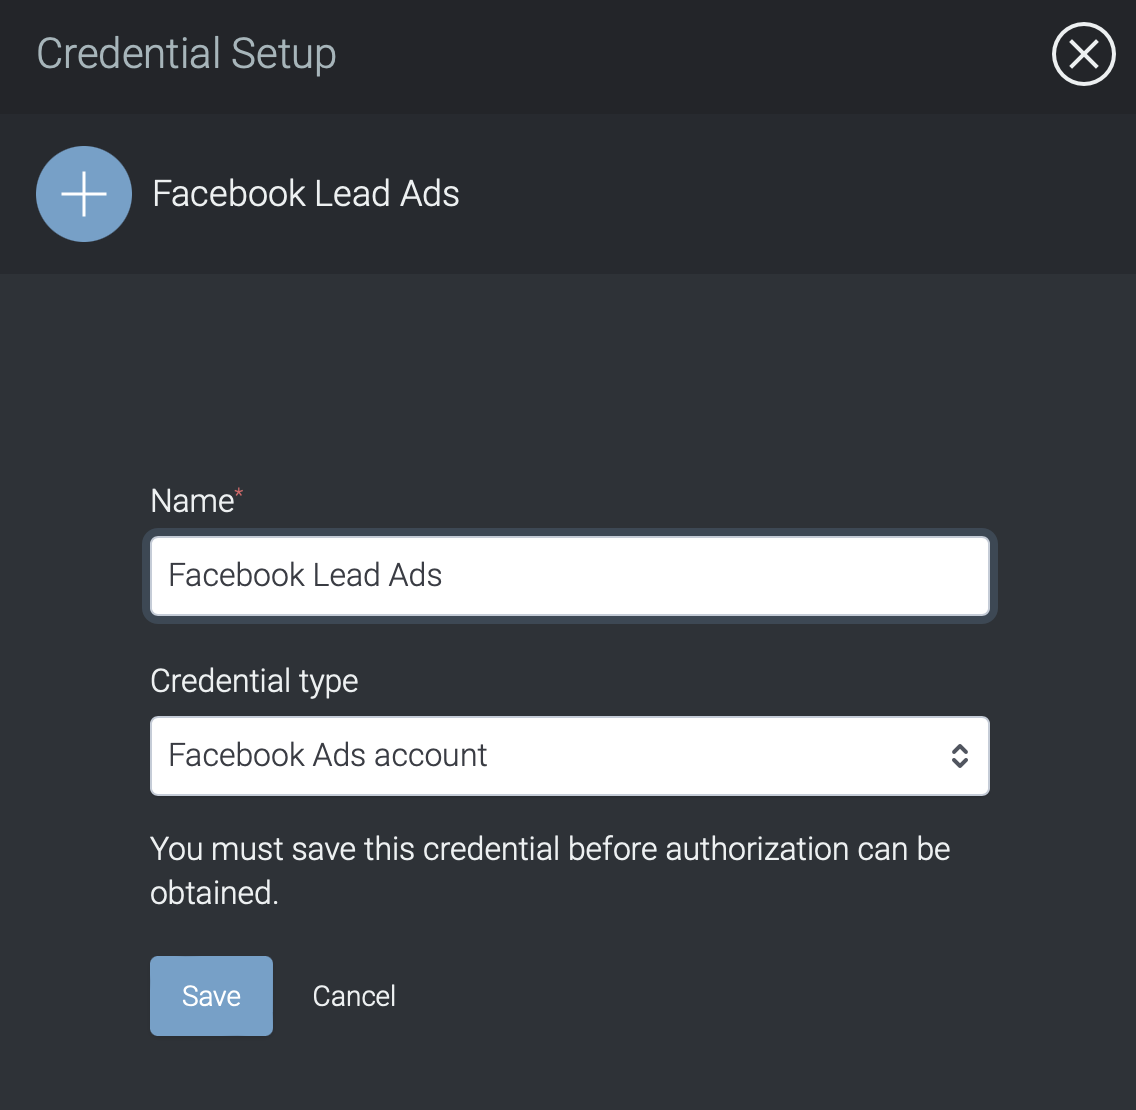
Type in a name – you may consider being specific about the account name should you operate more than 1 ad account.
Select the ‘Credential type’ in the drop down and choose Facebook Ads account (note: there are other standard integration credentials available in Taguchi which are included in this list).
Click Save. At this point, it will ask you to save but the account is not yet connected.
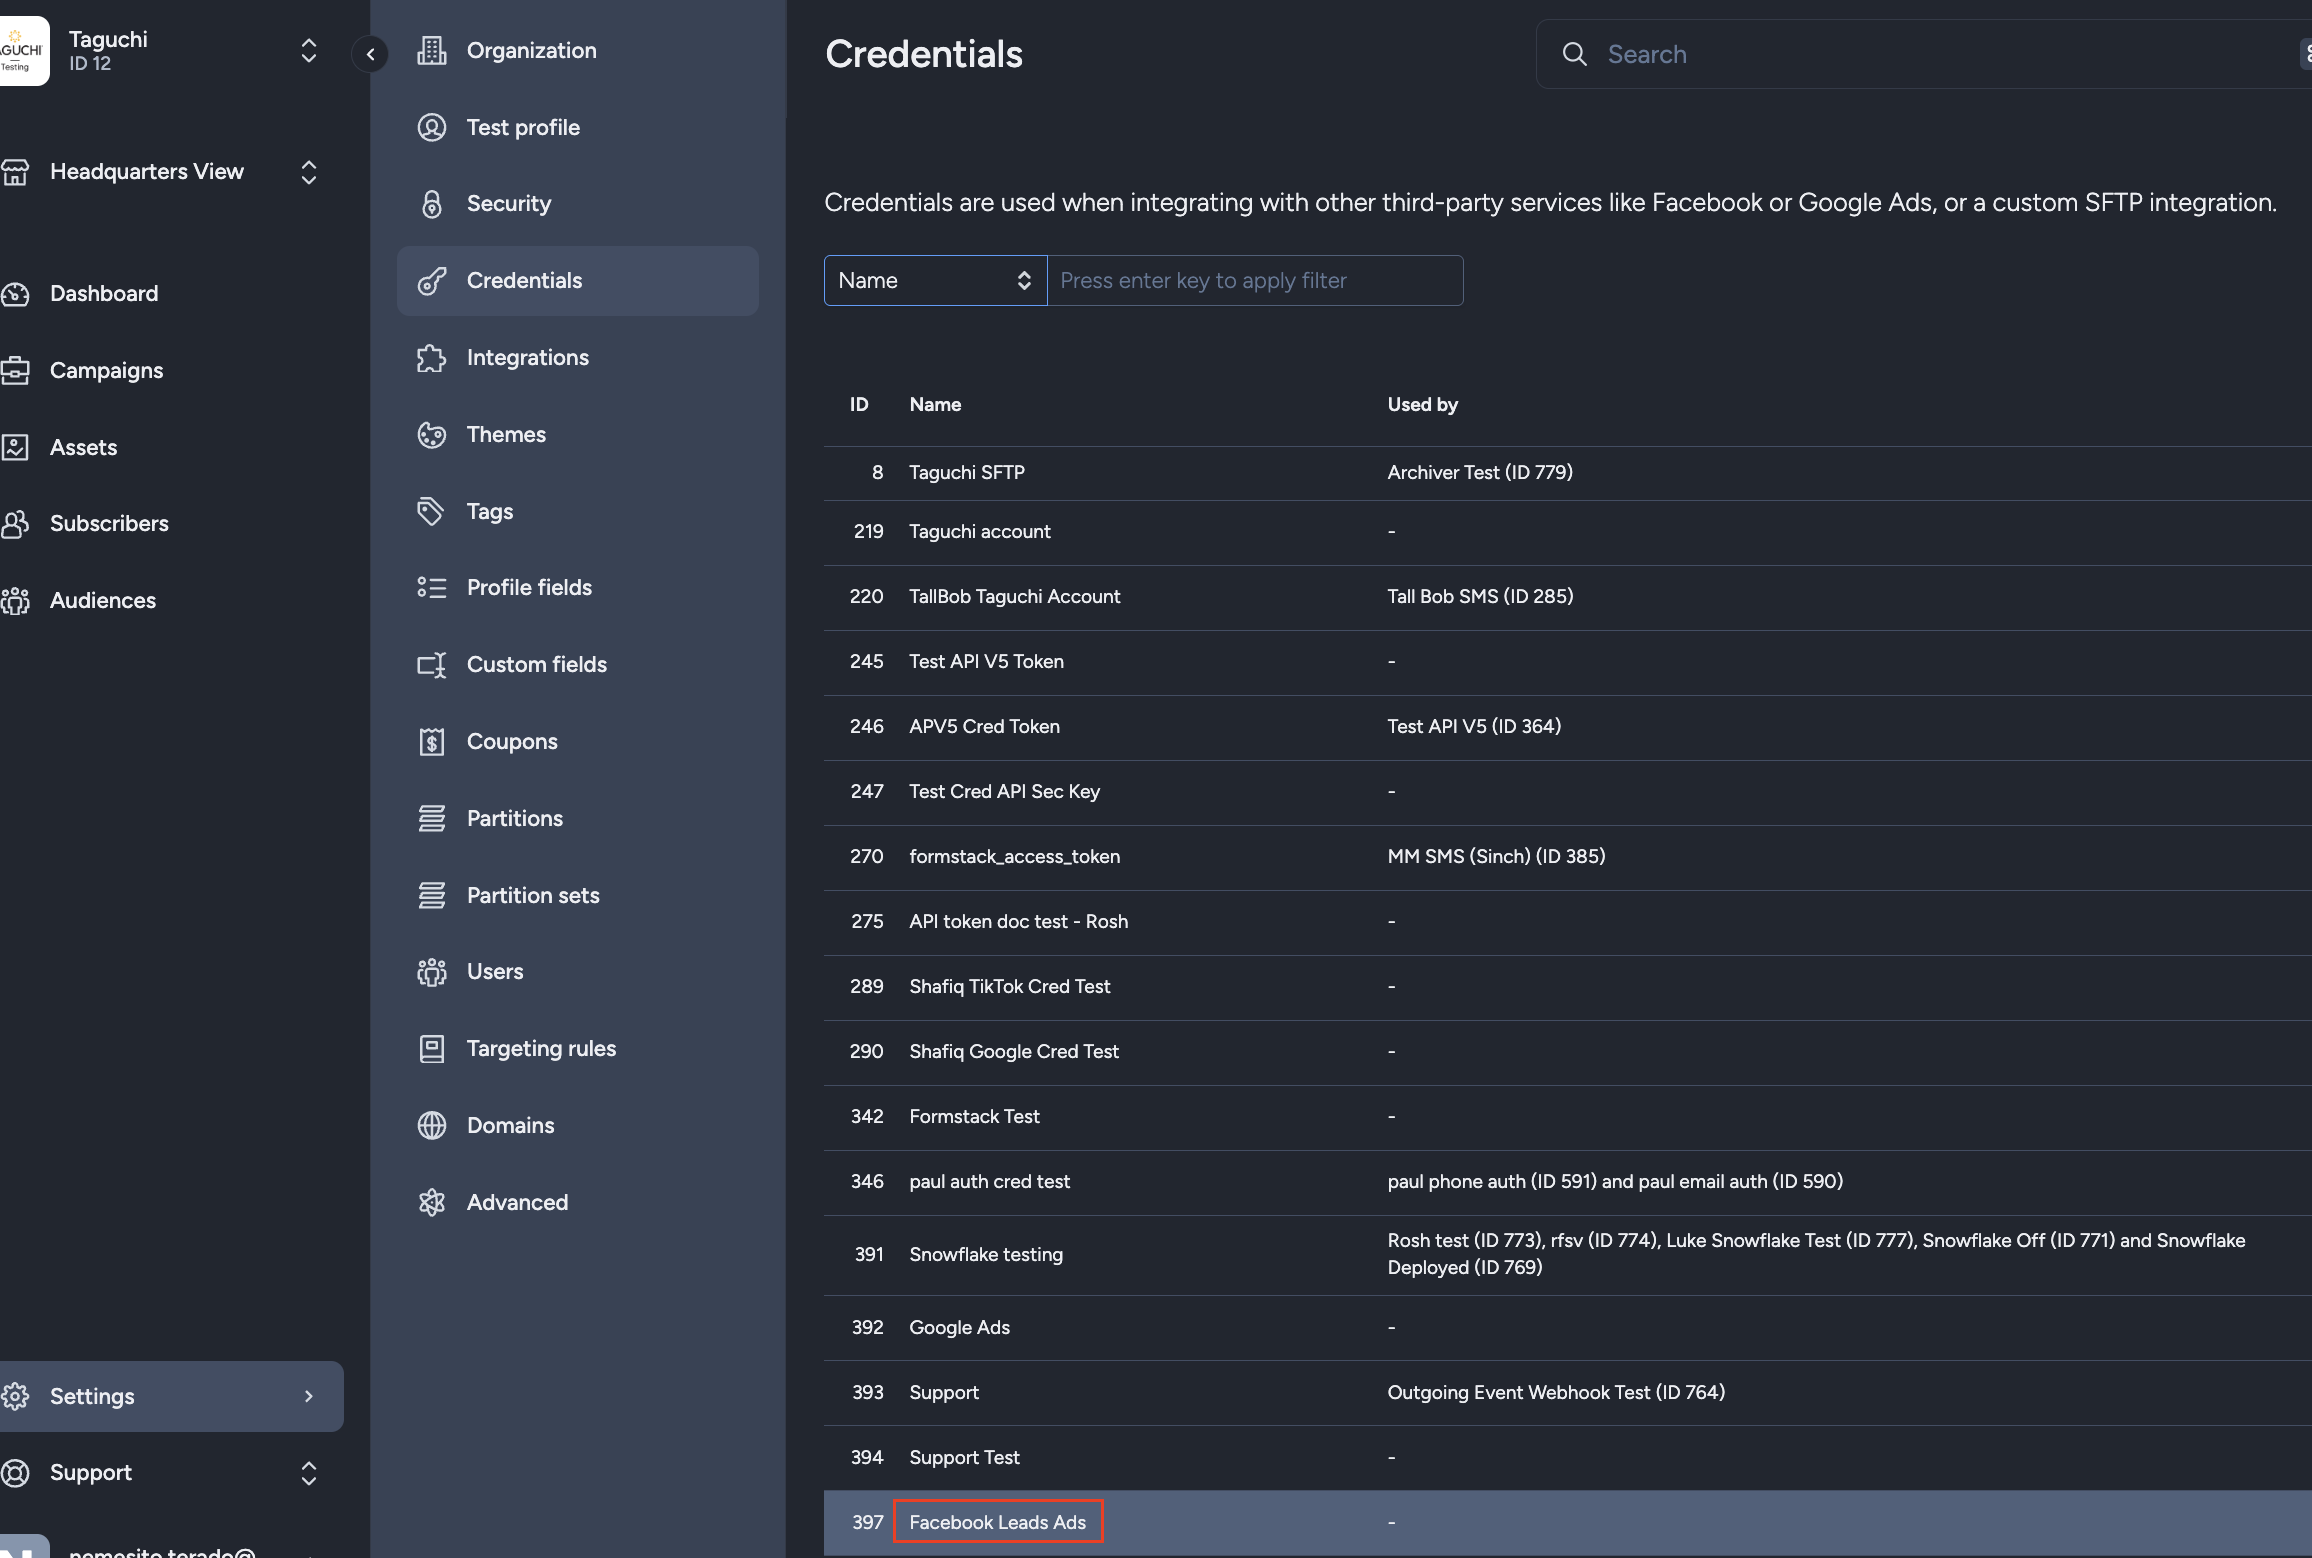
Once saved, this will close the screen and return you to the list of Credentials. The new Credential name will appear in this list.
Click on this name of the new credential.
- Once the name is clicked in the list of Credentials, it will re-open the screen. What appears now, is a link to request Authorization from Facebook.
Request Authorization from Facebook
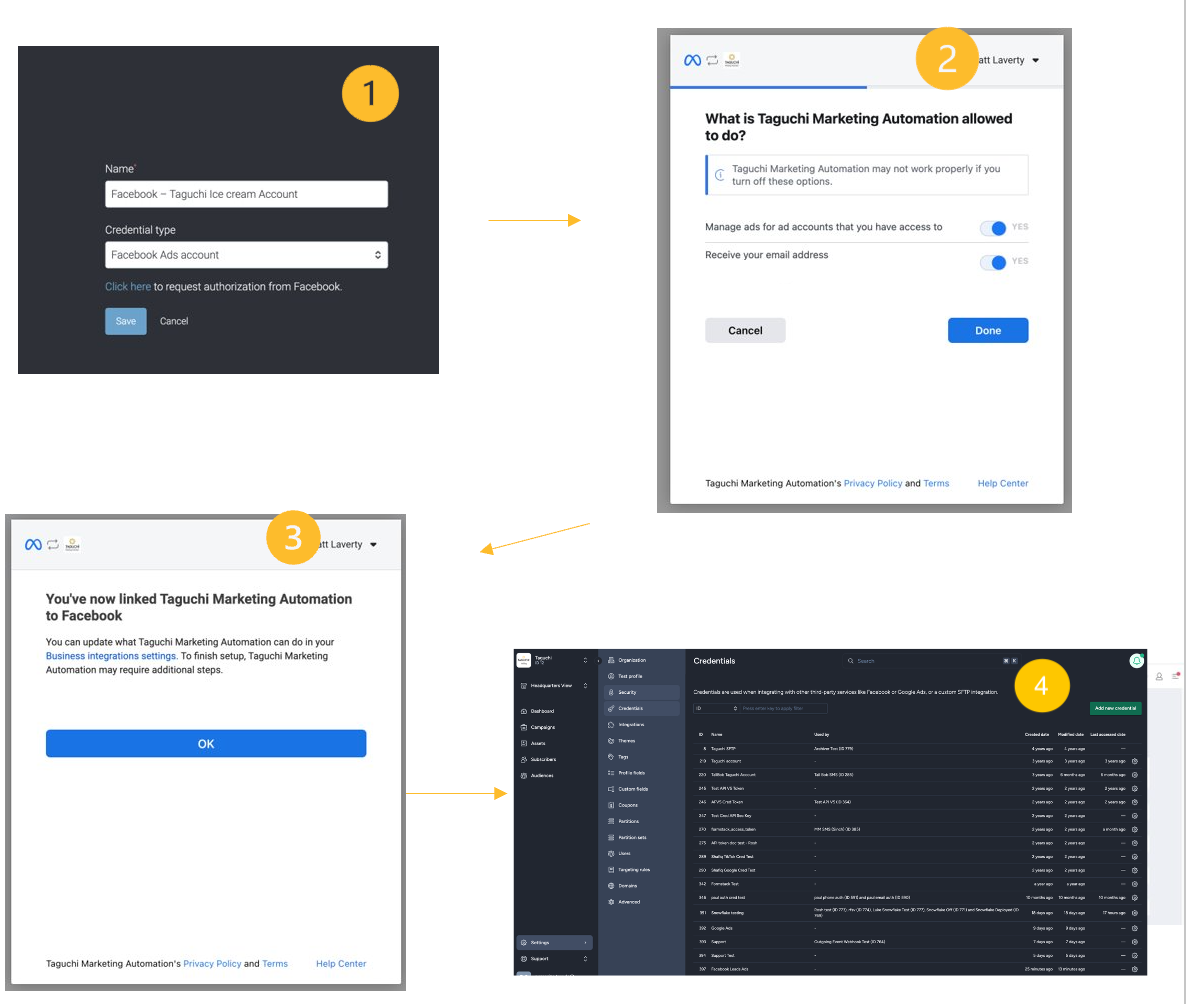
Click on 'Click here'
This will redirect you to Facebook. You will be prompted to login to your account. Once you have logged into your account, a pop up will appear asking to provide permission for Taguchi to access the account and the user email address. Select Yes to both and click Done.
A confirmation will appear and select ‘OK’
This will redirect you back to Taguchi and now the connection is in place.
Critical: The Facebook account you authorize with must use the same email address as your Taguchi user login (the email on your Taguchi profile/settings). This is separate from subscriber profile email addresses. Using a different email for authorization will cause the connection to fail.
Create Your Audiences
New Integration
To create a new integration, ensure that you have the required User Type integration role privileges assigned to you. The 'integration' page is under Settings > Integrations.
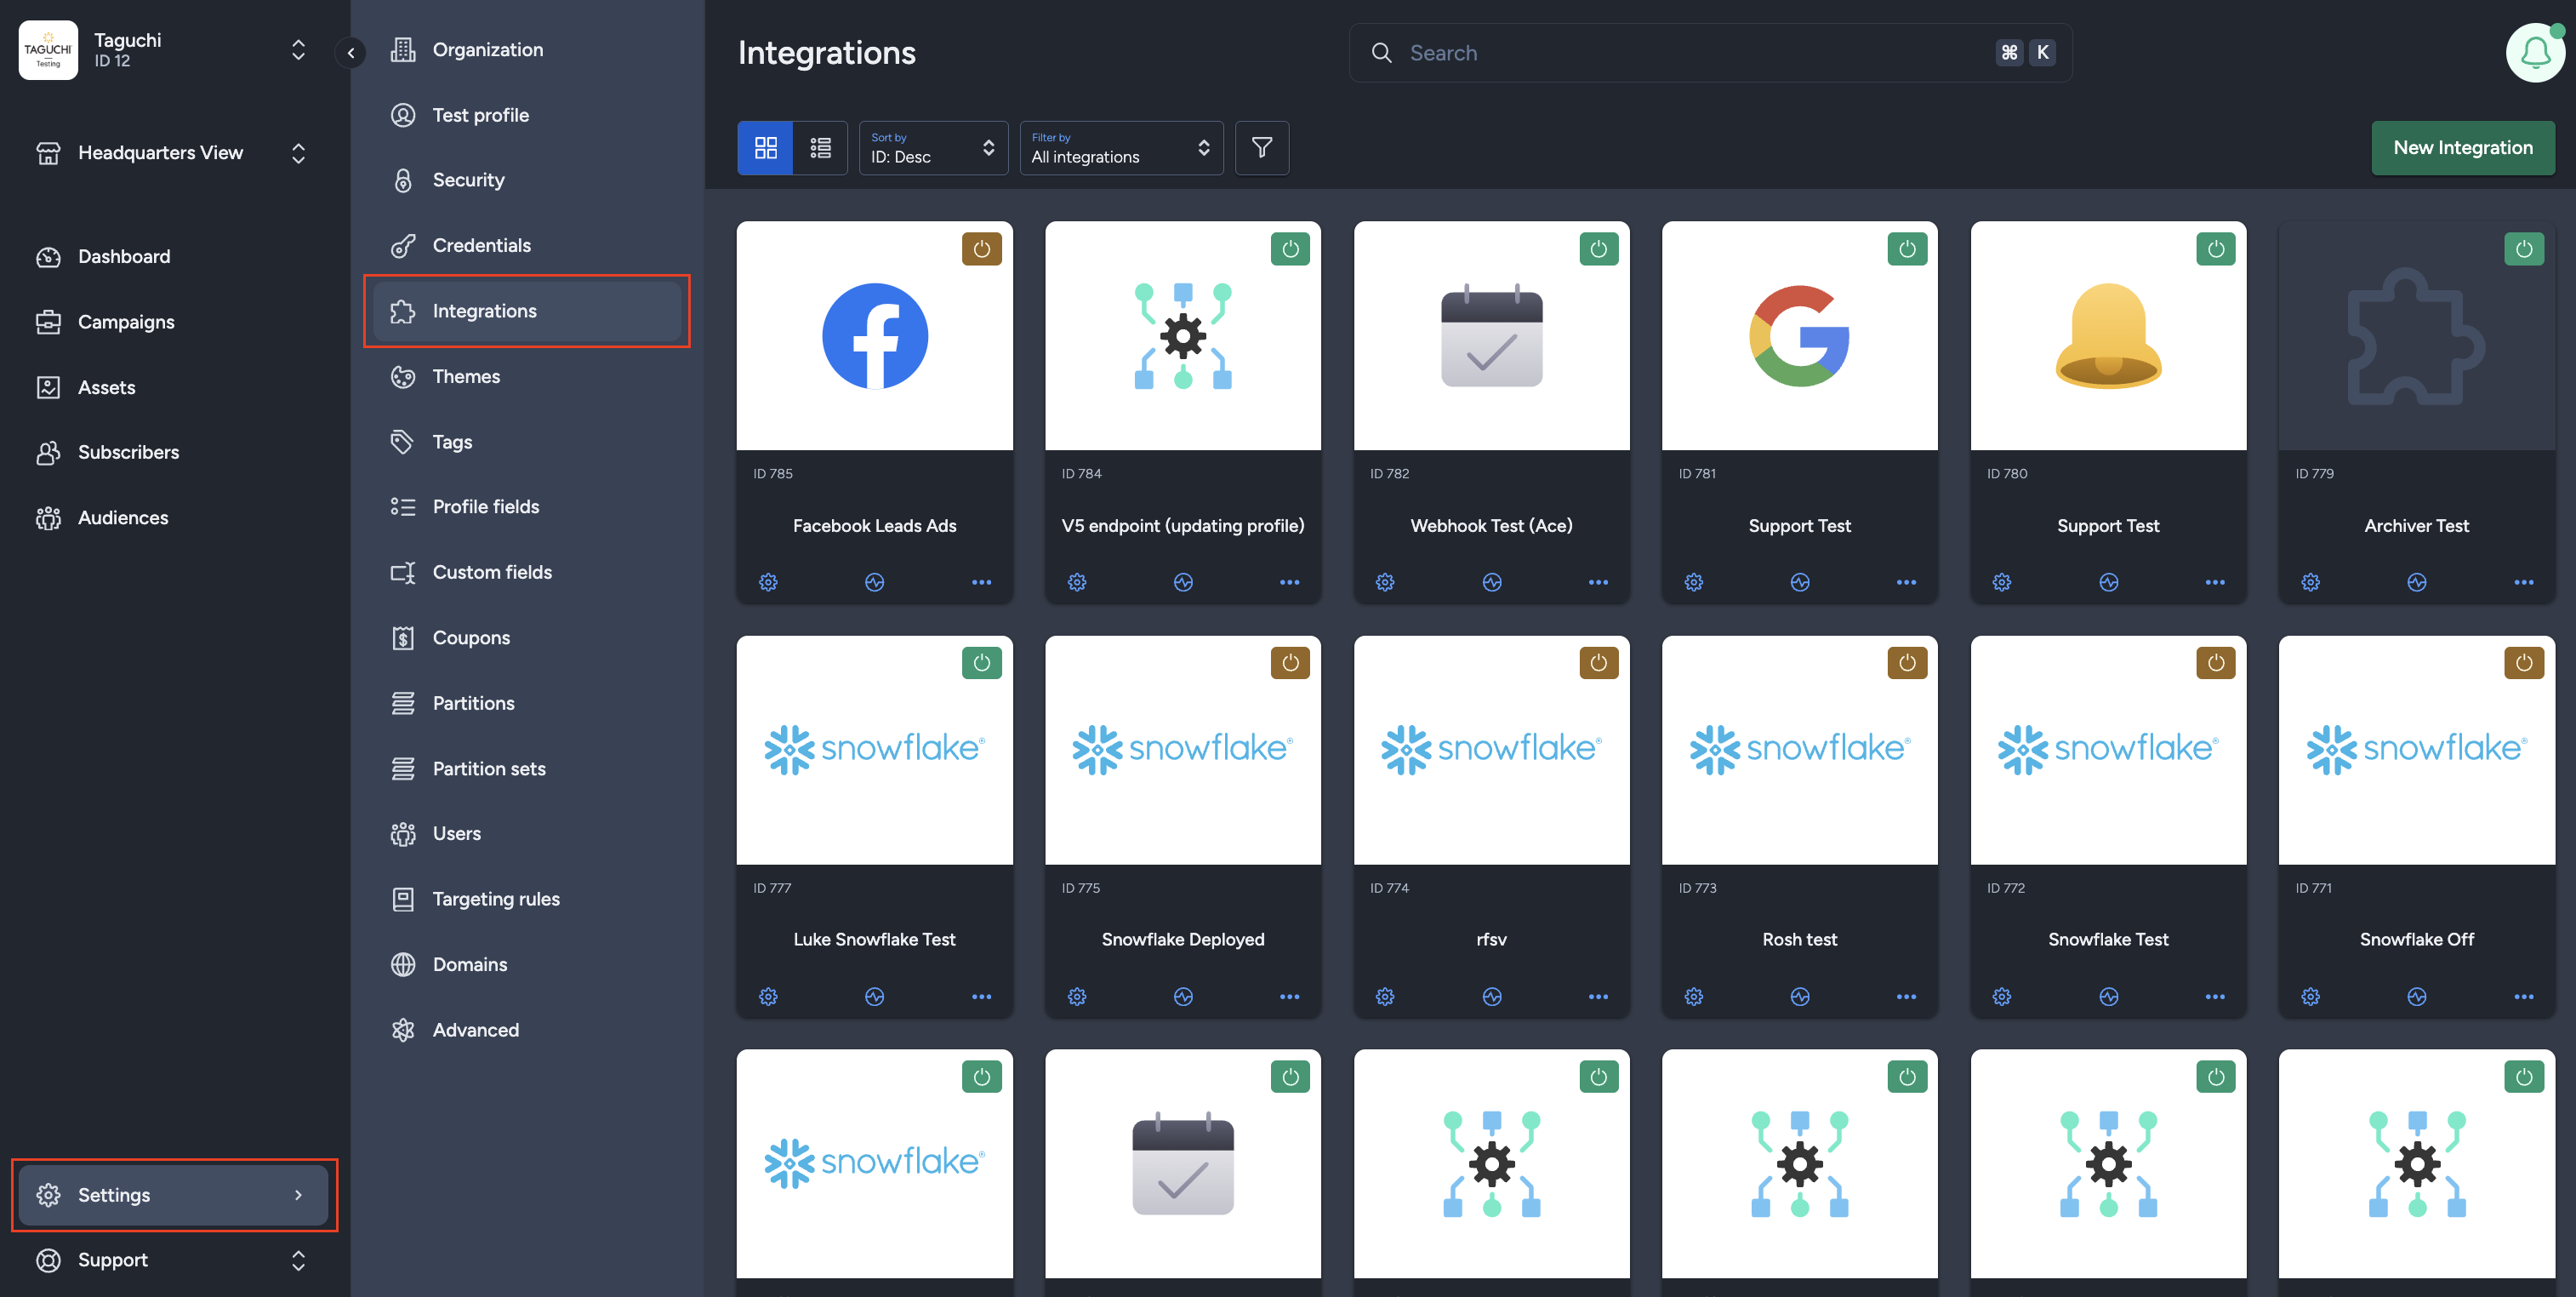
Select ‘New Integration' and a new screen will popup.

Details
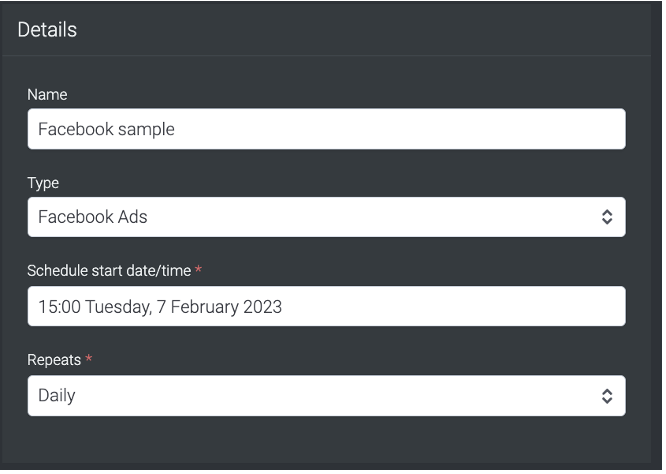
Set the name of the integration.
Under 'Type', select either:
- 'Audience Sync Mapping: Meta Ads': Use this integration type to map Taguchi audiences to existing Meta audiences or create new Meta audiences directly from the mapping screen.
- 'Audience Sync: Facebook Ads (Legacy)': This legacy integration synchronizes the audience with Facebook Ads. It only adds and removes subscribers from the audience who start matching or stop matching the target expression.
- 'Export: Facebook Ads (Legacy)': This legacy integration sends the entire matching audience to Facebook Ads on the schedule you nominate. It will either add any matching subscribers to whoever is currently in the audience (if you select "Add" for "Audience Update Operation"), or it will replace everyone currently in the audience (if you select "Replace" for "Audience Update Operation").
When selecting the integration type, do take note that the integrations are arranged in five different groups: API, Import, Export, Messaging, Scheduled, and that some integrations may appear in multiple groups.
The Schedule start date/time allows the integration start point. When used in tandem with repeat (daily), this allows the integration to repeat daily at 15:00 (based on the example above).
Repeats allow you to conduct the integration multiple times without having to create a new integration. You could choose either Yearly, Monthly, Weekly, Daily, or Hourly.
Important: We strongly advise against using 'Hourly' repeats. Facebook's processing limitations mean it can take up to 24-28 hours for your data to be fully ingested and available for use in your ad campaigns. Hourly repeats will not speed up this process and can lead to unexpected behavior. We recommend using Daily, Weekly, or Monthly repeats instead.
Configuration
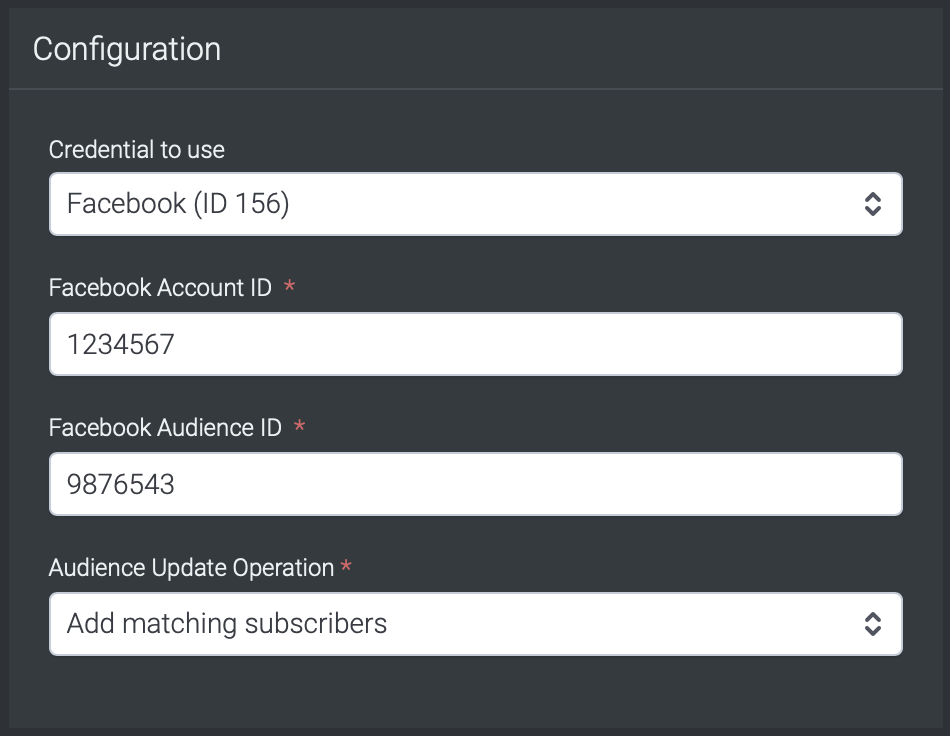
Choose the desired credential to use that you have set up in the credential page.
Add the Facebook account ID of the account that you want to feed the data to. Since the Facebook account ID is not pre-populated, you would need to obtain the Facebook account ID by accessing the Ads Manager > Audiences section in Facebook. Once you are in audiences, the account ID is in the top right hand corner.
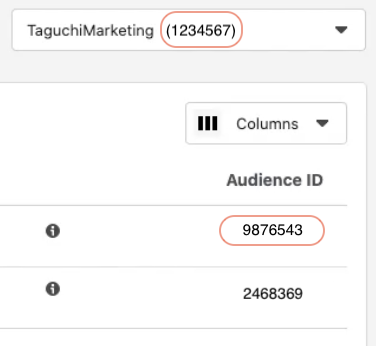
The Facebook Audience ID is equivalent to the Taguchi List ID whereby you would be able to access the list of audiences you would like to target. To obtain the Facebook Audience ID, you would need to create a list in Facebook which would generate the ID. Once the ID has been generated, copy and paste it into the Facebook Audience ID input box. The Audience ID is located in the Ads Manager > Audiences in right side of the page.
Audience Update Operation allows us to "Add matching subscribers" or "Replace subscribers".
"Add matching subscribers" will add subscribers to Facebook who match the target expression set up in the integration. This is a cumulative feed.
"Replace subscribers" allows users to refresh subscriber data in Facebook with new information. This process works by removing the old data of the subscriber in Facebook and adding new information of the subscriber.
Audience Sync Mapping
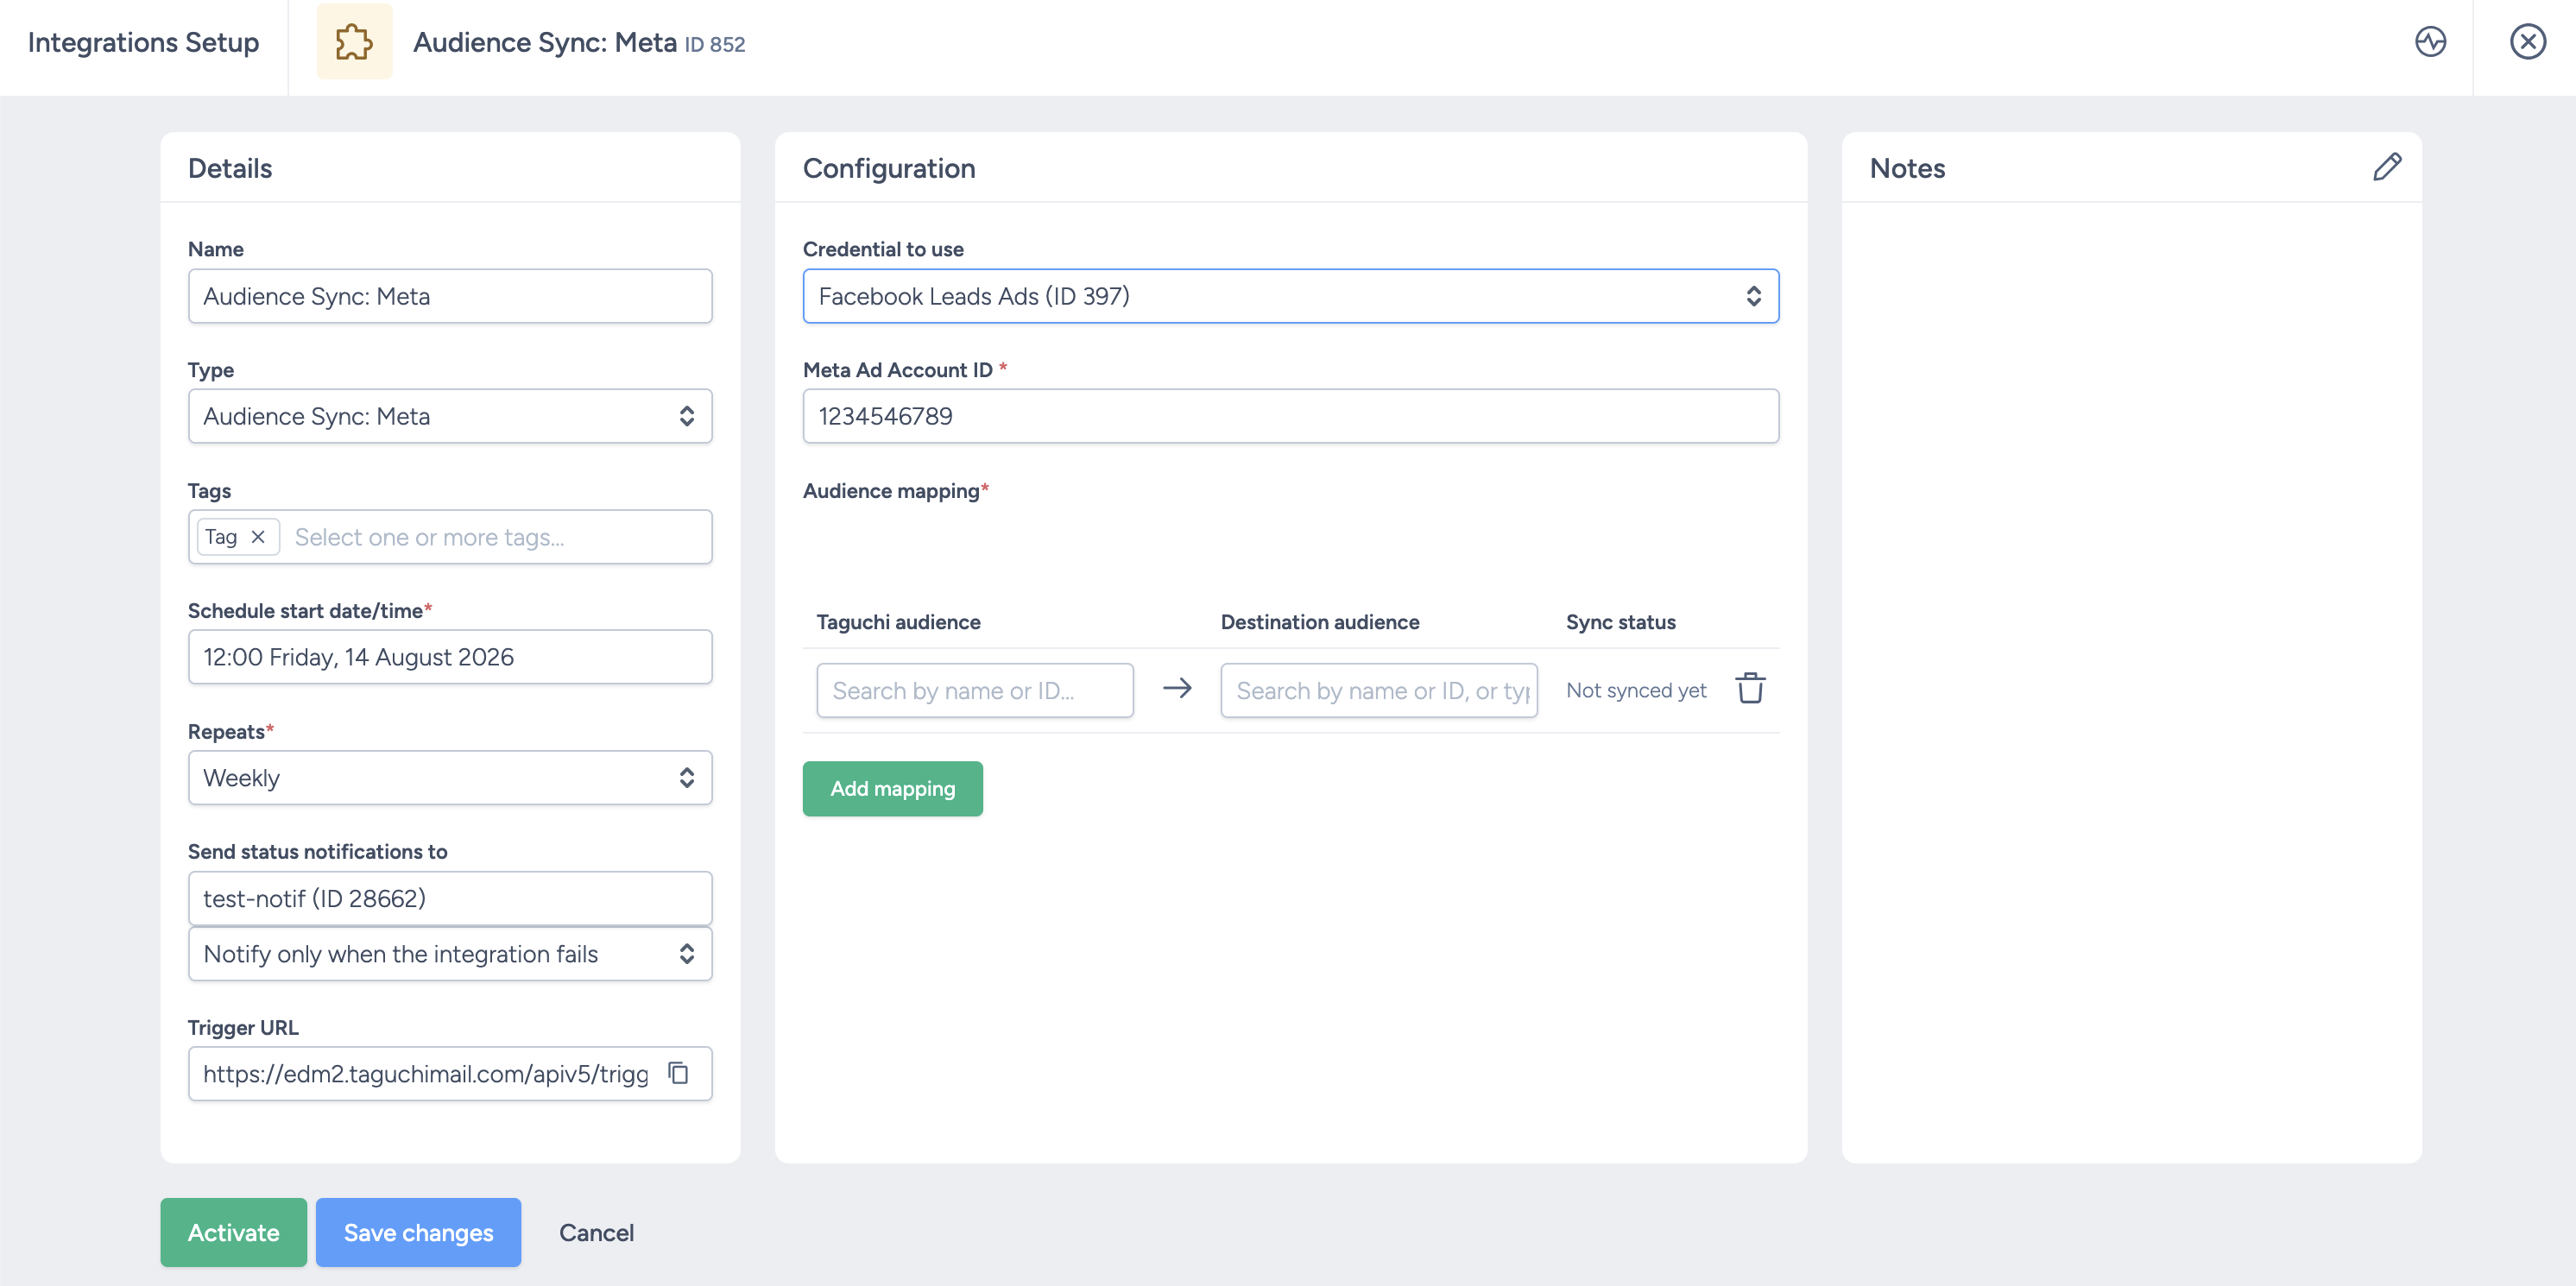
With Audience Sync Mapping: Meta Ads, you can set up all of your audience mappings in a single integration instead of creating a separate integration for each audience.
When using Audience Sync Mapping: Meta Ads, each mapping row lets you:
- Choose a Taguchi audience.
- Map it to an existing Meta audience; or
- Create a new Meta audience directly from the mapping screen.
Each mapping also displays Sync status and Last synced so you can monitor progress at a glance.
Target Expression
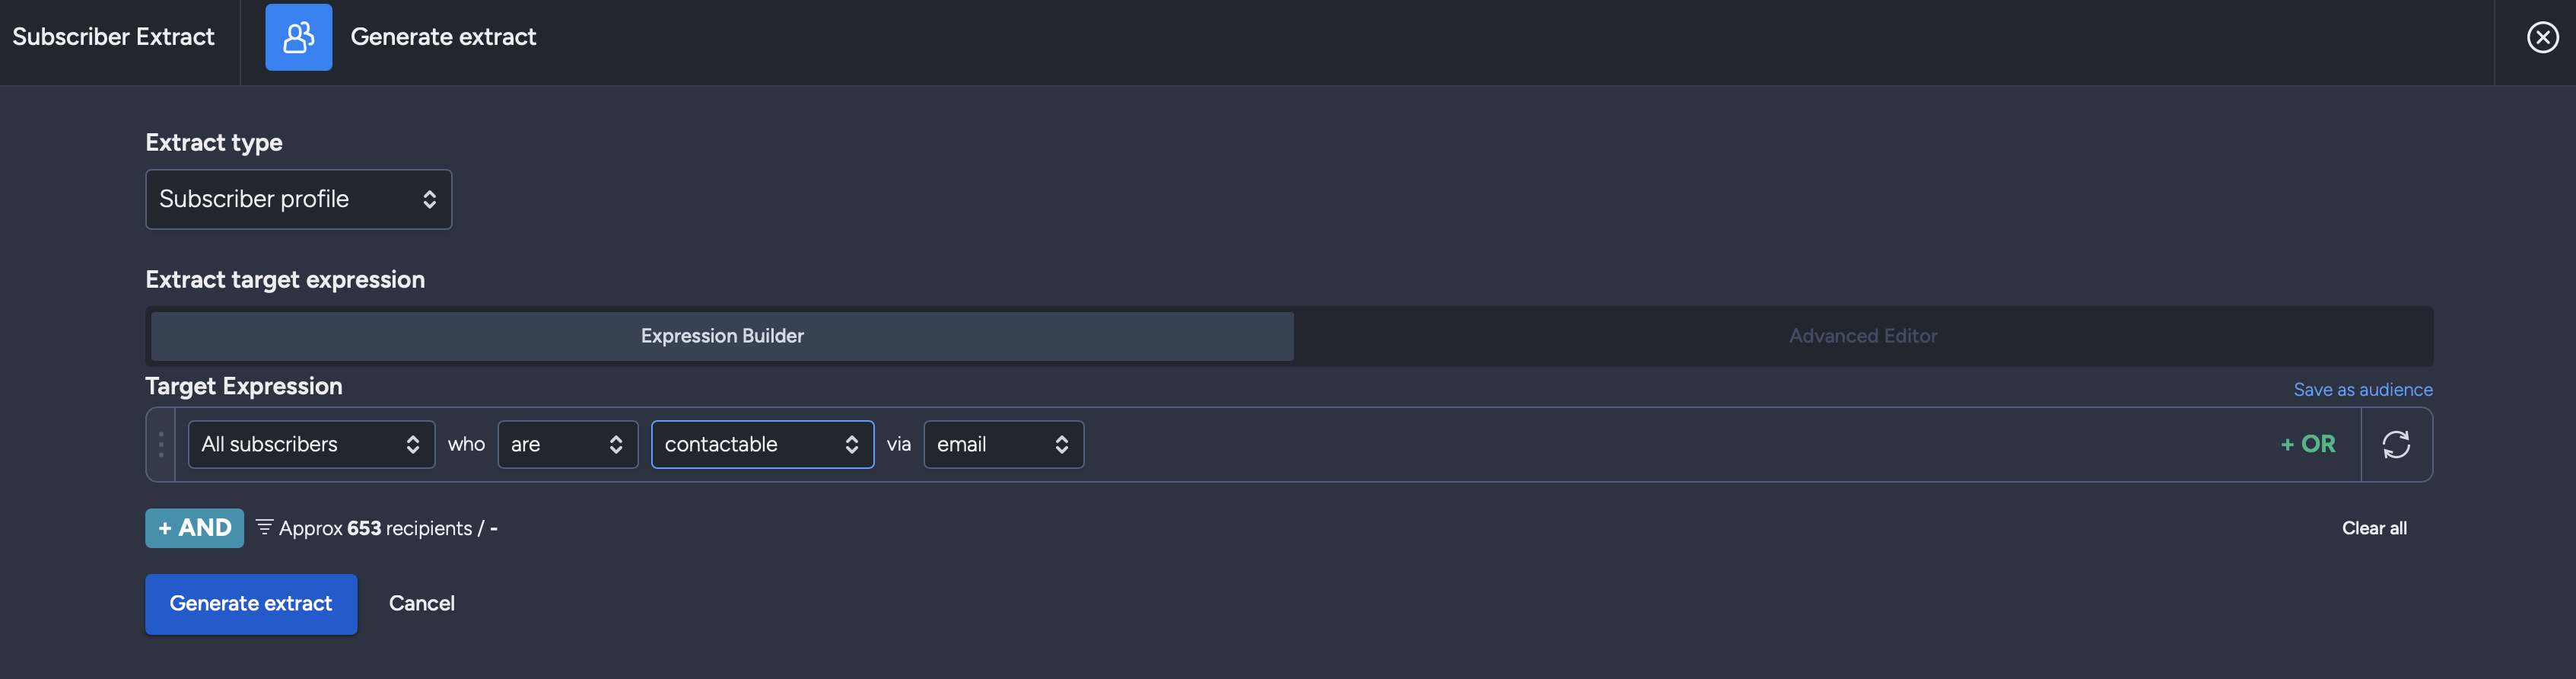
Target expressions allows us to target specific subscribers in a list or based on other variables.
For more on Target Expressions see our article ‘What are target expressions?’
Lookalike Audiences and Customer Lifetime Value (CLV)
Taguchi can enhance your Facebook Lookalike Audiences by sending Customer Lifetime Value (CLV) metrics alongside subscriber data. This allows Facebook to build more effective lookalike models based on your highest-value customers.
How it works:
When you configure your integration, the total_spent and/or total_orders fields from your Taguchi subscriber profiles are automatically appended to the data sent to Facebook. These fields are standard metrics in Taguchi that track a customer's total purchase value and order count.
What this means for Facebook: By providing CLV data, you are telling Facebook which of your customers are the most valuable. Facebook uses this signal, along with the provided email addresses, to create a more powerful seed audience for its lookalike algorithm. This helps Facebook find new people who share similar purchasing behaviors and high-value traits with your best customers.
Relevant Field Appended to the Record:
total_spent: The total amount a customer has spent with your business (tracked in Taguchi).total_orders: The total number of orders a customer has placed.
Benefit for Lookalike Creation: This data enhances the matching process by providing additional behavioral context (purchase history). It allows Facebook to prioritize finding lookalikes who are likely to be high-value, not just people who resemble your general audience.
For more information on Lookalike Audiences on Facebook, please refer to Facebook's own documentation: Facebook Lookalike Audiences
Viewing Integration Schedules and Next Run Details
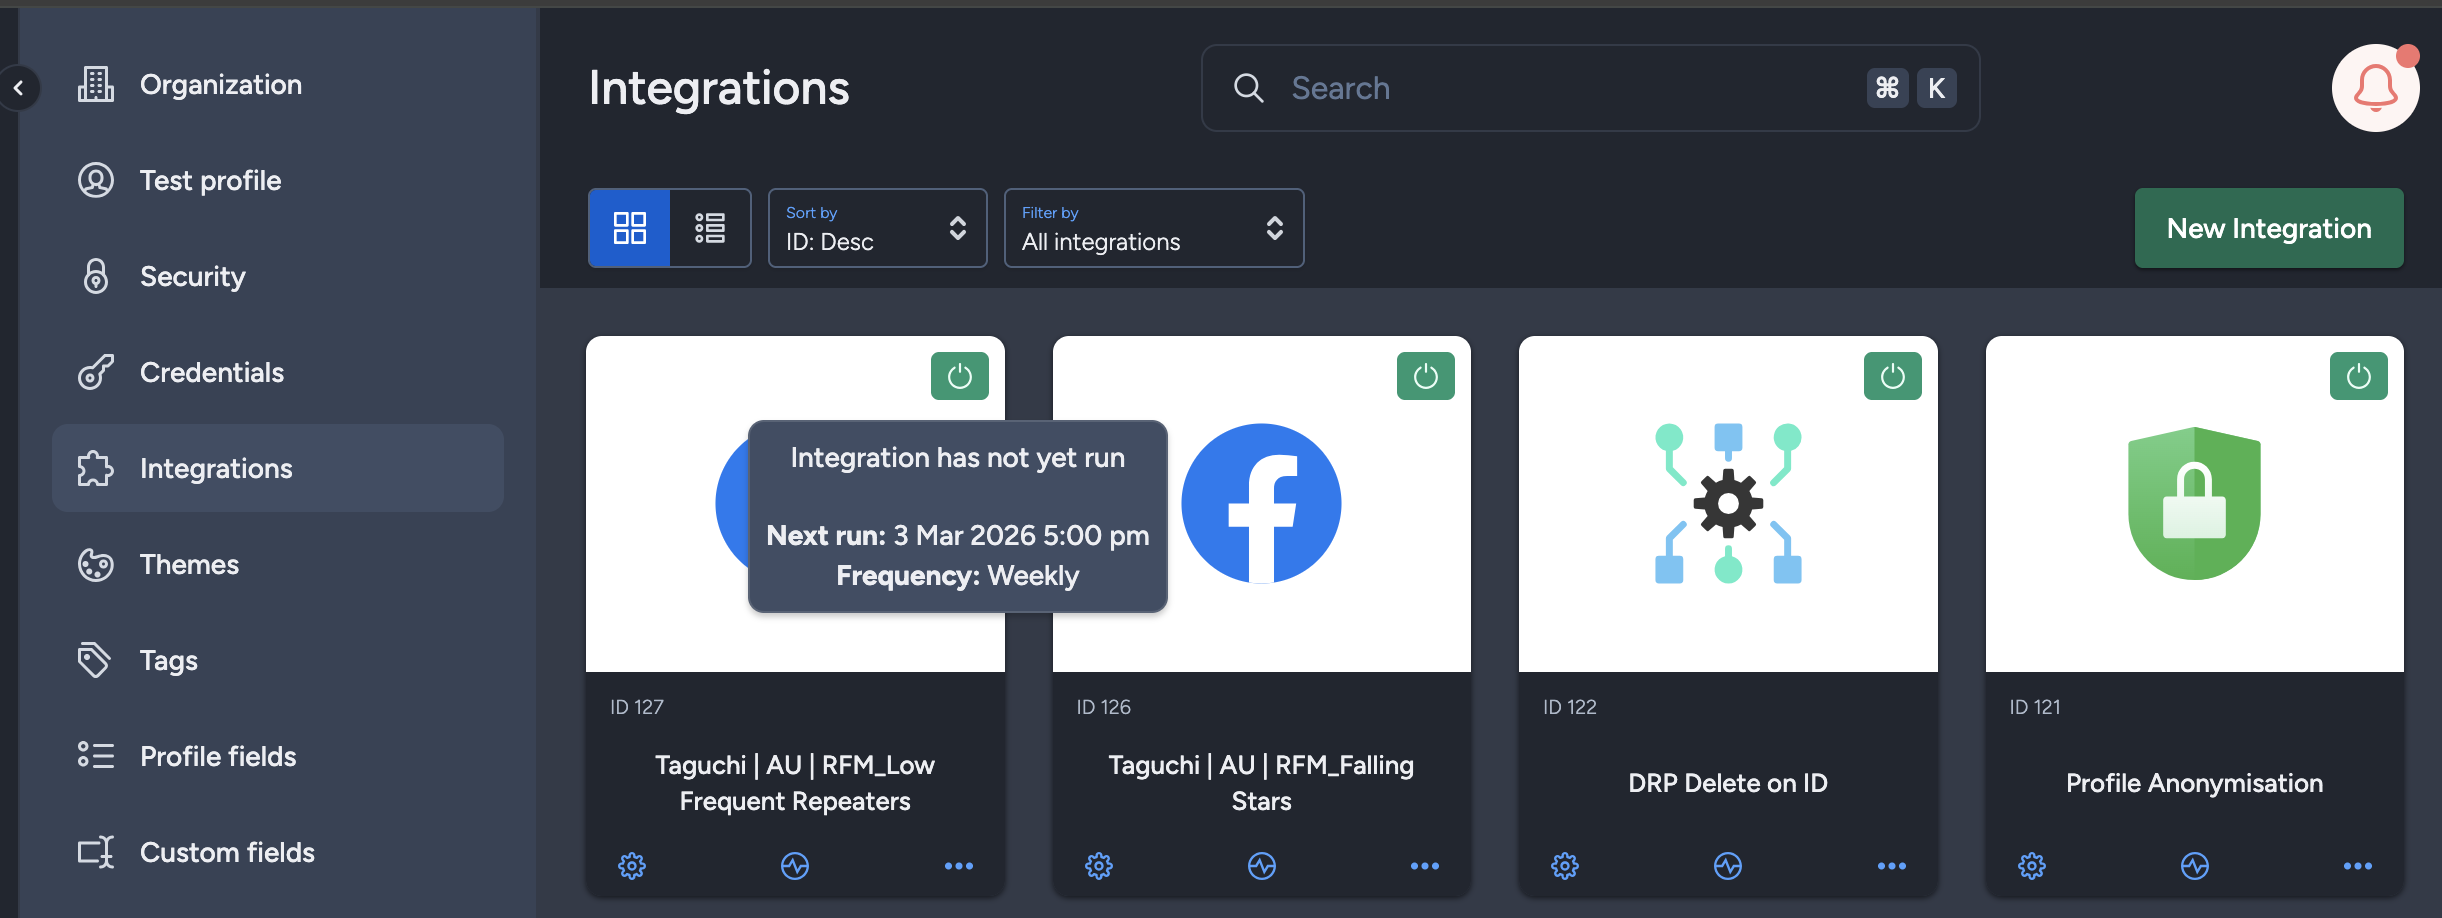
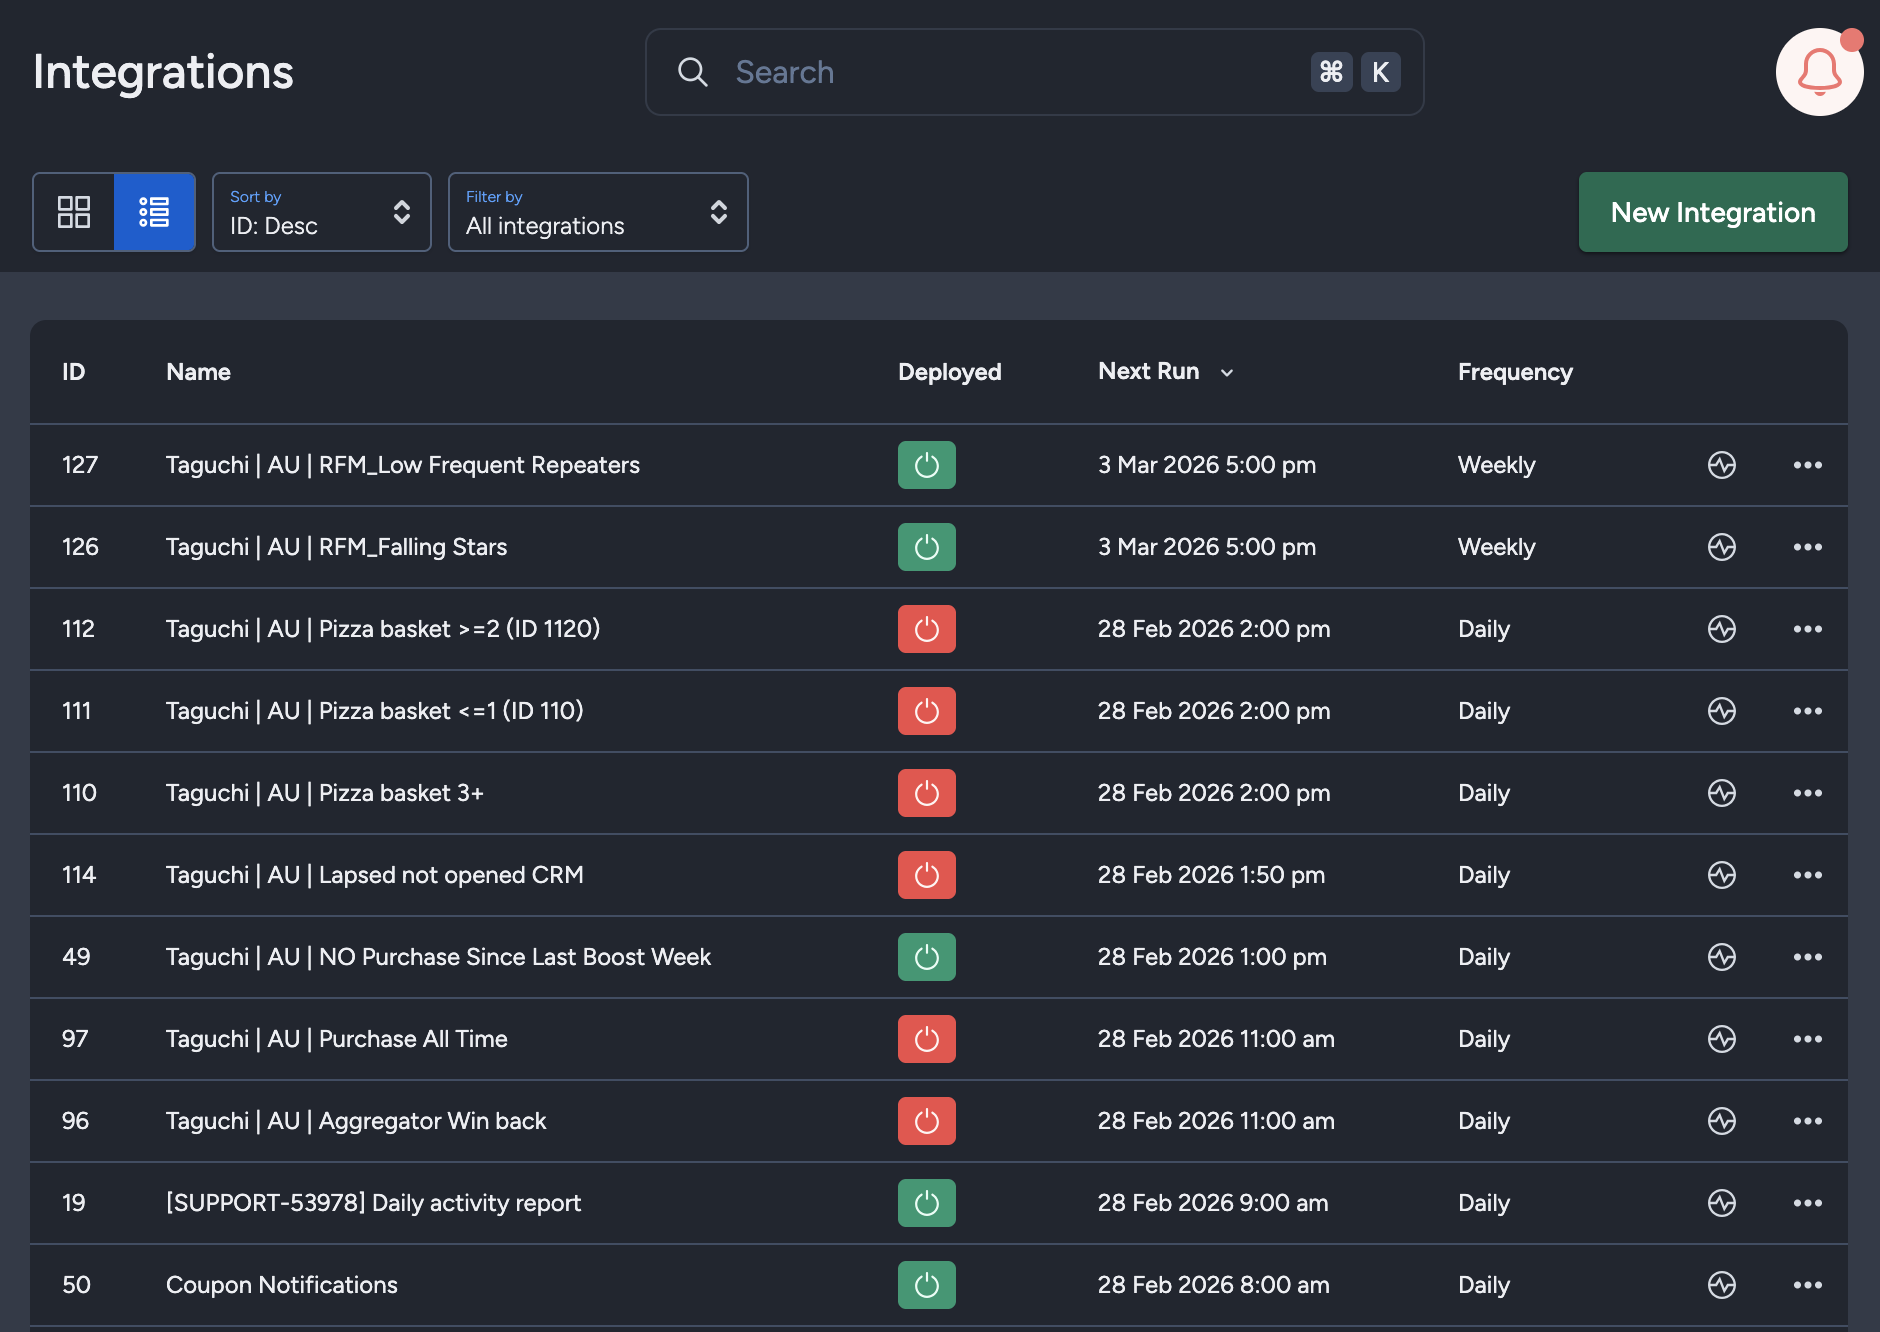
The Integration UI provides visibility into integration schedules by displaying the scheduled frequency and the time of the next run when hovering over the status icon. Adding to that, the integration UI supports list view with sortable columns so you can see the next run timestamp and frequency there too. This helps users quickly check when integrations are scheduled to execute and manage them more efficiently.
Save Changes and Activate
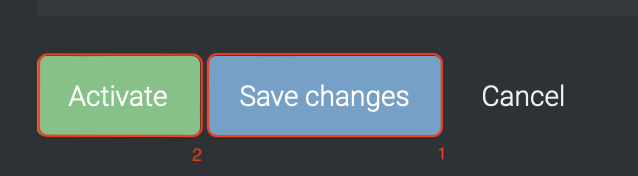
Once you have added your Details, Configuration and Target Expression, you will be able to save changes (1) and activate (2) the integration. You can only activate once you have save changes.
Deactivate
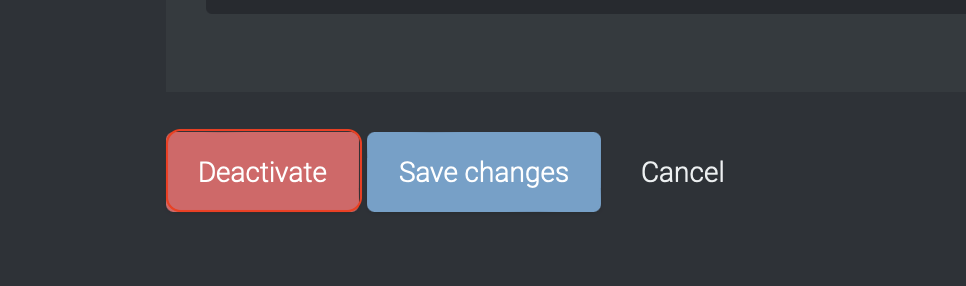
To stop the integration, click on Deactivate. This will stop Taguchi and Facebook from sharing data.
Active Integration
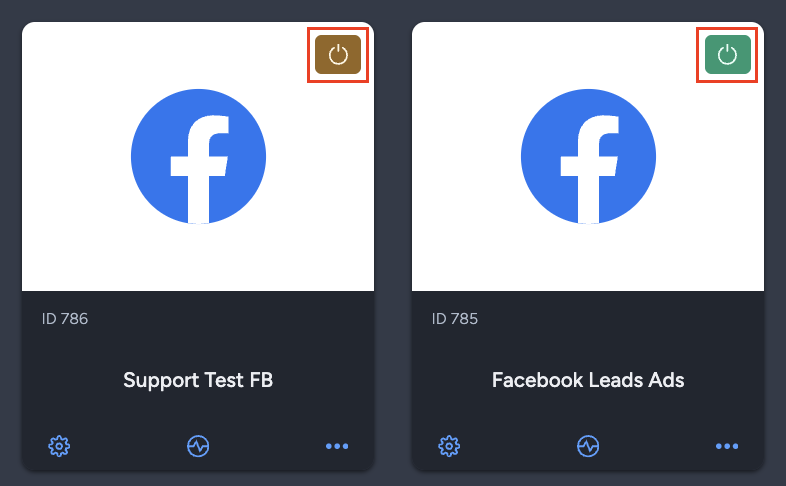
Once the integration has been saved and activated, the on/off icon of the integration card will change from yellow (Off) to green (On) which indicates that it is now activated.
Update Integration
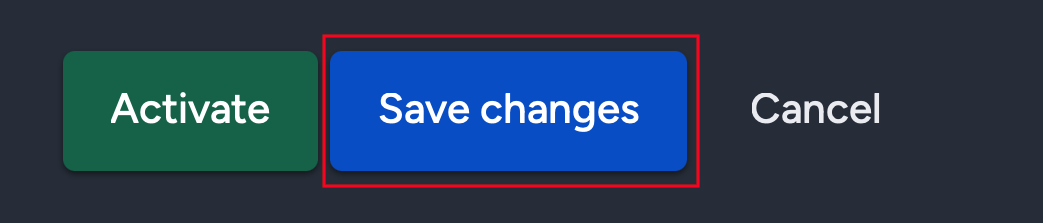

If you want to update your Integration, you will be able to make the changes while it is activated or deactivated. Once the changes have been made, you will be able to update the integration by clicking on 'Save changes'. The Integration will be updated immediately.
Integration Status & Logs
Users can determine the status of an integration by looking for the status symbol (On/Off icon) colour within the integration tile.
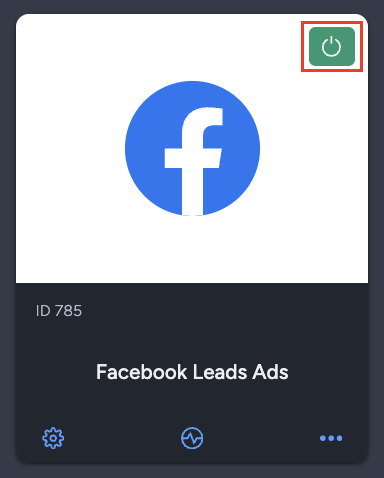
Green – This colour indicates that integration is active and has either been deployed or awaiting deployment.
Yellow – This colour indicates that the integration has been deactivated.
Red – This colour indicates that the integration has failed to deploy the extract.
Viewing Logs in the UI
Users can now view detailed integration logs directly in the Taguchi UI to troubleshoot issues.
To access logs:
- Navigate to Settings > Integrations.
- Select the integration you want to review.
- Click on View Status in the top right hand corner to see recent activity, including timestamps, status updates, and error messages (if any).
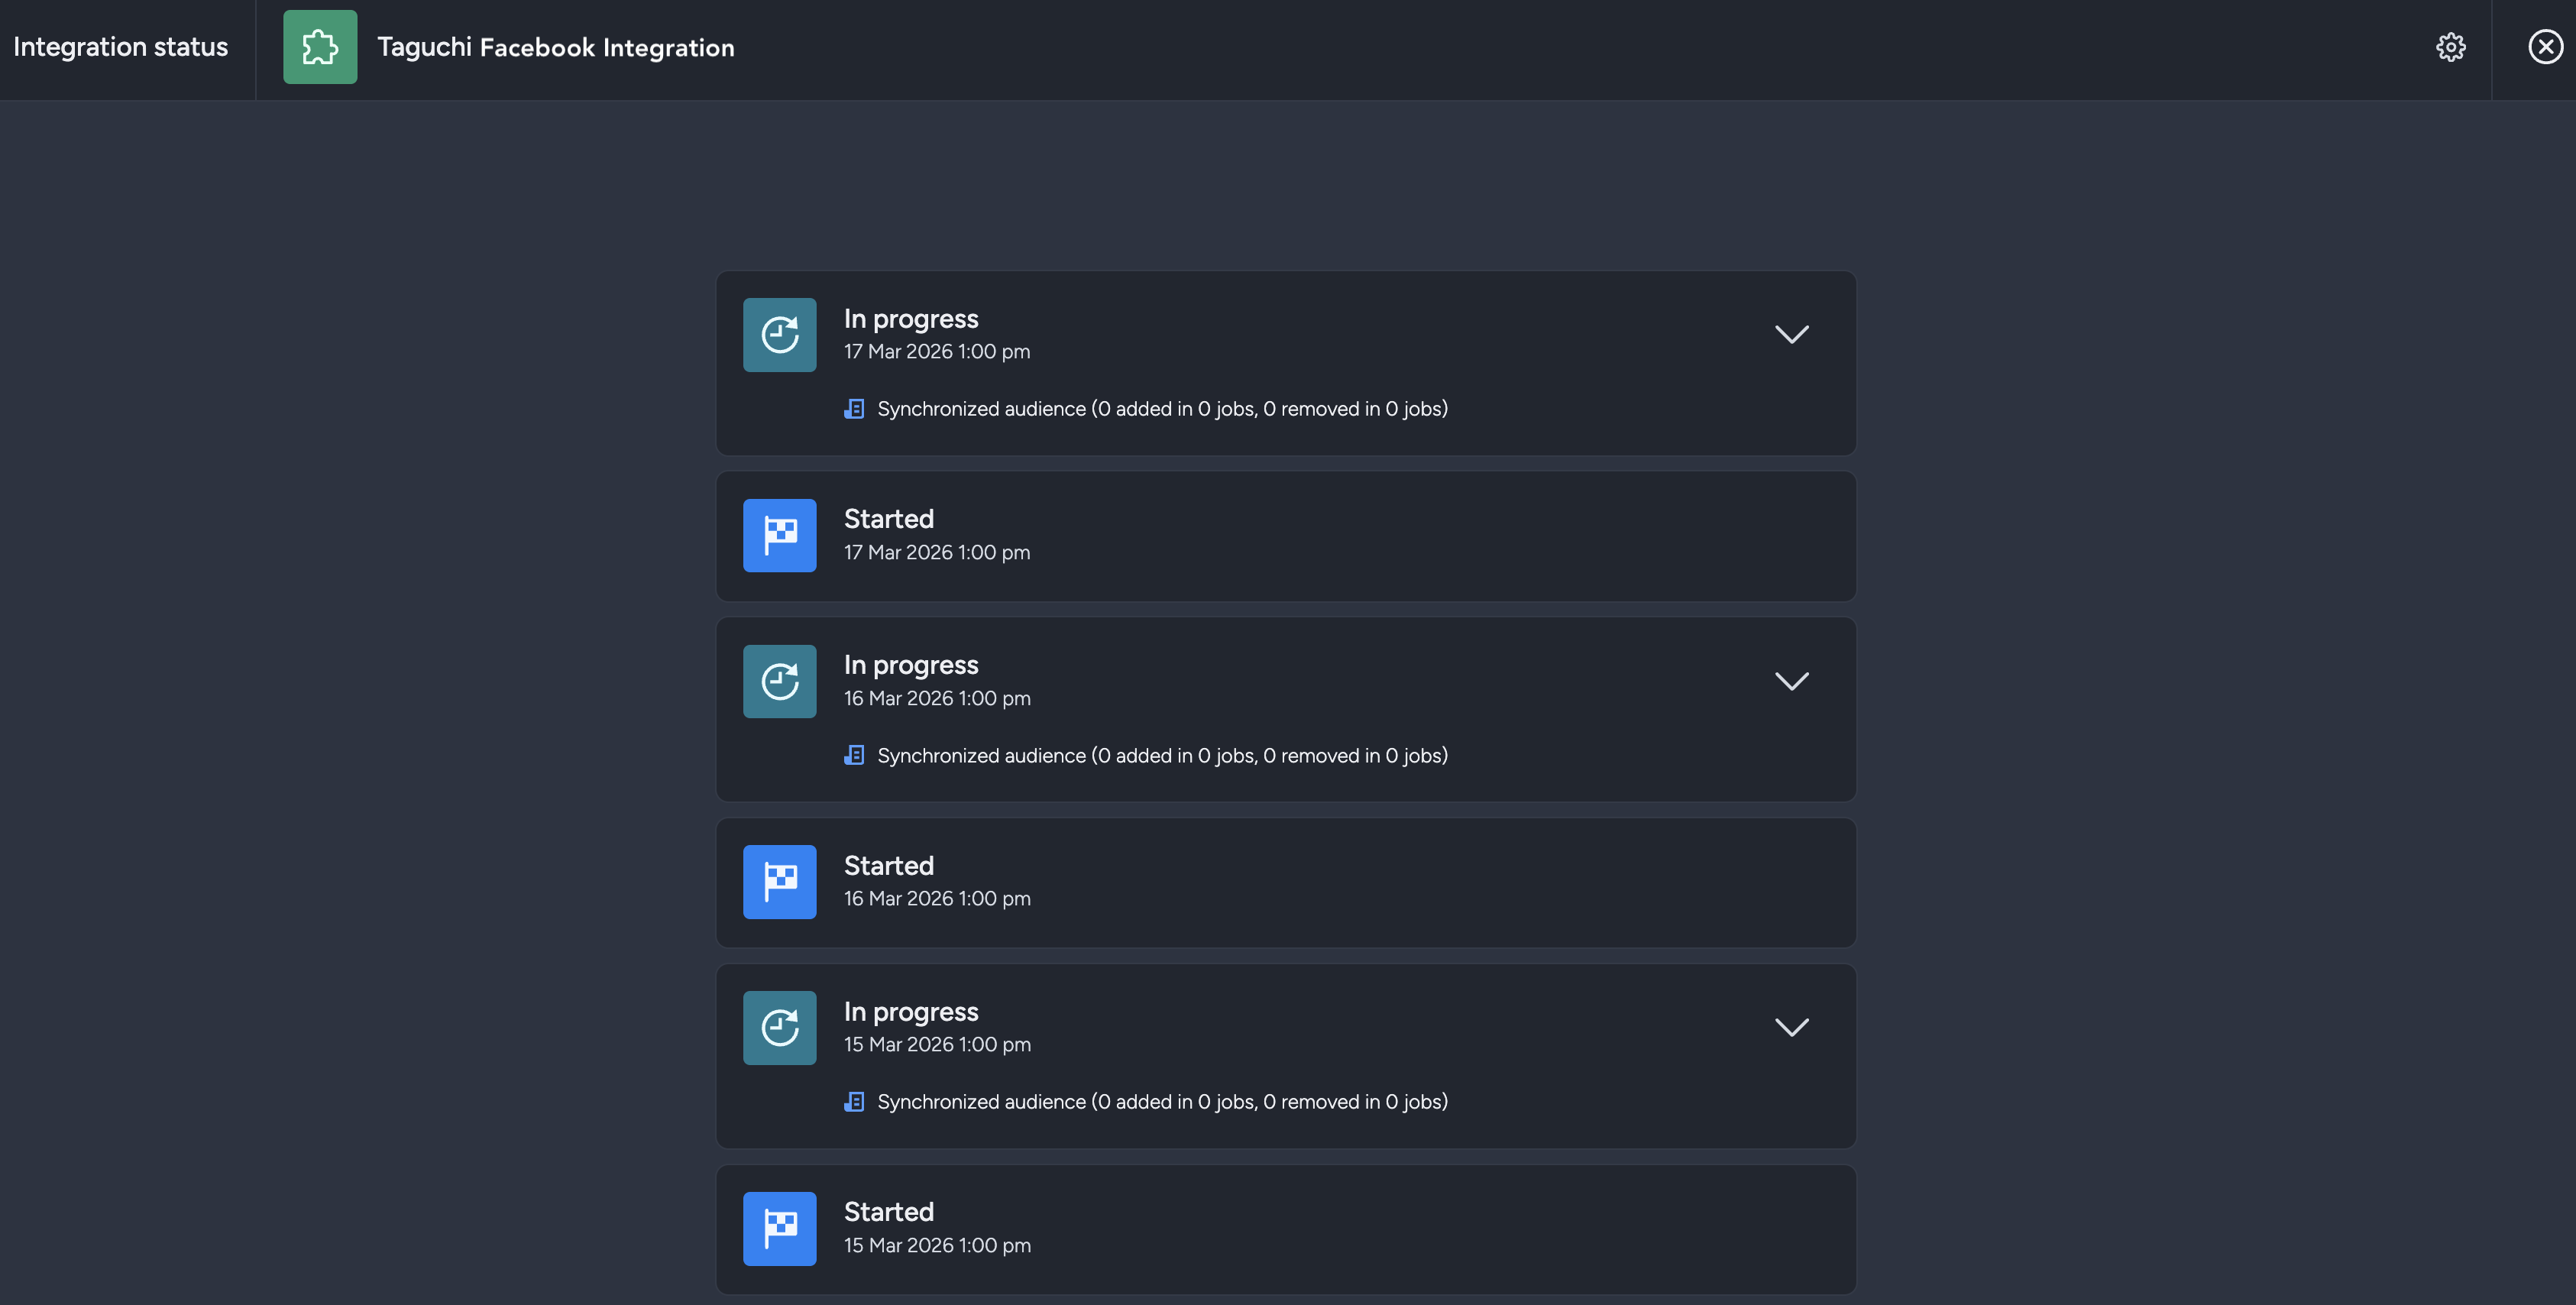
If an integration fails, checking the logs can help identify issues such as incorrect credentials, invalid audience configurations, or query timeouts.
Integration Deployment Status
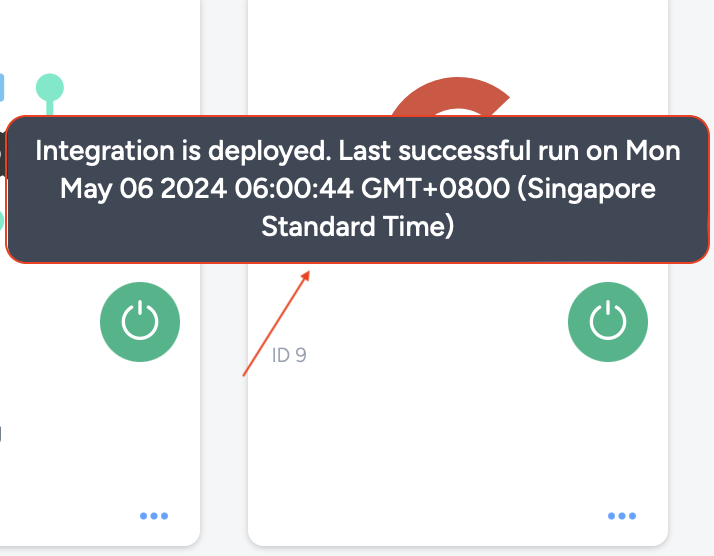
Users will be able to view the integration status message by hovering their cursor over the status symbol (On/Off) icon.
The messages the users will see will vary based on the deployment of the integration.
Green – "Integration has not yet run (Start time/date have not occurred yet) / Integration is deployed. Last successful run on Mon May 06 2024 06:00:44 GMT+0800 (Singapore Standard Time)"
Yellow – "Integration is not deployed (Deactivated)"
Red – "Integration Failed to run on Mon May 06 2024 06:00:44 GMT+0800 (Singapore Standard Time)"
Troubleshooting Measures
Same Email Address Required: Users must ensure that the email address used for credential authorization in Facebook is exactly the same as the email address used for their Taguchi user account. Using a different email address will break the connection between Taguchi and Facebook. Reauthorize the credential with the correct email address to resolve this.
Processing Time: Please be aware that Facebook may take up to 24-28 hours to ingest and process the data we send. This is a platform limitation. Data will not appear instantly in your Facebook Ads account.
Check Integration Status and Logs: If your integration appears to be running but you don't see data in Facebook, check the integration status and logs to confirm it has successfully completed. If it has, the delay is most likely due to Facebook's processing time.
Account and List IDs: Your ads platform account can have multiple accounts (Account IDs) in which each account ID can have multiple lists (Lists IDs) associated with it. So, when populating the integration, the user would need to take into consideration which account and list they will be sending the extract over to and to ensure that the correct account ID and list ID is added into the integration configuration and that the account ID and list ID matches the ads platform. Do ensure that you do not mix your list ID and account ID as that will also break the connection.
Reauthorizing Credentials: To reauthorize the credentials, you would need to click on “Click to request authorization from Facebook” within the chosen credential. The link will lead you to an authorization page. The steps to reauthorize the credentials are the same as the authorization steps above. Ensure the email address used matches your Taguchi user account.
Timeout Limit: Any request issued by Taguchi has a 15-minute timeout limit. If the request takes longer, it will fail. To avoid this, ensure that queries on the receiving end (Facebook Ads) are optimized to run within 15 minutes.
If you are having trouble with this integration, please contact Taguchi Support for assistance.