- Support Home
- Knowledge Base
- Integrations
- SFTP Import Integration
SFTP Import Integration
Taguchi offers a self-service SFTP integration that allows you to easily import your data into Taguchi from an SFTP location.
This integration allows secure and efficient file transfers, enabling the import of large volumes of data, such as subscriber and purchase data, directly into the Taguchi platform. With the SFTP import integration, the process is fully automated, ensuring that your data is regularly updated without manual intervention, while maintaining the highest level of security.
Credentials
You will need to setup up one compulsary SFTP credential and one optional GPG credential before you are able to create an SFTP import integration.
Here is more information on SFTP credentials. In order to set up credentials, you will need to be an administrator of your organization.
SFTP Import Integration Setup
To create a new integration, ensure that you have the required User Type integration role privileges assigned to you. The 'integration' page is under Settings > Integrations.
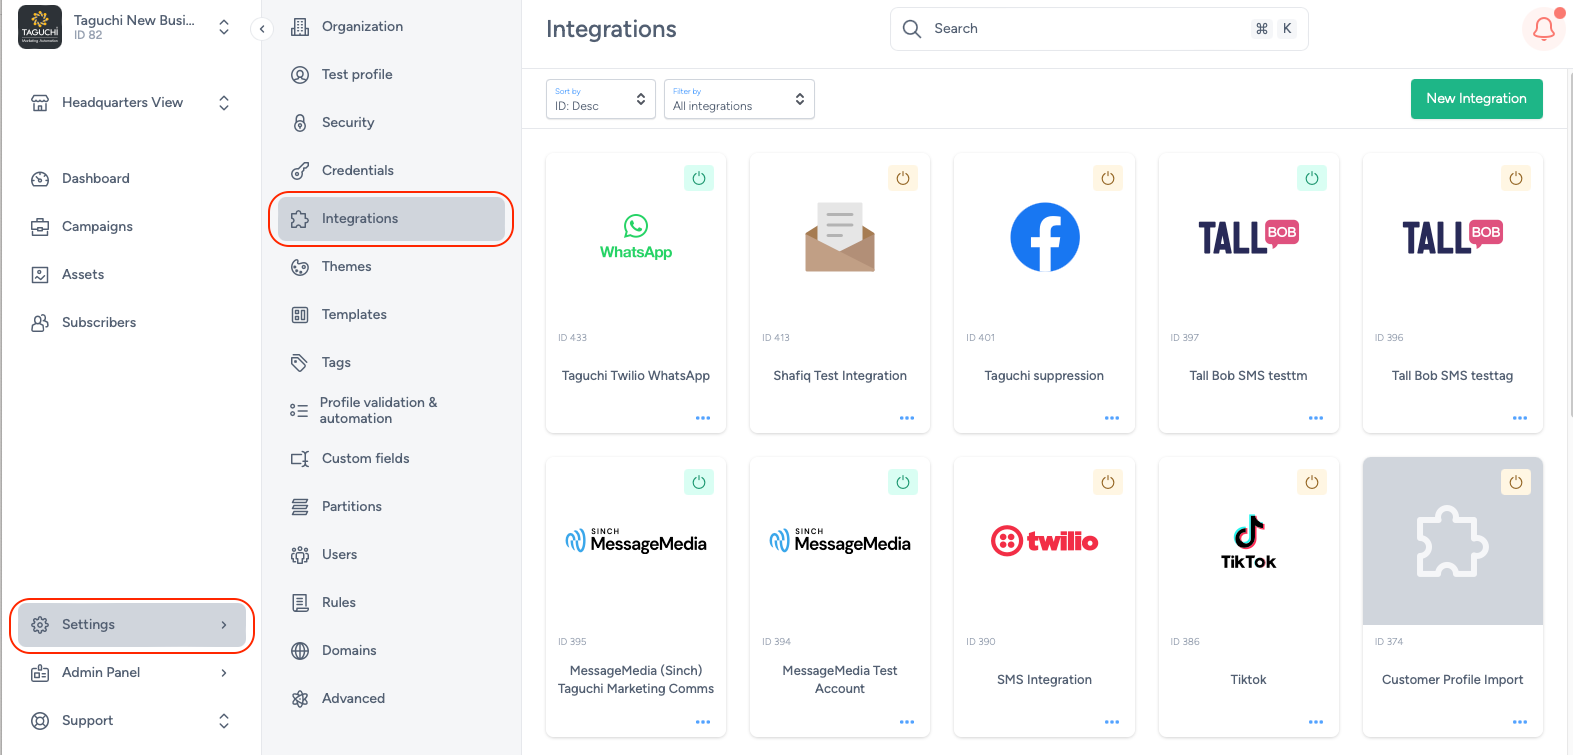
Select ‘New Integration’ and a new screen will popup.

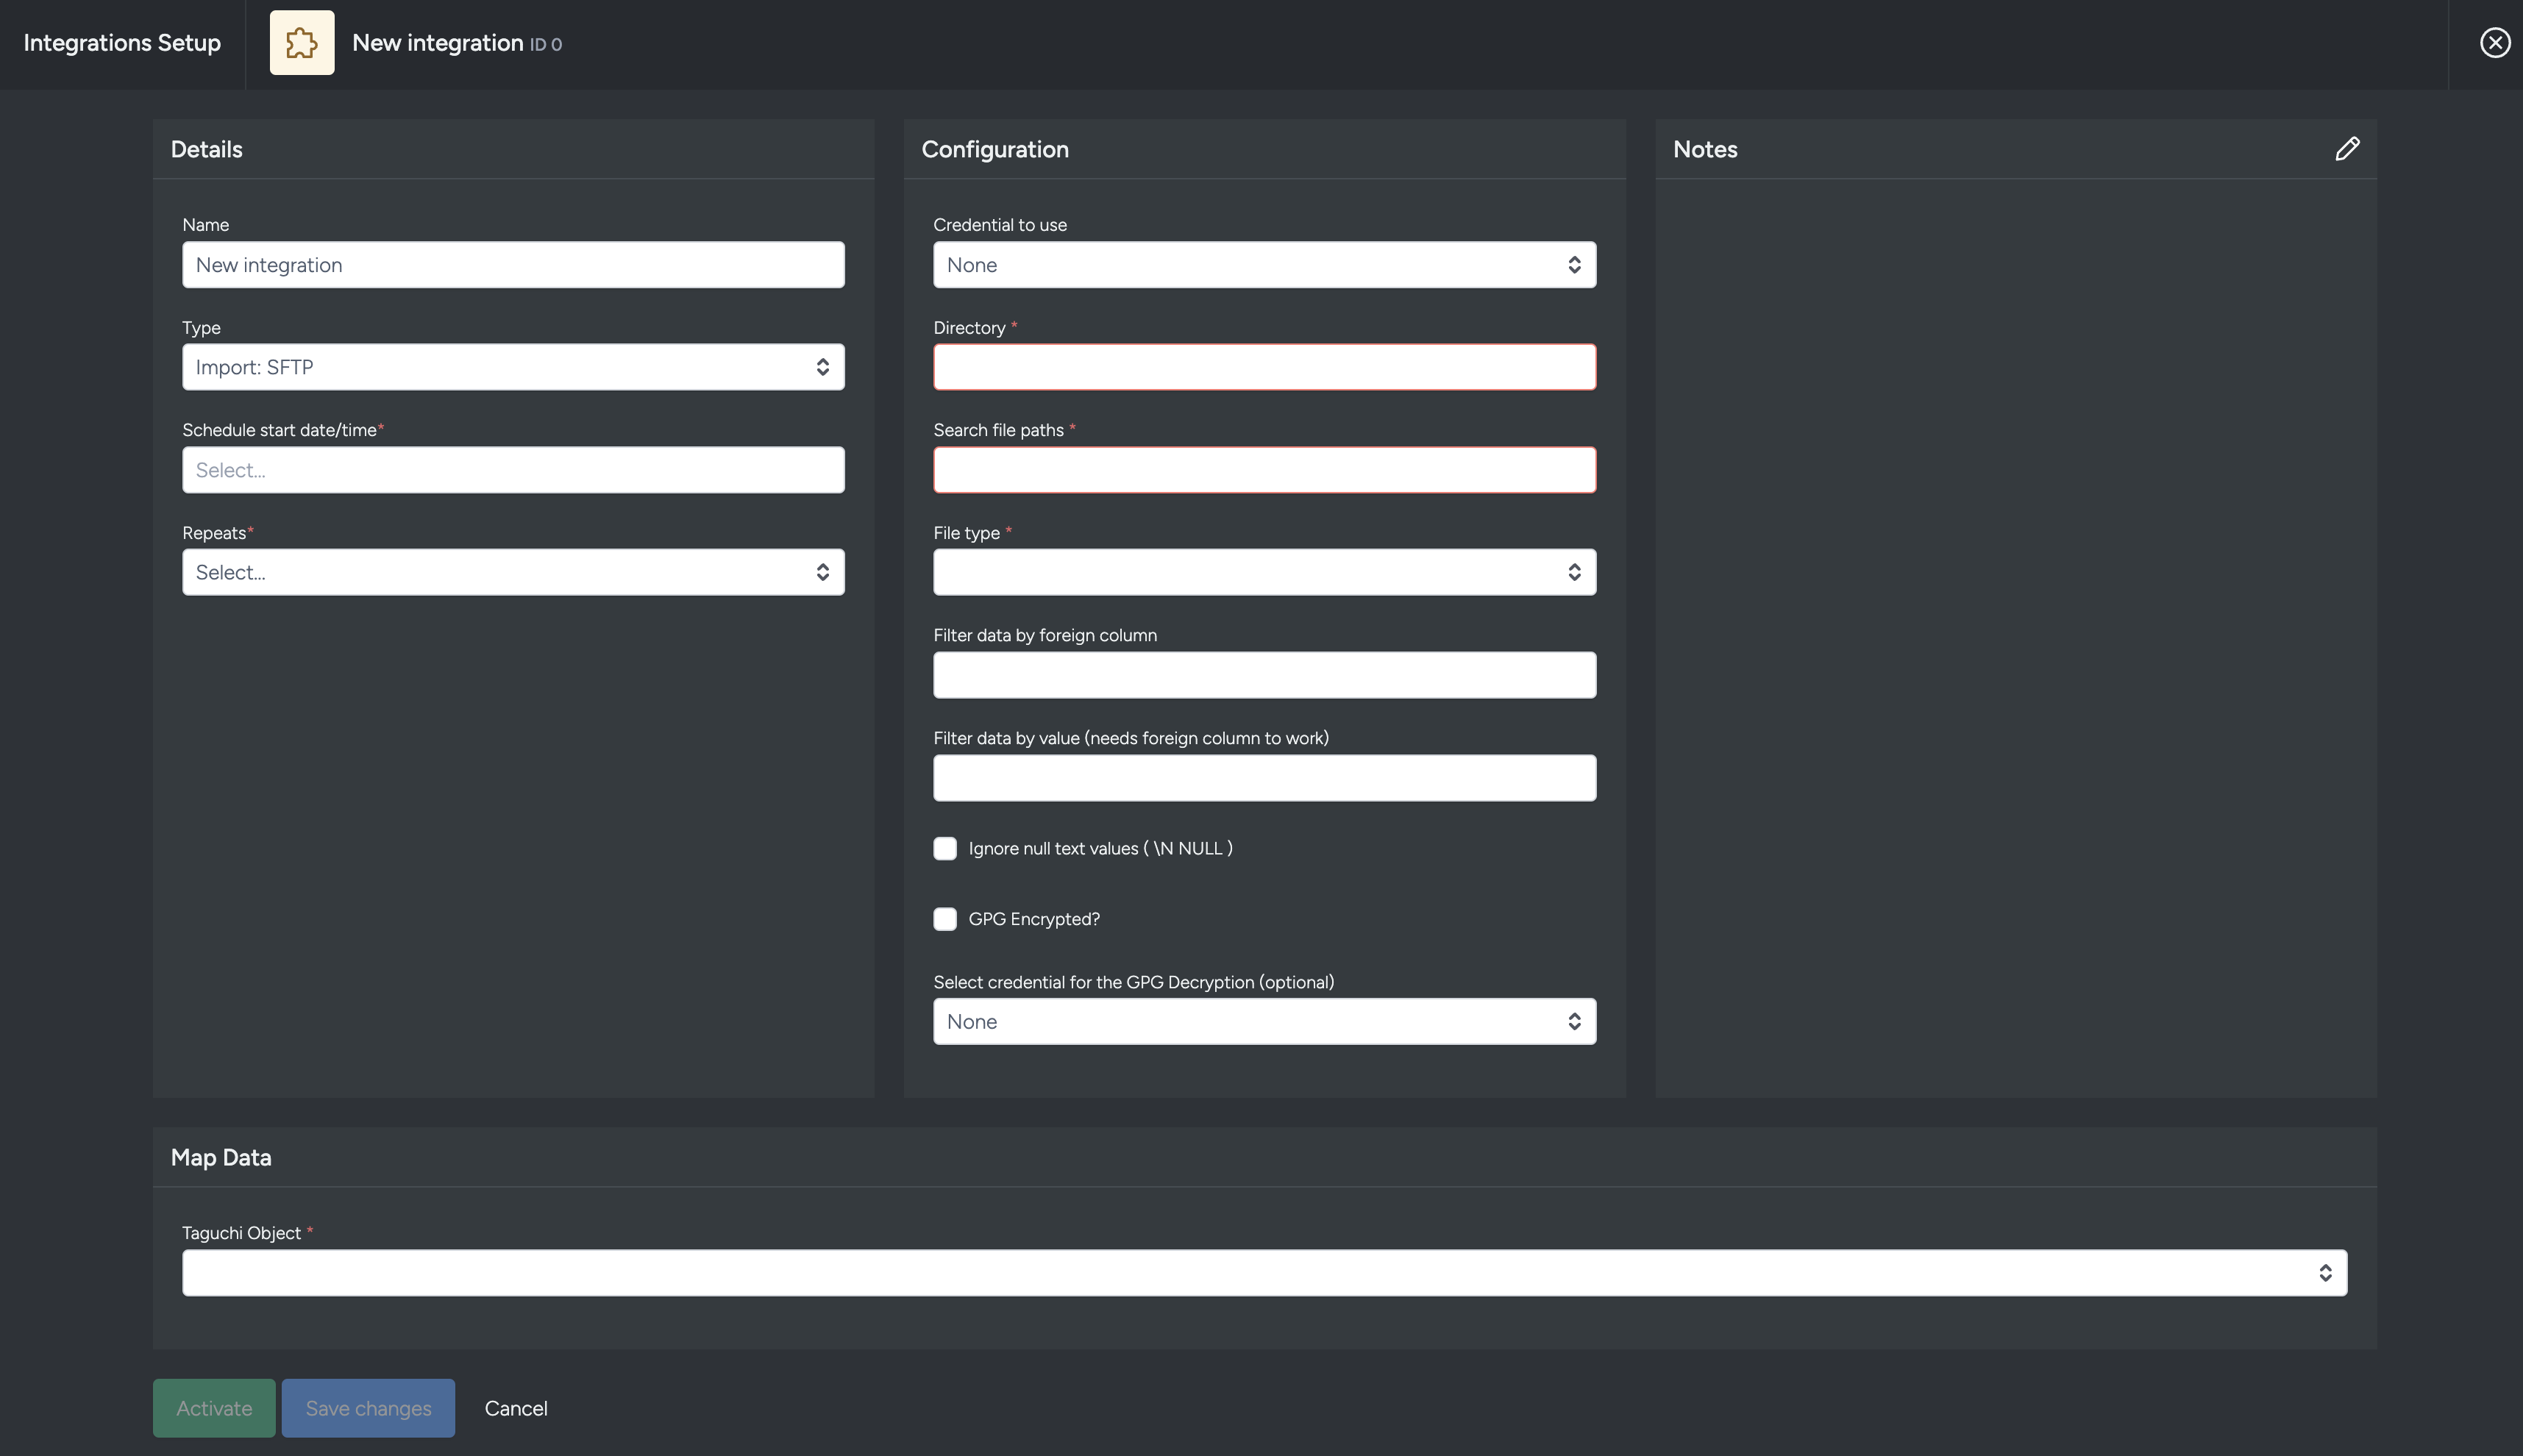
There are 4 areas within this integration set-up screen:
- Details
- Configuration
- Map data; and
- Notes
Details
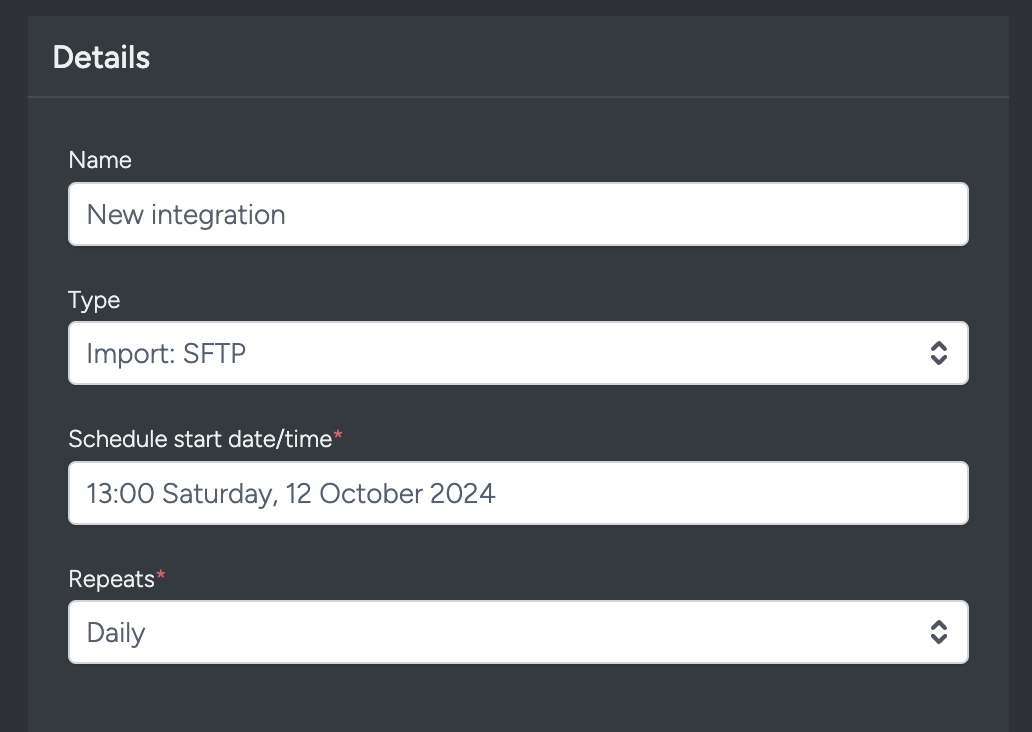
Set the name of the integration.
Under 'Type', select 'Import: SFTP'. When selecting the integration type, do take note that the integrations are arranged in five different groups which are API, Import, Export, Messaging, Scheduled and that some integrations would appear in multiple groups.
The Schedule start date/time determines the integration start point. When used in tandem with repeat (daily), this allows the integration to repeat daily at 13:00 commencing from the 12th of October 2024 (based on the example above).
Repeats allow you to conduct the integration multiple times without having to create a new integration. You could choose either Yearly, Monthly, Weekly, Daily and Hourly. Some platforms have processing limitation whereby it could take some time to process the data. Hence hourly repeats might be affected and daily repeat might be a preferred option instead.
Configuration
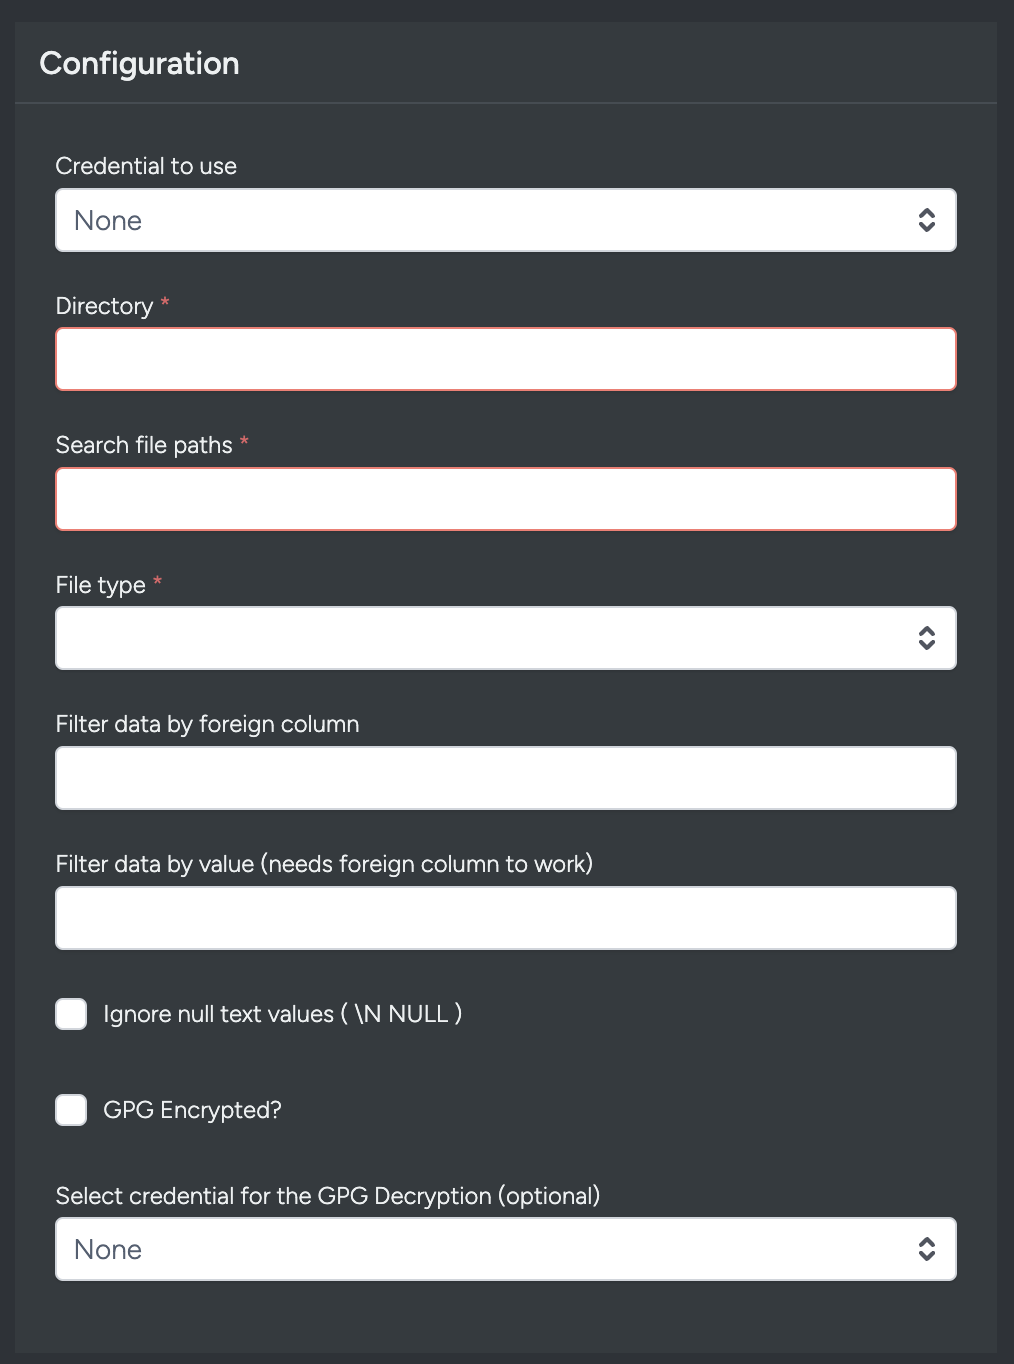
Credential to use: Choose the desired credential to use that you have set up in the credential page for this SFTP import integration.
Directory: The Directory is a specific folder on the SFTP server where files are stored.
Search file paths: The Search file paths is the location that you are uploading the data to and will search for files in the directory and any of its subdirectories. (e.g. /to_taguchi/*)
File Type: You can choose the file type that you would like to import. The file type options are - JSON, CSV, TSV. You can also choose PGP and GPG version of the three available types.
Filter data by foreign column: You can filter data by using a foreign column within the import. (e.g. Country)
Filter data by value: You can filter the data of the foreign column that you have stated above using a specific value. Do take note that you would need to add an input into the foreign column fo it to work. (e.g. AU)
Ignore null text values: When this option is enabled, the integration will treat specific representations of null values (like \N or NULL) as empty or missing values rather than inserting them into the database as actual text.
GPG Encrypted: You can choose to encrypt the file with GPG encryption by clicking on this checkbox.
Select Credential for the GPG Decryption: You can choose the GPG credential from this dropdown menu. The GPG credential can be created within the credential section via the setting.
Map Data
This SFTP import integration has four Taguchi objects that you can use for data mapping
Taguchi Object - Subscriber Normal, Subscriber Custom Field, Subscriber List, Partition Custom Field.
Subscriber Normal -
Add to subscriber list: Add a subscriber list ID that you would like to map/add data into.
Performs Subscription Management: This checkbox will allow you to manage your subscription. By clicking on this checkbox, you will reveal two additional fields.
Subscription Unsub Type: You can choose to unsubscribe via a list or global. If you choose list, you will unsubscribe the subscriber based on the list that you have indicated above.
Subscriber Custom Field, Operator and Unsub Value: You can add a subscriber custom field which will determine whether the subscriber will be unsubscribed based on the value of their subscriber custom field.
There are two operators which you can choose from which are = (Equal) and != (Not Equal).
The "Unsub Value" is the value which will determine if the subscriber will be unsubscribed depending on the operator. So if the option that you have choosen is this (unsub = Y), this will mean that the subscriber, that has "Y" in their "unsub" custom field, will be equal (=) to the Unsub Value of "Y" and be unsubscribed. If you were to use the != (Not Equal) operator instead, you can unsubscribe subscribers that do value equal to the "Unsub Value"
Subscriber Partition Custom Field (Optional): You can choose a partition custom field which will determine where the partition information comes from.
Data Mapping: The data mapping section allows you to map the custom fields from the import file to the custom field within.
Subscriber Custom Field - This allows you to create custom fields based on data within the file.
Custom Field Subscriber Reference Taguchi Field: This field allows you to map to either email or ref (Reference).
Custom Field Subscriber Reference Foreign Field: This field will map to email or ref (depending on the option choosen above)
Custom Field Field Name Foriegn Field: This will map to the the column name of the "email" field within the file.
Custom Field Field Value Foreign Field: This will map to the the column name of the "field name" field within the file
Custom Field Group Foreign Field: This will map to the the column name of the "field group foreign" field within the file
Custom Field Group Constant Field: This will map to the the column name of the "field group constant" field within the file
Custom Field Create Subscribers If They Do Not Exist: This checkbox will allow you to create subscribers if they do not exist.
Subscriber list -
List Subscriber Reference Taguchi Field: This field allows you to map to either email or ref (Reference).
List Subscriber Reference Foreign Field: This field will map to email or ref (depending on the option choosen above)
List Foreign Reference Field: List Foreign Reference Field refers to a specific field in the incoming dataset that establishes a relationship between the current dataset and another related dataset.
List Subscribed Boolean Field (Optional) [Comma Separated]: List Subscribed Boolean Field refers to a specific field in the incoming dataset that indicates whether a particular entity (such as a user, customer, or service) is currently subscribed or not.
List Unsubscribed Boolean Fields (Optional) [Comma Separated]: List Unsubscribed Boolean Field refers to a specific field in the incoming dataset that indicates whether a particular entity (such as a user, customer, or service) has opted out of a subscription or service.
List Start Datetime Field (Optional): List Start Datetime Field refers to a specific field in the incoming dataset that indicates the start date and time for an event, subscription, or activity.
List End Datetime Field (Optional): List End Datetime Field refers to a specific field in the incoming dataset that indicates the end date and time for an event, subscription, or activity.
List Template String: List Template String is a defined format or template that specifies how data from incoming files should be structured or transformed during the import process.
List Resub Days: List Resub Days refers to a field that specifies the number of days after which a subscription or an item should be re-evaluated, re-subscribed, or subject to renewal processes.
List Resub Timestamp Field: a List Resub Timestamp Field refers to a specific field in the incoming data that records the timestamp indicating when a subscription or related entity was last re-evaluated or re-subscribed.
List Resub Timestamp Format: List Resub Timestamp Format refers to the specific format in which timestamps are represented in the incoming data.
Partition Custom Field -
- Partition Reference Foreign Field: The name of the foreign field column that identifies what the partition reference is.
Save Changes and Activate

Once you have added your Details, Configuration and Target Expression, you will be able to save changes (1) and activate (2) the integration. You can only activate once you have save changes.
Deactivate

To stop the integration, click on Deactivate. This will stop the integration between your SFTP server and Taguchi.
Active Integration
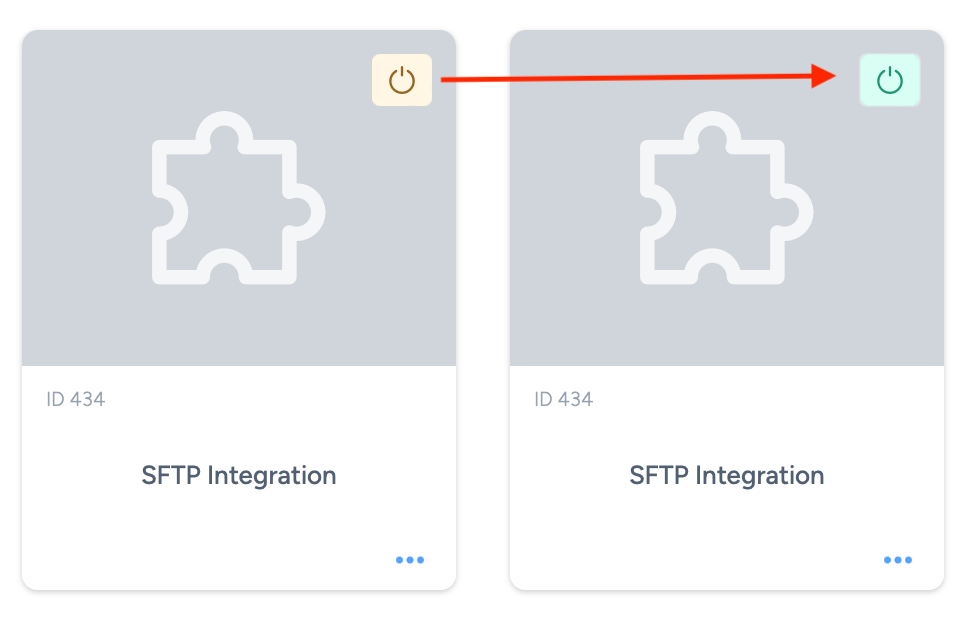
Once the integration has been saved and activated, the on/off icon of the integration card will change from yellow (Off) to green (On) which indicates that it is now activated.
Update Integration


If you want to update your Integration, you will be able to make the changes while it is activated or deactivated. Once the changes have been made, you will be able to update the integration by clicking on 'Save changes'. The Integration will be updated immediately.
Integration Status & Logs
Users can determine the status of an integration by looking for the status symbol (On/Off icon) colour within the integration tile.
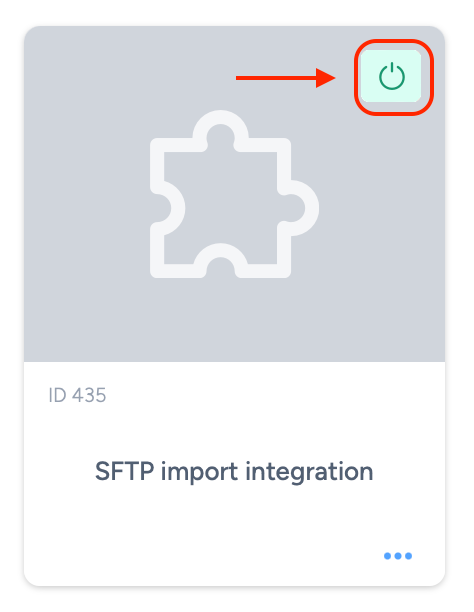
Green – This colour indicates that integration is active and has either been deployed or awaiting deployment.
Yellow – This colour indicates that the integration has been deactivated.
Red – This colour indicates that the integration has failed to deploy the extract.
Viewing Logs in the UI
Users can now view detailed integration logs directly in the Taguchi UI to troubleshoot issues.
To access logs:
- Navigate to Settings > Integrations.
- Select the integration you want to review.
- Click on View Status in the top right hand corner to see recent activity, including timestamps, status updates, and error messages (if any).

If an integration fails, checking the logs can help identify issues such as incorrect credentials, invalid audience configurations, or query timeouts.
Integration Deployment Status

Users will be able to view the integration status message by hovering their cursor over the status symbol (On/Off) icon.
The messages the users will see will vary based on the deployment of the integration.
Green – "Integration has not yet run (Start time/date have not occurred yet) / Integration is deployed. Last successful run onMon May 06 2024 06:00:44 GMT+0800 (Singapore Standard Time)"
Yellow – "Integration is not deployed (Deactivated)"
Red – "Integration Failed to run on Mon May 06 2024 06:00:44 GMT+0800 (Singapore Standard Time)"
Troubleshooting Measures
When choosing the interval (Hourly, Daily, Weekly and Monthly) in the integration setup, users would need to take into consideration that the platform (Formstack) that will receive the data from us will take 24 - 48 hours to ingest which would mean that an hourly repeat for the integration would result in the data not being displayed on your ads platform and could also result in your connection being potentially cut. Hence, we recommend using Daily, Weekly or Monthly instead of Hourly.
Any request issued by Taguchi has a 15-minute timeout limit. If the request takes longer, it will fail. To avoid this, ensure that queries on the receiving end (SFTP) are optimized to run within 15 minutes.
If you are having trouble with this integration, please contact Taguchi Support for assistance.
