- Support Home
- Knowledge Base
- Web Forms
- How to Build a Survey in Taguchi
How to Build a Survey in Taguchi
This article explains how to build a survey webform, test submissions, share the survey in a marketing email and review responses.
1. Create a web activity
From the Dashboard, click New Activity, then select Web as the Distribution Channel.
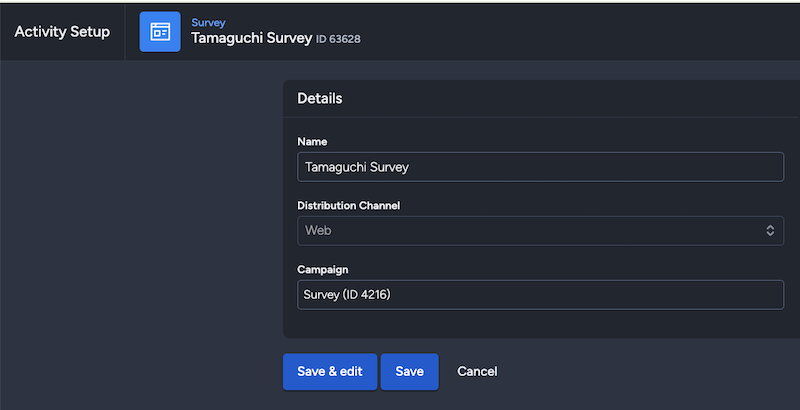
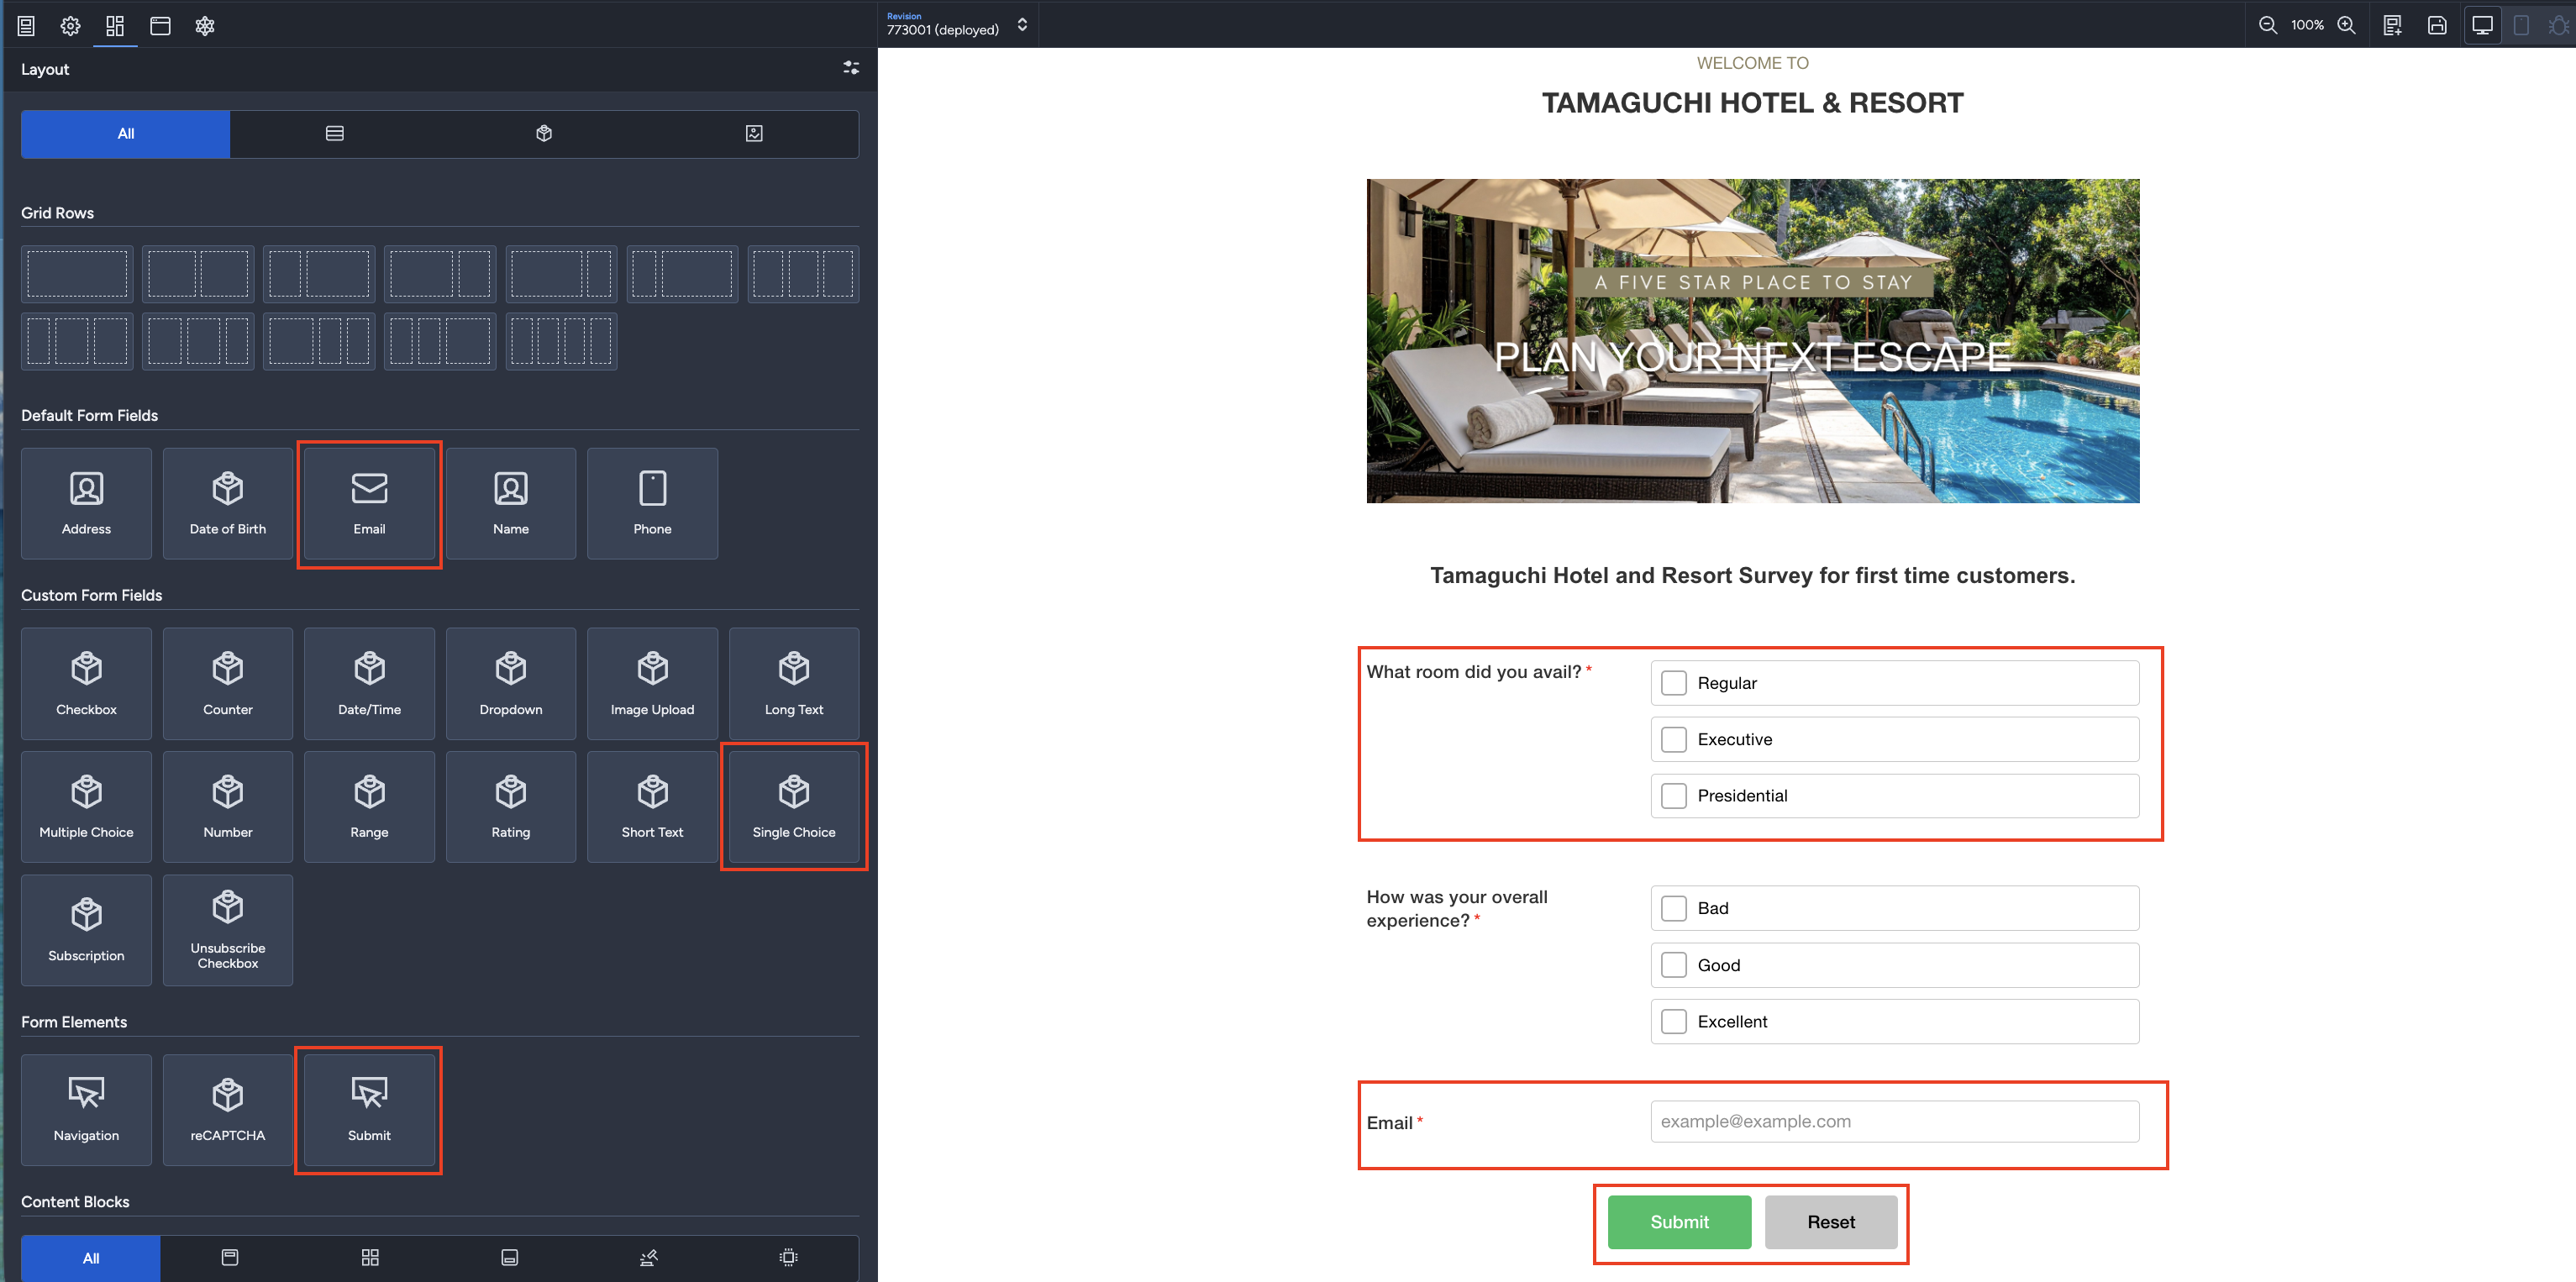
2. Build and configure your survey
In the Layout tab, add the fields and content blocks needed for your survey. This example uses two Single Choice fields, an Email field and a Submit button.
For each Single Choice field:
- Enter your question under Label.
- Set a unique Input Name, such as
room_typeoroverall_experience. This names the subscriber custom field used to save the answer. Using the same Input Name for different questions can overwrite answers. - Add the answer options, including the label respondents see and the value saved for each option.
- Enable Required if respondents must answer the question.
For the Email field, enable Required and leave the default value empty.
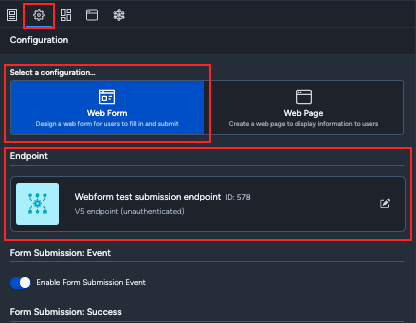
3. Select and check your endpoint
In the Configuration tab, select Web Form, then choose a deployed V5 API endpoint (unauthenticated).
For this example, confirm that the endpoint:
- Identifies profiles by Email.
- Allows subscriber profile updates, so answers can be saved to existing profiles.
- Allows subscriber profile creation if people without an existing profile can complete the survey.
- Allows subscriber event logging, so submissions can be recorded.
Under Form Submission: Event, confirm that Enable Form Submission Event is enabled.
For endpoint setup instructions, see V5 API Endpoint (Unauthenticated) Integration.
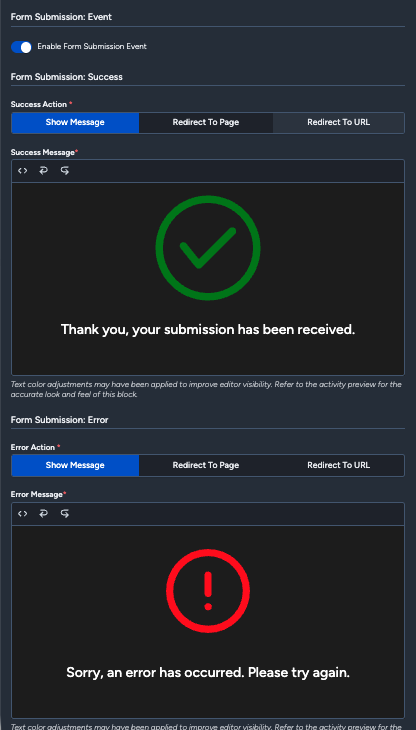
4. Configure what happens after submission
Configure the Form Submission: Success and Form Submission: Error actions separately.
By default, the form displays a success or error message. You can customise these messages or choose:
- Redirect to Page to display another page within the same web activity.
- Redirect to URL to send respondents to a specified URL.
5. Deploy and test your survey
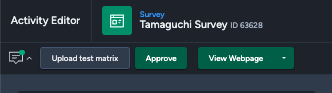
Save, approve and deploy the web activity. Use View Webpage to open the live survey.
Before sharing it with customers, submit a test response and confirm that:
- Required fields prevent incomplete submissions.
- Each answer is saved to the correct subscriber custom field.
- The submission appears in the webform submission records.
- The success message or redirect works as intended.
If the survey accepts new respondents, also test with an email address that does not already have a subscriber profile.
6. Add the survey link to your invitation email
Open the deployed survey's View Webpage menu and copy its URL from Share via Link.
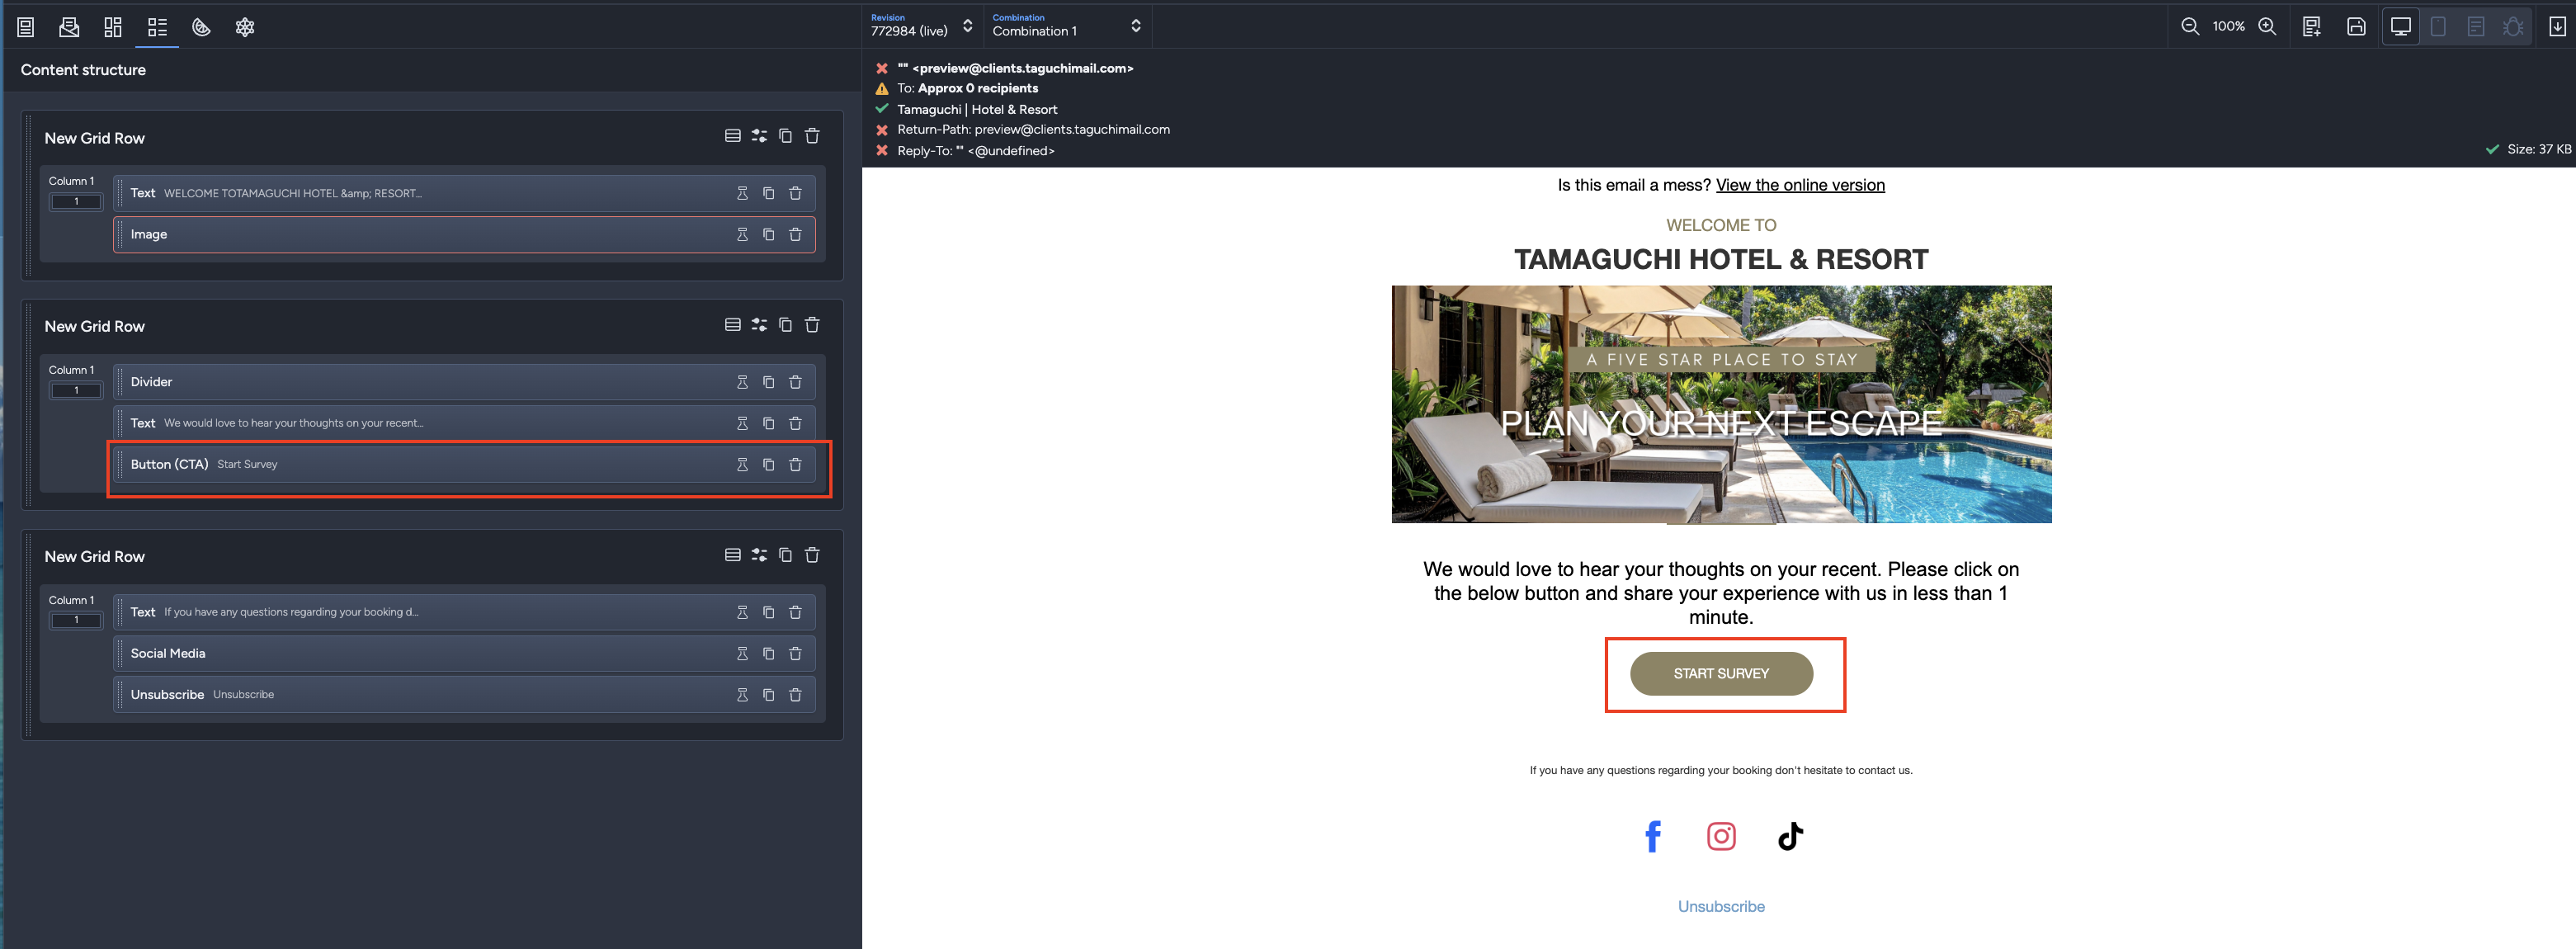
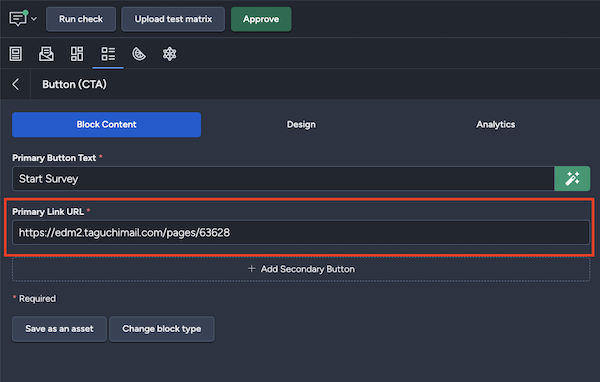
Create a marketing email inviting recipients to complete the survey. Add a CTA button, such as Start Survey, and paste the survey URL into that button's Primary Link URL field.
Send a proof email and test the button before approving and deploying the invitation.
7. Review survey responses
Open the web activity's report to review submission counts. Use the webform submissions extract to download individual responses for analysis.
Subscriber custom fields hold the saved profile values; submission records retain the answers captured for each logged submission.