In-App Messaging User GuideLast Updated: 26/8/2026

What is In-App Messaging?

In-App Messaging (IAM) activities let you display targeted messages inside your mobile application. An IAM can contain text, images, HTML and call-to-action buttons, and can include multiple pages for longer experiences. An IAM is different from a visible push notification: the silent push is the delivery mechanism, while the IAM is the content displayed inside the application.

IAM content is delivered to the Taguchi mobile SDK using a silent push notification. The SDK downloads the content and displays it when the mobile application is active and ready to present the message.

This guide explains how to create and manage an IAM activity in Taguchi. It is intended for marketers and other Taguchi users who are building the message after the mobile application integration has been completed.

For instructions on configuring Twilio Notify, installing the Taguchi SDK, creating the required Taguchi integrations, and linking device tokens to subscribers, see the Push Notifications and In-App Messaging developer guide.

Before you begin: Confirm with your application team that the SDK is installed and that the Taguchi credential, push notification integration and IAM integration have been configured. A subscriber must have a valid device binding whose Application value matches the value configured in the integrations.
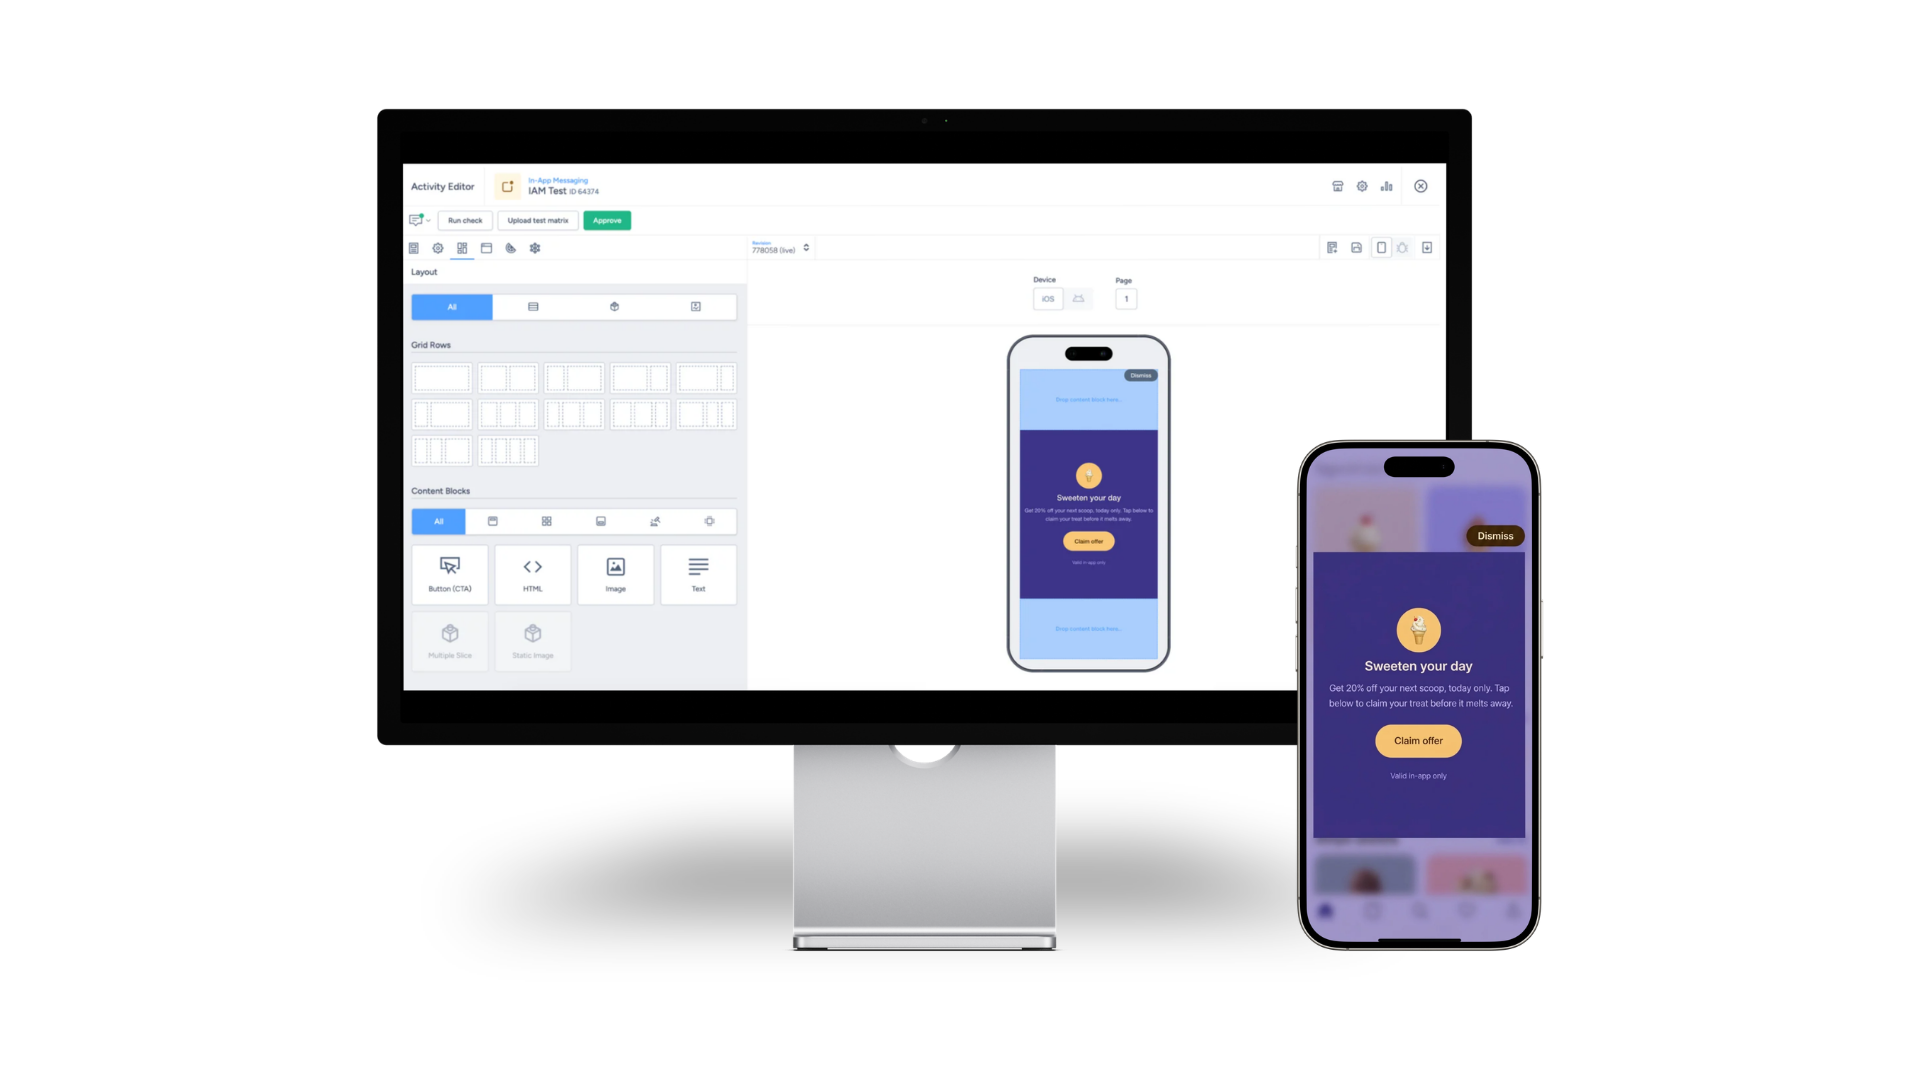
iam template

Create an IAM activity

IAM activities can be created from a campaign or from the Taguchi dashboard.

  1. Open the campaign that will contain the message, or use New Activity from the dashboard.
  2. Enter a clear activity name. Include the campaign, purpose, audience or planned deployment date where helpful.
  3. Select the In-App Messaging (IAM) distribution channel.
  4. Select the required distribution type and complete any scheduling or automation settings displayed for that type.
  5. Add internal notes where required.
  6. Enter the activity target expression. The target should identify the intended audience; only subscribers with a valid matching device binding can receive the IAM.
  7. Save the activity, then open its activity tile to begin editing.

Every activity has a unique activity ID. Include this ID when requesting support or discussing the activity with another Taguchi user.

Configure the message

Complete the activity settings before adding content.

Select a theme

Open the Templates area and select the theme that represents the mobile application's brand. The theme supplies default colours, fonts, buttons and other styling used by the IAM assets.

Applying a different theme can change the appearance of existing content. Confirm the theme before completing detailed design work.

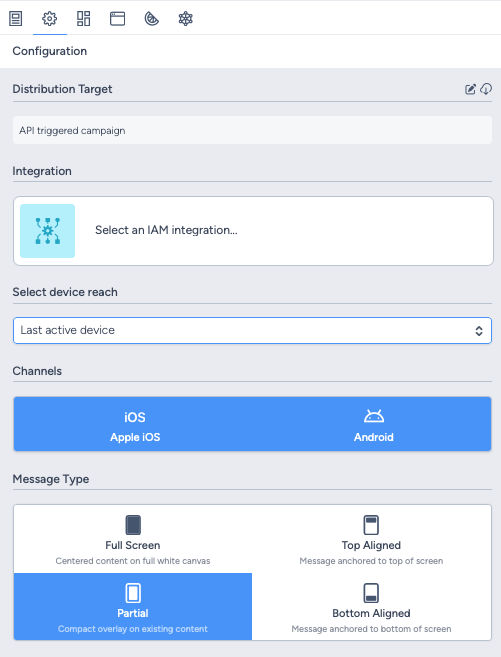
Select the channels

Choose whether the IAM is available on:

  • iOS
  • Android
  • Both iOS and Android

Only select a platform that has been configured and tested by the application team.

Select a message type

Choose the layout that best suits the message:

  • Fullscreen fills the available IAM view.
  • Partial presents a smaller message over the application.
  • Top aligned positions the message at the top of the view.
  • Bottom aligned positions the message at the bottom of the view.

Check the close-button settings and spacing after selecting a layout. Keep important content and controls clear of device safe areas, notches and navigation controls.

Select device reach

Device reach determines which linked device is selected when a subscriber has more than one device. The available options include:

  • Last active device
  • Last converted device
  • Last active device per platform

Select the option that matches the purpose of the campaign. For example, use Last active device per platform when a subscriber should be reachable on their most recently active iOS and Android devices.

iam configurations

Build the IAM content

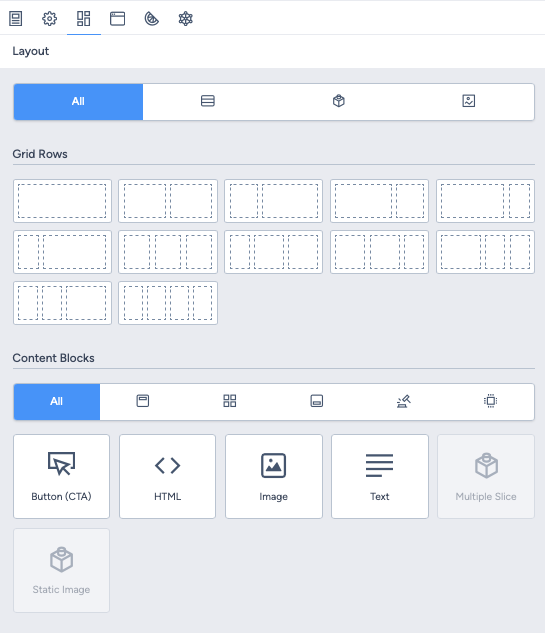
The IAM editor uses pages, grid rows and assets. A page can contain one or more grid rows, and each grid row can contain one or more assets.

Add and organise pages

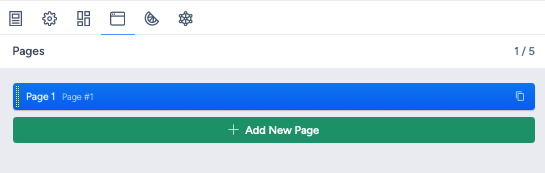
The first page is created with the activity. Add more pages when the experience needs to guide the user through several panels or steps.

Give each page a descriptive name and confirm that every grid row is assigned to the correct page. Use a Button (CTA) asset with Page Navigation to move to the next or previous page.

Keep the experience concise. Each extra page adds another action before the user reaches the main outcome.

Add grid rows

Add a grid row, select its column layout, then place assets into its columns. A single-column row is normally the clearest choice on a mobile screen. Use multi-column rows only when the content remains readable on all supported devices.

Adjust grid and content padding to create consistent spacing. Preview both iOS and Android when the activity supports both platforms.

Add assets

IAM activities support the following assets:

Text

Use Text for headings, body copy and supporting information. Keep copy short enough to remain readable on smaller devices.

Image

Use Image for a hero image, product image or other visual content. Add meaningful alternative text and select the image fit and focal point so the important area remains visible when the image is cropped.

An image can optionally use the same actions as a button: URL or deep link, page navigation, or copy to clipboard.

HTML

Use HTML when the required content cannot be created with the standard assets. Test custom HTML carefully on every supported platform and application version.

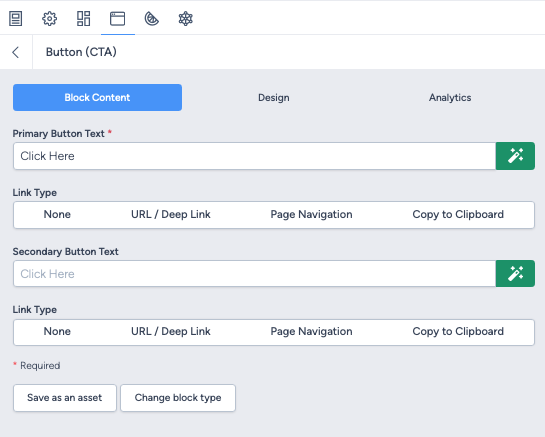
Button (CTA)

Use Button (CTA) to give the user a clear next action. The available link types are:

  • None displays a button without a navigation action.
  • URL / Deep Link opens a web URL or a route supported by the mobile application.
  • Page Navigation moves to the next or previous IAM page.
  • Copy to Clipboard copies a supplied value on the user's device.

iam button settings

A secondary button can be added when the message requires two choices. Use clear labels and avoid giving the primary and secondary actions equal visual weight unless both outcomes are equally important.

iam page

iam content blocks

Personalise and target content

IAM text and supported asset fields can use Taguchi personalisation tags. For example:

Hi {%= recipient.firstname || "there" %}, your offer is ready.

Always provide a fallback when a value may be empty. Preview the activity with representative subscriber profiles to confirm that names, custom fields and other personalised values render correctly.

Use content segments when different groups within the activity target need different content. Assign the appropriate target expression to each segment, then configure the relevant assets to display for that segment.

The activity target controls who is eligible to receive the IAM. Content segments only control which content an eligible subscriber sees; they do not add subscribers to the activity target.

For more information, see What are target expressions? and JavaScript personalisation.

Configure tracking

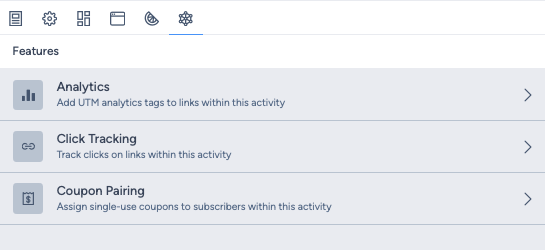
Turn on activity tracking when the campaign requires engagement reporting. If tracking is off, Taguchi records only the sent event.

IAM activities can record the following events:

Event When it is recorded
Sent The IAM is sent from Taguchi. This does not confirm delivery to the device.
View The IAM opens and is displayed to the user.
Click The user selects an action that navigates to a webpage.
Analytics The user selects a deep link or copies a value to the clipboard.

View, click and analytics events require activity tracking to be enabled and the user to have approved application tracking on their device.

If Google Analytics parameters are required, enable analytics and enter the source, medium and campaign values before testing links.

iam tracking

Preview and test the activity

Save a revision, then preview each page and platform before requesting approval.

Use the following checklist:

  • Confirm the correct theme, layout and supported platforms are selected.
  • Check every page, grid row and asset.
  • Test primary and secondary buttons.
  • Test web URLs, application deep links, page navigation and copy-to-clipboard actions.
  • Check personalisation with profiles that contain complete and missing data.
  • Confirm image cropping, focal points and alternative text.
  • Confirm the close button is visible and does not cover content.
  • Test on physical iOS and Android devices used by the intended audience.
  • Confirm the test subscriber is linked to the correct application and has a current device token.
  • Confirm notification and application-tracking permissions are in the expected state.
  • Confirm view, click and analytics events are recorded when tracking is enabled.

Push notifications cannot be received on the iOS Simulator, so use a physical iOS device for end-to-end testing.

Approve, deploy and report

After testing is complete:

  1. Save the final revision.
  2. Review the activity target, distribution type, schedule and send limit where applicable.
  3. Request approval using your organisation's normal workflow.
  4. Deploy the activity after approval.
  5. Monitor the IAM report for sent, view, click and analytics activity.

Remember that silent push delivery is best effort. Network conditions, device state and operating-system behaviour can delay or prevent delivery. Do not use IAM for communications that require guaranteed or time-critical delivery.

The number of sent events may also differ from the original target estimate because a subscriber needs a valid device binding for the configured application to receive the message.

Troubleshooting


The message is not received

  • Confirm the subscriber has a current iOS or Android device token.
  • Confirm the device binding's Application value matches the Taguchi IAM integration.
  • Confirm the appropriate channel is enabled in the activity.
  • Confirm the subscriber matches the activity target.
  • Confirm the relevant notification permissions and background-notification capabilities are enabled in the application.
  • Ask the application team to verify the Twilio Notify and mobile SDK configuration.

The message is received but engagement is not reported

  • Confirm activity tracking was enabled before deployment.
  • Confirm the user approved application tracking.
  • Confirm URLs and deep links use the correct Button (CTA) or Image link type.

Content is cropped or difficult to read

  • Check the selected IAM layout.
  • Reduce the amount of copy or split the experience into pages.
  • Use a single-column grid on smaller screens.
  • Adjust grid, asset and close-button spacing.
  • Check the image fit and focal point.
  • Retest on the supported iOS and Android device sizes.

If the issue persists, contact Taguchi Support and include the organisation name, activity ID, affected platform, device details and testing steps.