- Support Home
- Knowledge Base
- Integrations
- Send Anomaly Alerts Integration
Related articles
Need some help?
If you have questions or can't find what you're looking for, we're here for you.
Taguchi Support is available Monday to Friday, 9am - 5:30pm AEDT.
Create New TicketTaguchi Certified Training
Join our free and live online training sessions. You'll benefit from a better understanding of the platform's features and functionality. Plus with Taguchi Certified Rewards, every session you attend, you're not just learning - you're earning your way to some fantastic rewards.
About Taguchi Certified RewardsAPI Version 5
Did you know Taguchi has an API that supports all of the functionality provided by the admin interface and more?
Explore API Documentation
Thanks for your feedback!
Send Anomaly Alerts Integration
The Send Anomaly Alerts Integration allows you to monitor the sends of your triggers and receive scheduled reports.
This helps you detect any unexpected drops or spikes in your trigger sends quickly and take action as needed.
Send Anomaly Alerts Integration Setup
To create a new integration, ensure that you have the required Integration Role privileges assigned to your user.
Navigate to:
Settings → Integrations

Select ‘New Integration’, and a setup screen will appear.

There are two areas within the integration setup screen:
- Details
- Configuration
Details

- Set the Name of the integration.
- Under 'Type', select Scheduled: Send anomaly alerts. When selecting the integration type, do take note that the integrations are arranged in five different groups which are API, Import, Export, Messaging, Scheduled and that some integrations would appear in multiple groups.
- The Schedule start date/time allows the integration to start at the specified time/date. When used in tandem with repeat (Weekly), this allows the integration to repeat weekly at 12:30 (based on the example above).
- Repeats allow you to conduct the integration multiple times without having to create a new integration. You could choose either Yearly, Monthly, Weekly, Daily and Hourly. Some platforms have processing limitation whereby it could take some time to process the data. Hence hourly repeats might be affected, and daily repeat might be a preferred option instead.
- On the `Send status notification to’, add the notification list ID where you want to receive a notification status that the report has been successfully generated or failed to be generated.
Configuration
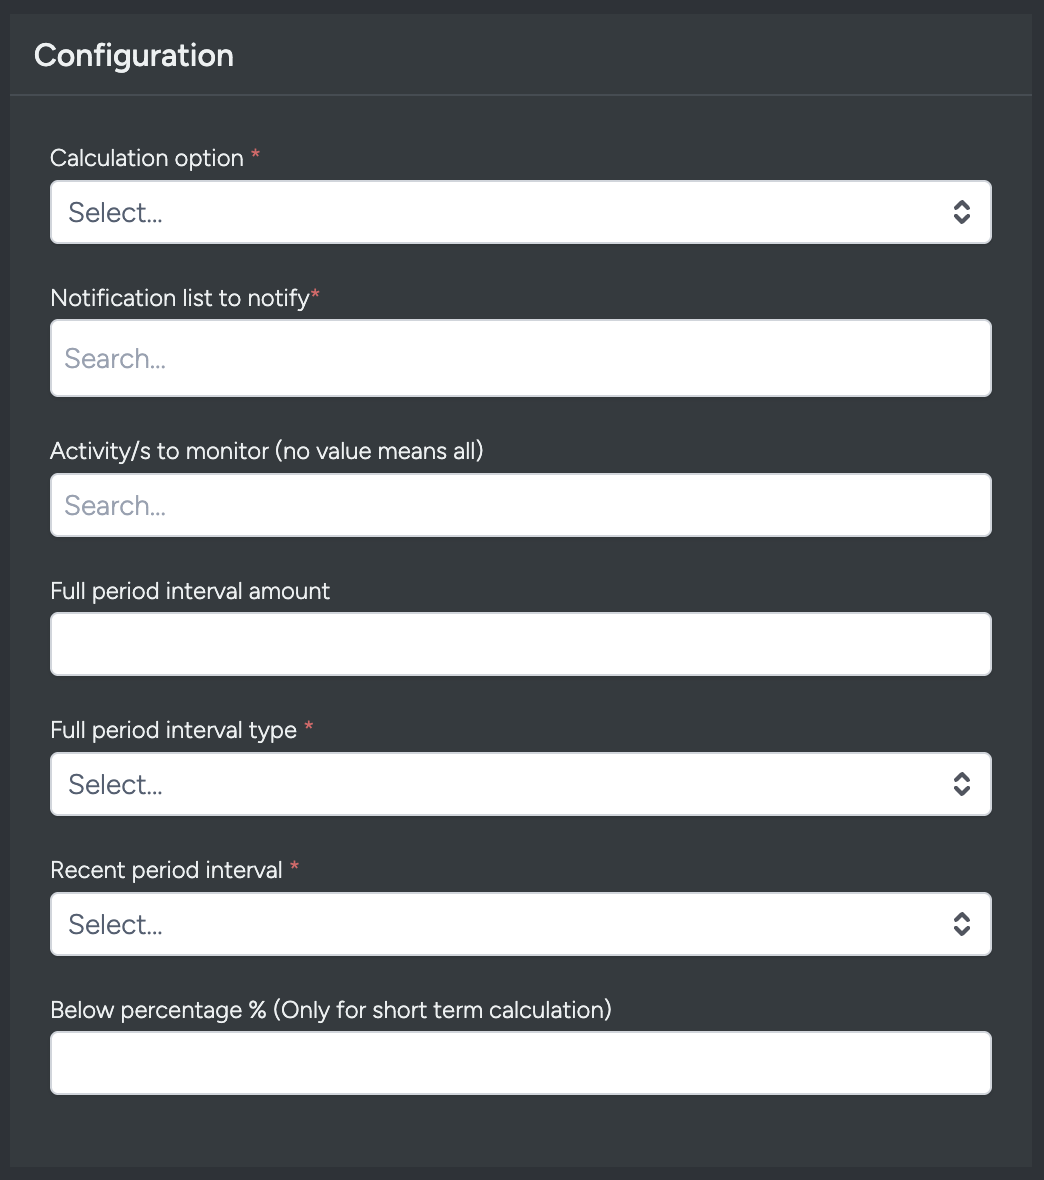
- Calculation option This is the formula that will be used to calculate the anomaly. The options are:
- Short Term – this option uses Poisson Distribution formula. This formula will estimate based on the send history of the activity and trigger if the rate for the last X period is outside the expected bounds.
- Long Term – this option uses two-tailed t-test. It checks if the averages of two groups are significantly different from each other, without assuming which group might have a higher average. It calculates a value (t-statistic) from the data and sees if this value is extreme enough to suggest that the observed difference between the group averages is not just due to random chance. If the t-statistic falls into a critical region at either end of the t-distribution, we conclude there's a statistically significant difference between the group means.
- Notification list to notify: You can add a notification list ID that will be receiving the generated report.
- Activity/s to monitor (no value means all): If you only need to monitor specific activity IDs, add the activity ID on this field or keep this field empty to monitor all email activities.
- Full period interval amount: Add a number on this field to set the period you required.
- Full period interval type: Select the type of interval. The options are: hours, days, weeks. For example, you would like 7 days as your full period interval then you enter ‘7’ on the previous field and select ‘days’ on this field.
- Recent period interval: Select the recent period interval. The options are: last hour, last day and last week.
- Below percentage % (Only for short term calculation): Set the percentage that will be flagged as anomaly when the result is less than this percentage. You can set this field to minimum 1 up to maximum 20 only.
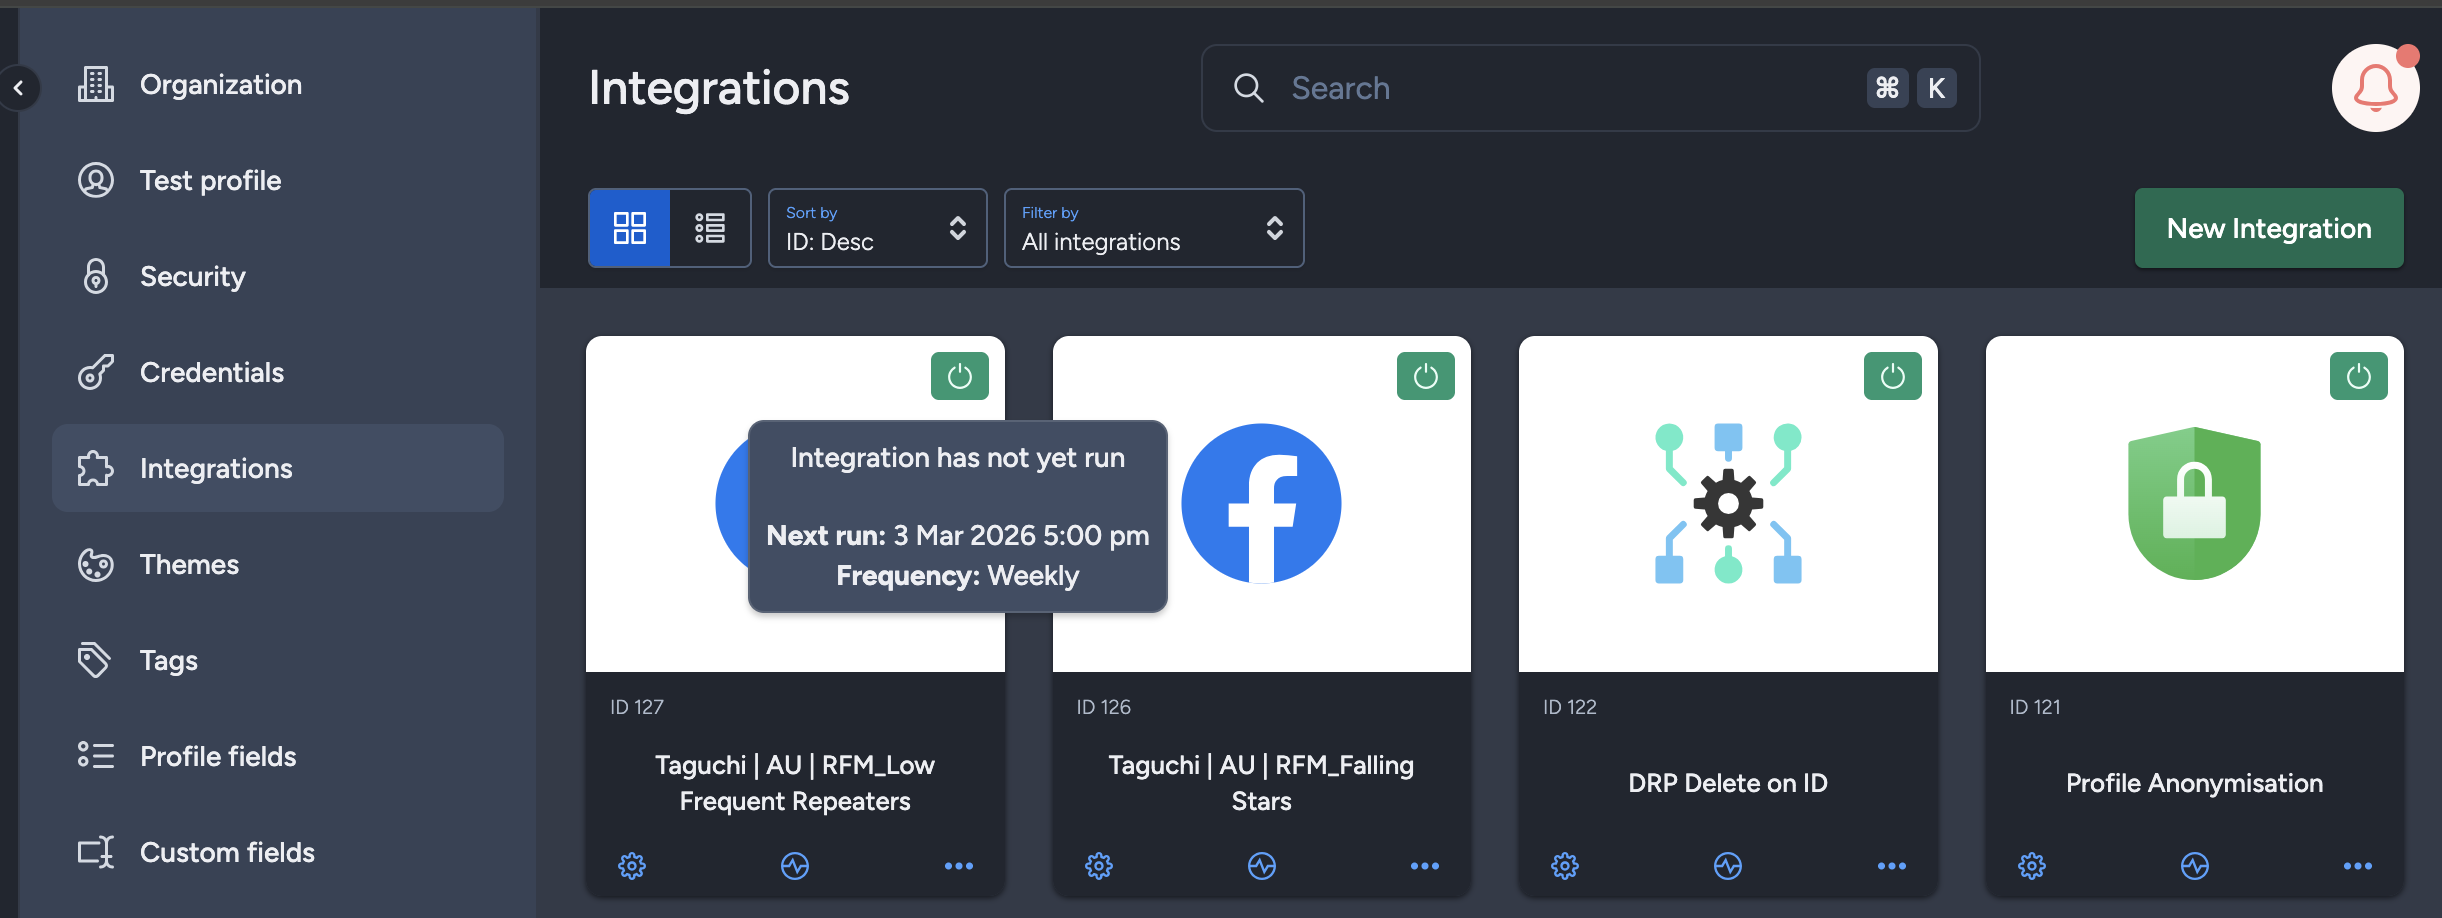
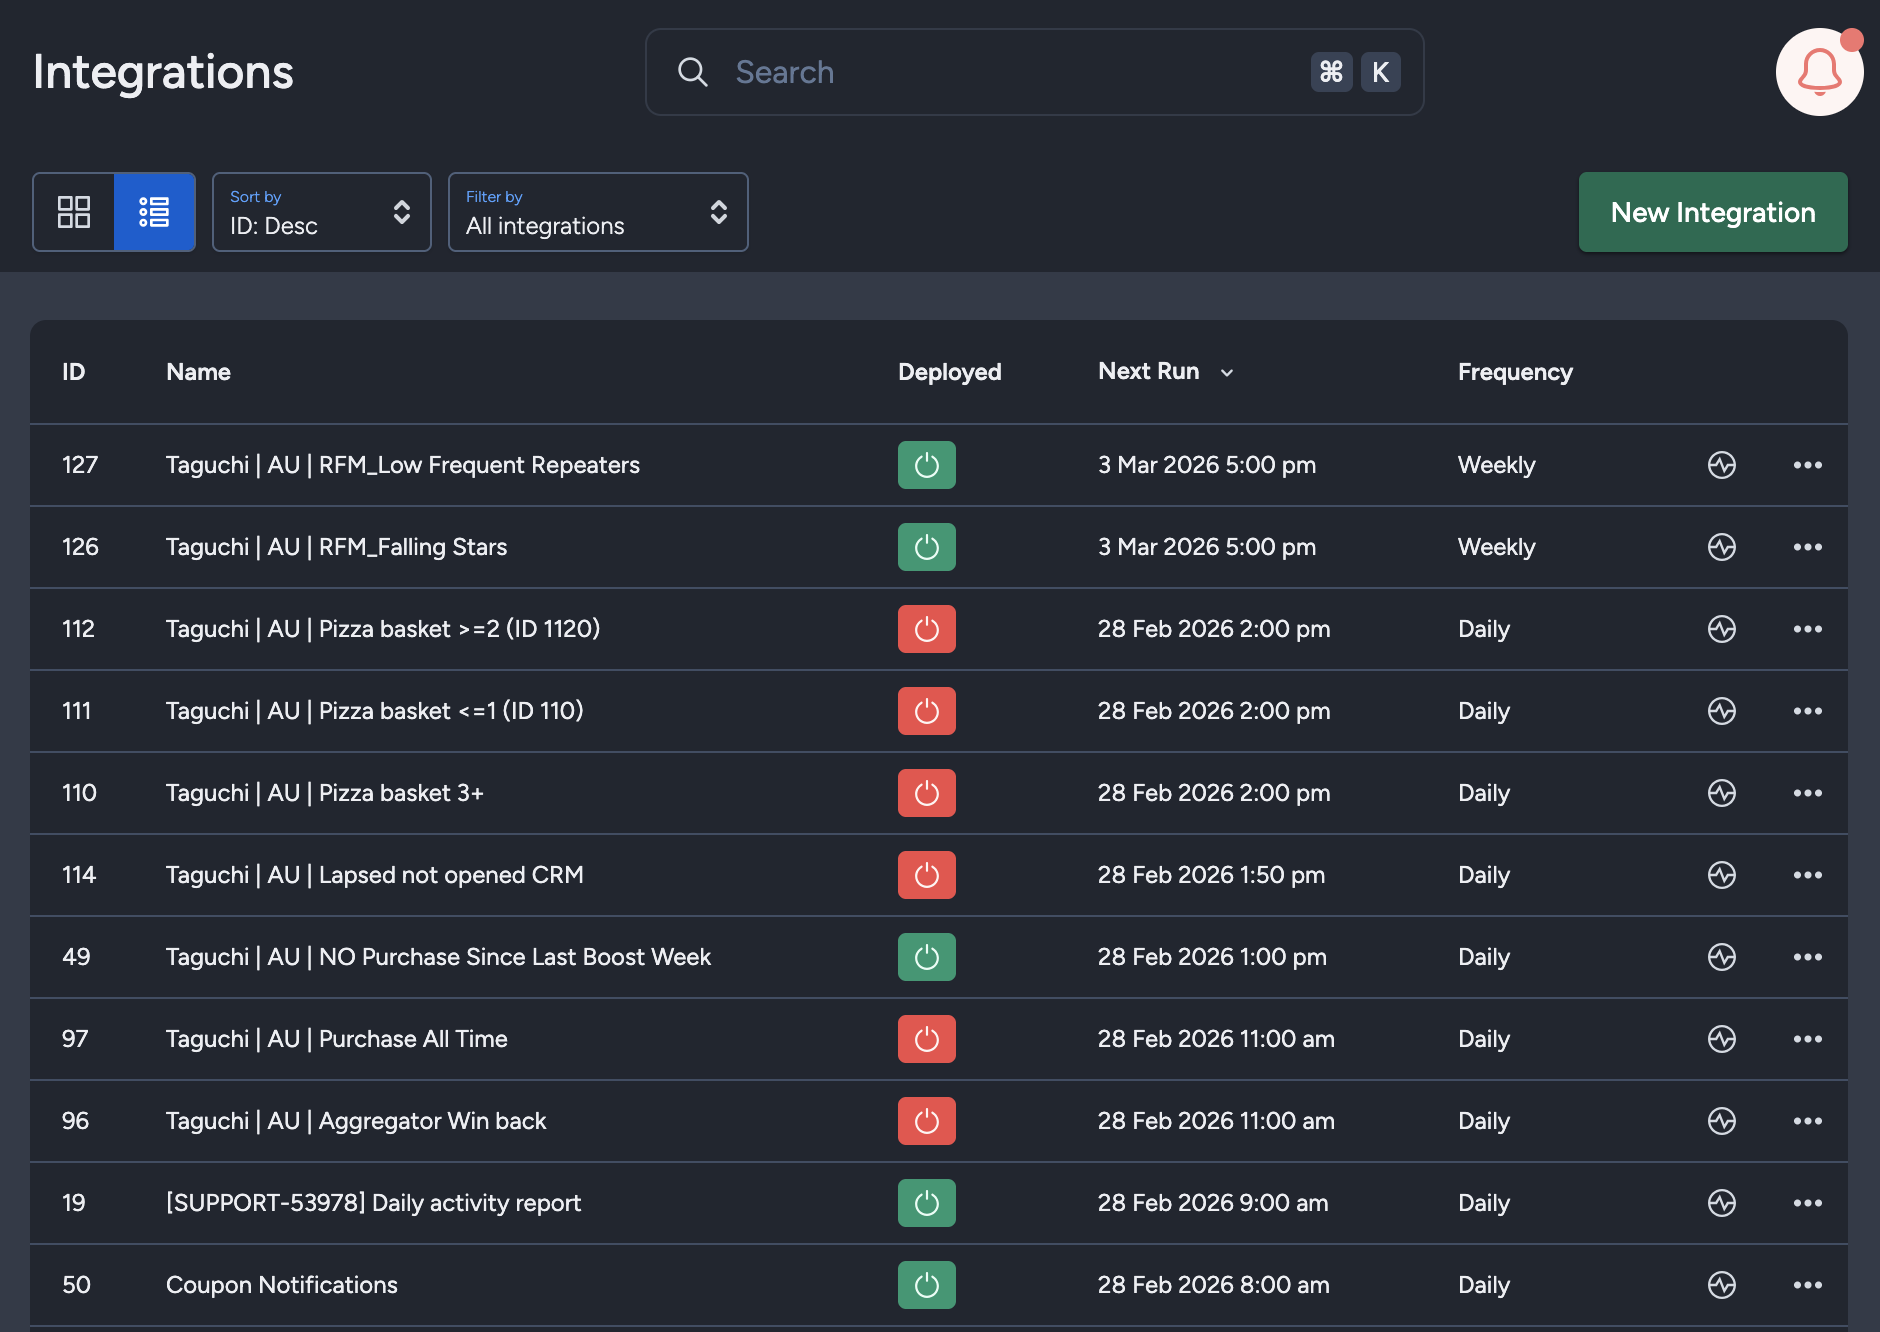
Viewing Integration Schedules and Next Run Details
The Integration UI provides visibility into integration schedules by displaying the scheduled frequency and the time of the next run when hovering over the status icon. Adding to that, the integration UI supports list view with sortable columns so you can see the next run timestamp and frequency there too.. This helps users quickly check when integrations are scheduled to execute and manage them more efficiently.
Save Changes and Activate
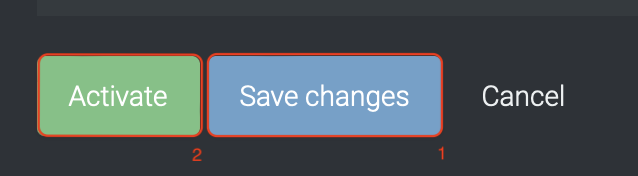
Once your integration details and configurations are complete:
- Save changes
- Activate the integration
You can only activate after saving.
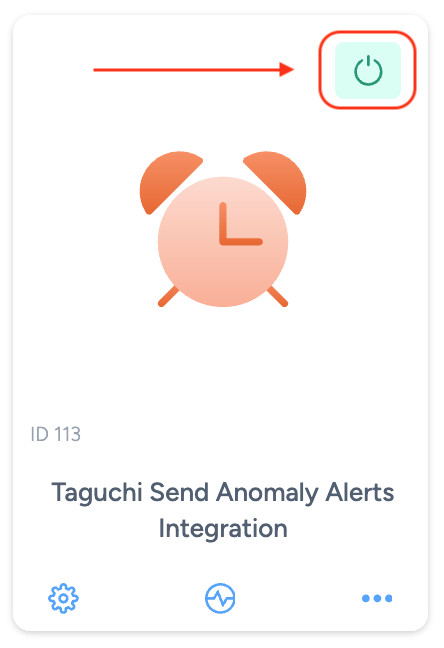
Deactivate
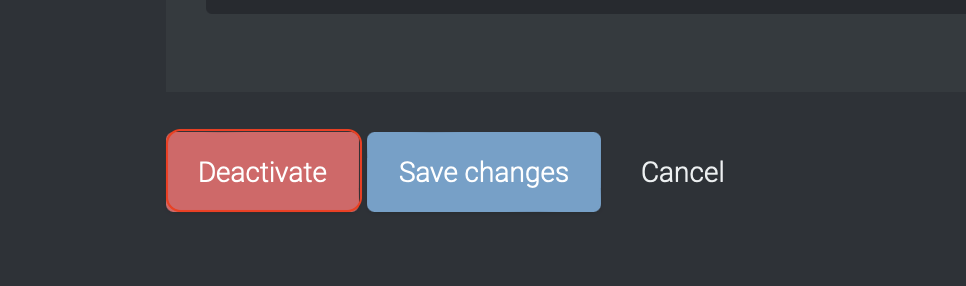
To stop the integration, click Deactivate.
This will disable the connection between Taguchi and your SMS provider.
Active Integration Status

Once activated, the integration icon changes color:
- 🟢 Green: Active / Deployed
- 🟡 Yellow: Deactivated
- 🔴 Red: Deployment failed
Updating an Integration

You can update integrations while active or inactive.
After editing, click Save changes — the update will take effect immediately.
Integration Deployment Status
Users can check integration status via the status icon color in the integration tile:
- 🟢 Green: Active and deployed (or awaiting next run)
- 🟡 Yellow: Deactivated
- 🔴 Red: Deployment failed
Troubleshooting Measures
- Double-check all input fields (credentials, IDs, URLs). Incorrect inputs can cause failed integrations.
- Ensure valid notification list IDs and accessible activities are specified.
- If the integration fails repeatedly, review system logs for configuration errors.
For further assistance, please contact Taguchi Support.