- Support Home
- Knowledge Base
- Subscriber Management
- Data Management
- How do I use partition data in my comms?
Related articles
Need some help?
If you have questions or can't find what you're looking for, we're here for you.
Taguchi Support is available Monday to Friday, 9am - 5:30pm AEDT.
Create New TicketTaguchi Certified Training
Join our free and live online training sessions. You'll benefit from a better understanding of the platform's features and functionality. Plus with Taguchi Certified Rewards, every session you attend, you're not just learning - you're earning your way to some fantastic rewards.
About Taguchi Certified RewardsAPI Version 5
Did you know Taguchi has an API that supports all of the functionality provided by the admin interface and more?
Explore API Documentation
Thanks for your feedback!
How do I use partition data in my comms?
So you’ve read our article on Partitions, and you need some inspiration around applications of partition data in your messages?
To begin, it’s worth understanding that partitions is simply a way to divide up your database.
Below we describe three effective examples of how we see organisations leverage the partitions feature.
Header & Footer
A great way to personalise, and perhaps the most common first step to using partition data, is to apply it to your email activity header and/or footer. It's especially appropriate if you have an organisation that manages multiple sub-brands.
Custom fields could include (but not limited to);
- Store name
- Store logo
- Contact number
- Book now URL
- Store manager headshot
- Store address
- Store opening hours
- Store awards
- Google review URL
As an example, adding store opening hours to your footer, you would follow these steps:
- Go to 'Settings', select 'Custom fields', click the 'add new field' button.
- Complete all necessary fields and select 'Partition' in the field type drop down menu.
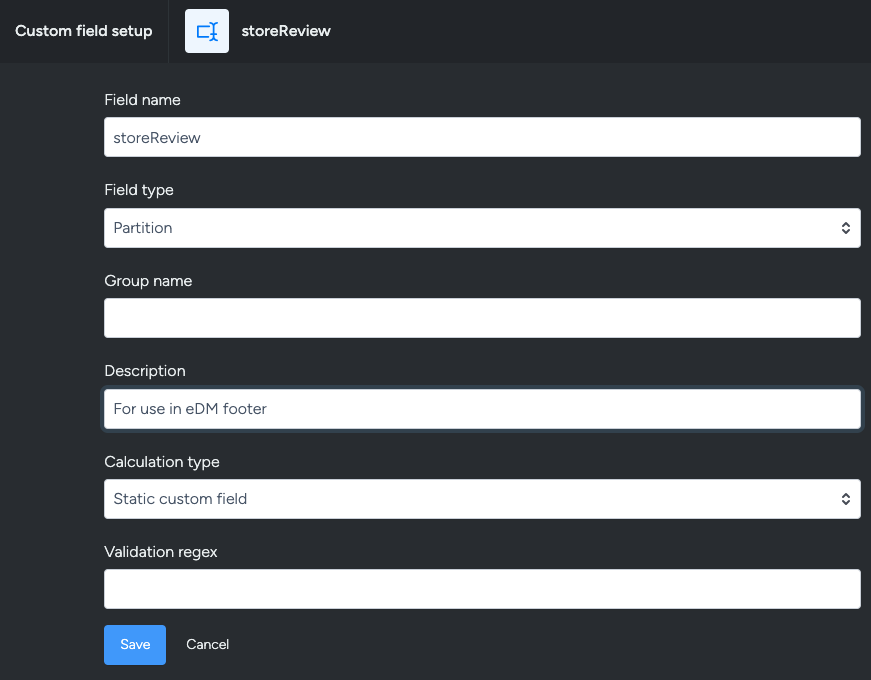
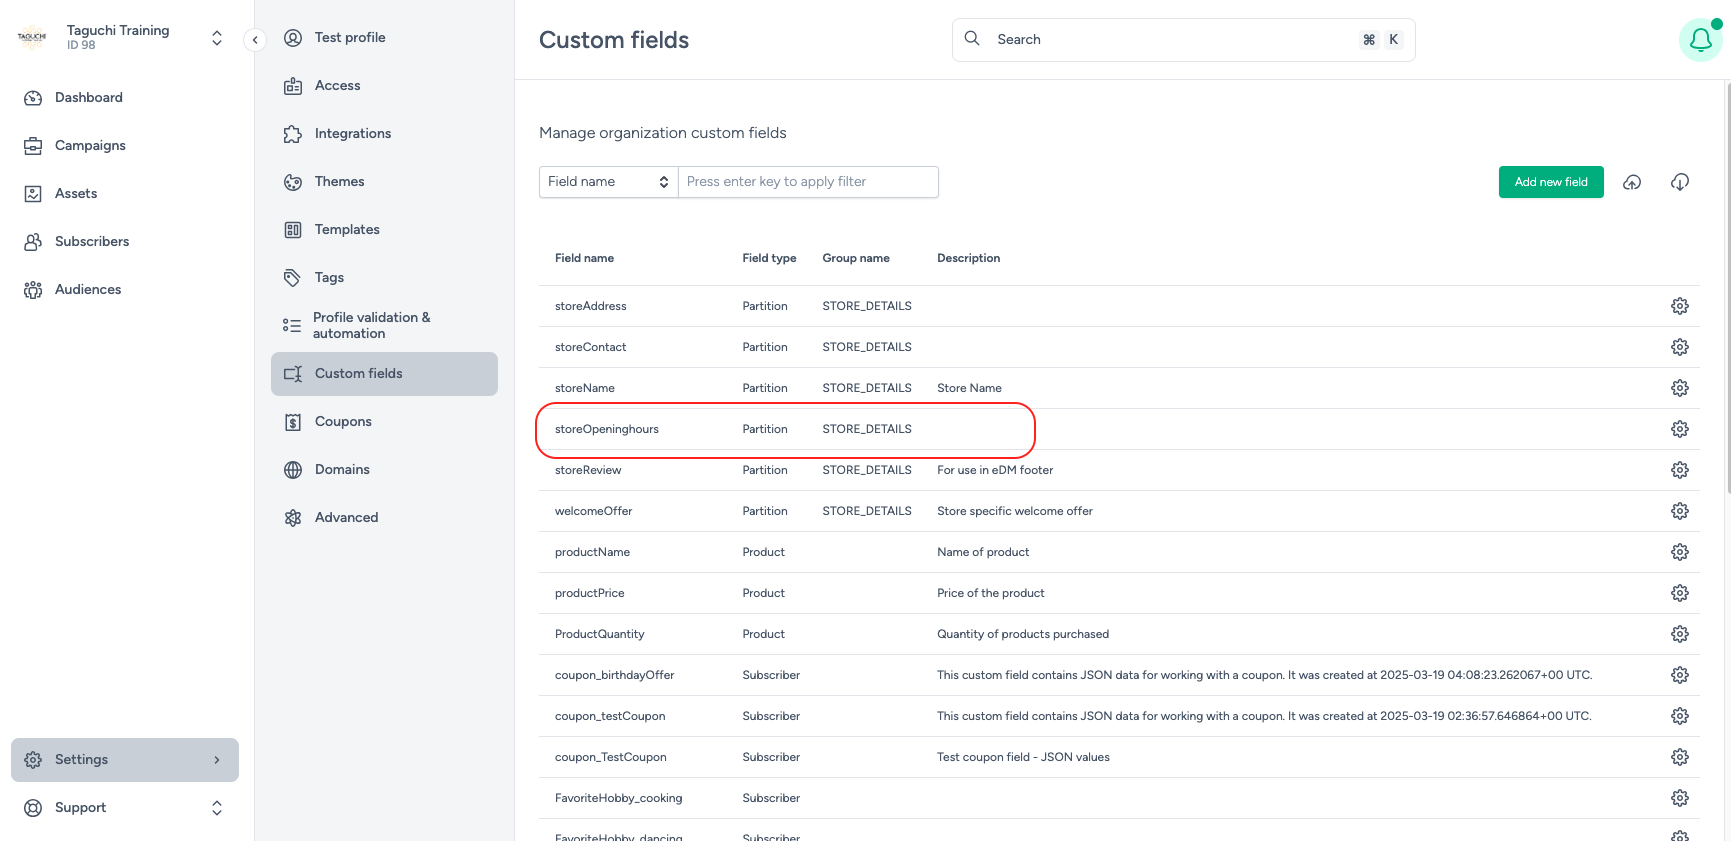
Click the save button and your new field will appear in the list, in alphabetical order.
- In 'Settings', select the 'Partitions' menu item. You may either download your existing partition file or upload a new file.
Add a column to your partition file, populating the column name with the same text you chose in field name in step 1. E.g. Custom: storeOpeninghours
Then, populate each row with applicable opening hour information.

- In the activity editor, add your personalisation tag
E.g. {%= recipient.partition.custom.storeOpeninghours %} to your footer text block.
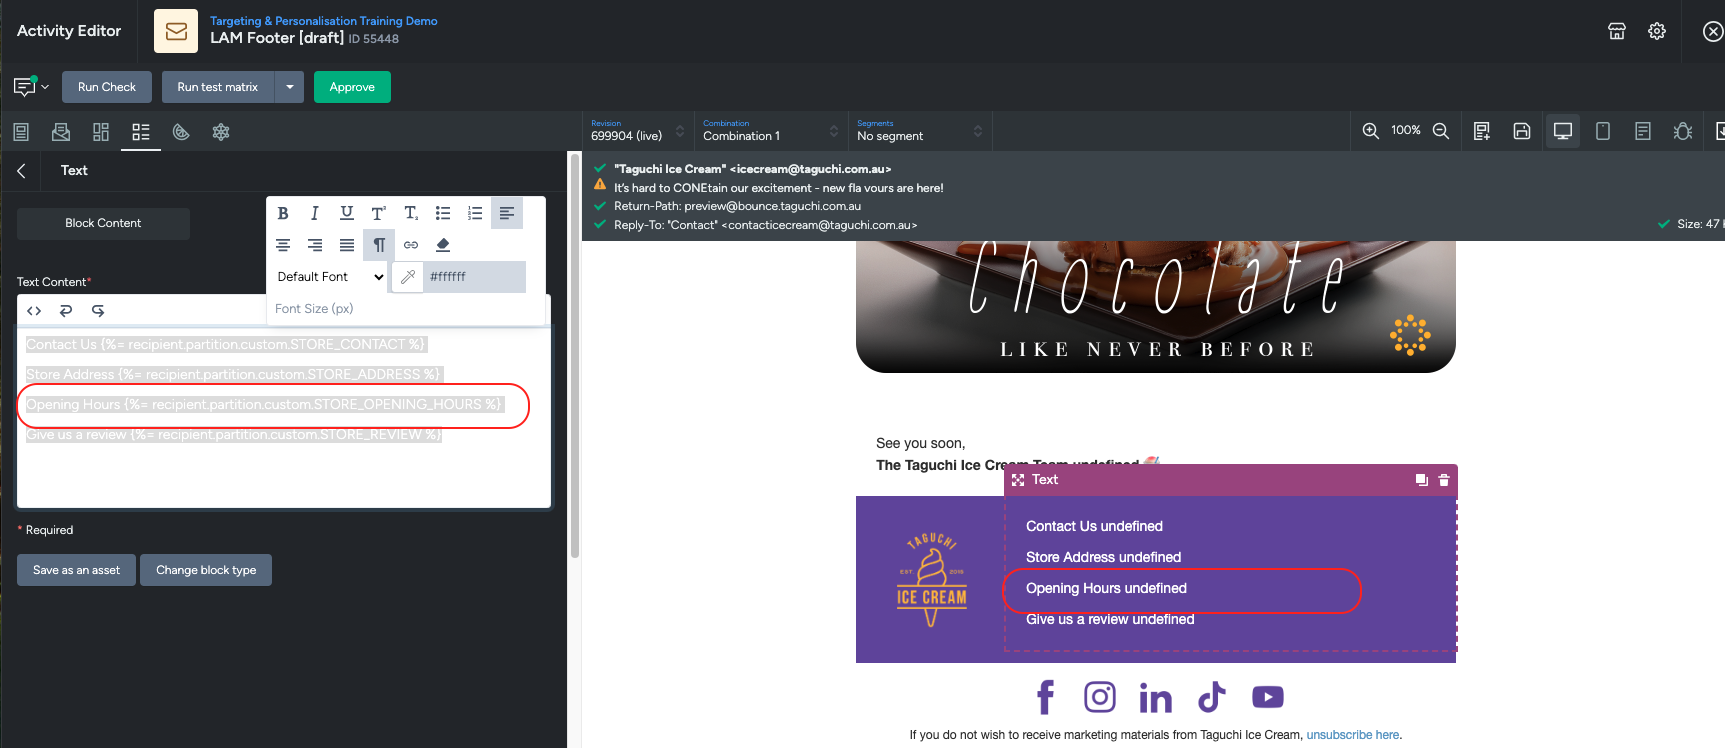
The preview may display as 'undefined' if that custom field doesn’t exist in your user profile. Live proofs or test matrix proofing will confirm if the setup is done correctly.
Sender details and reply-to's
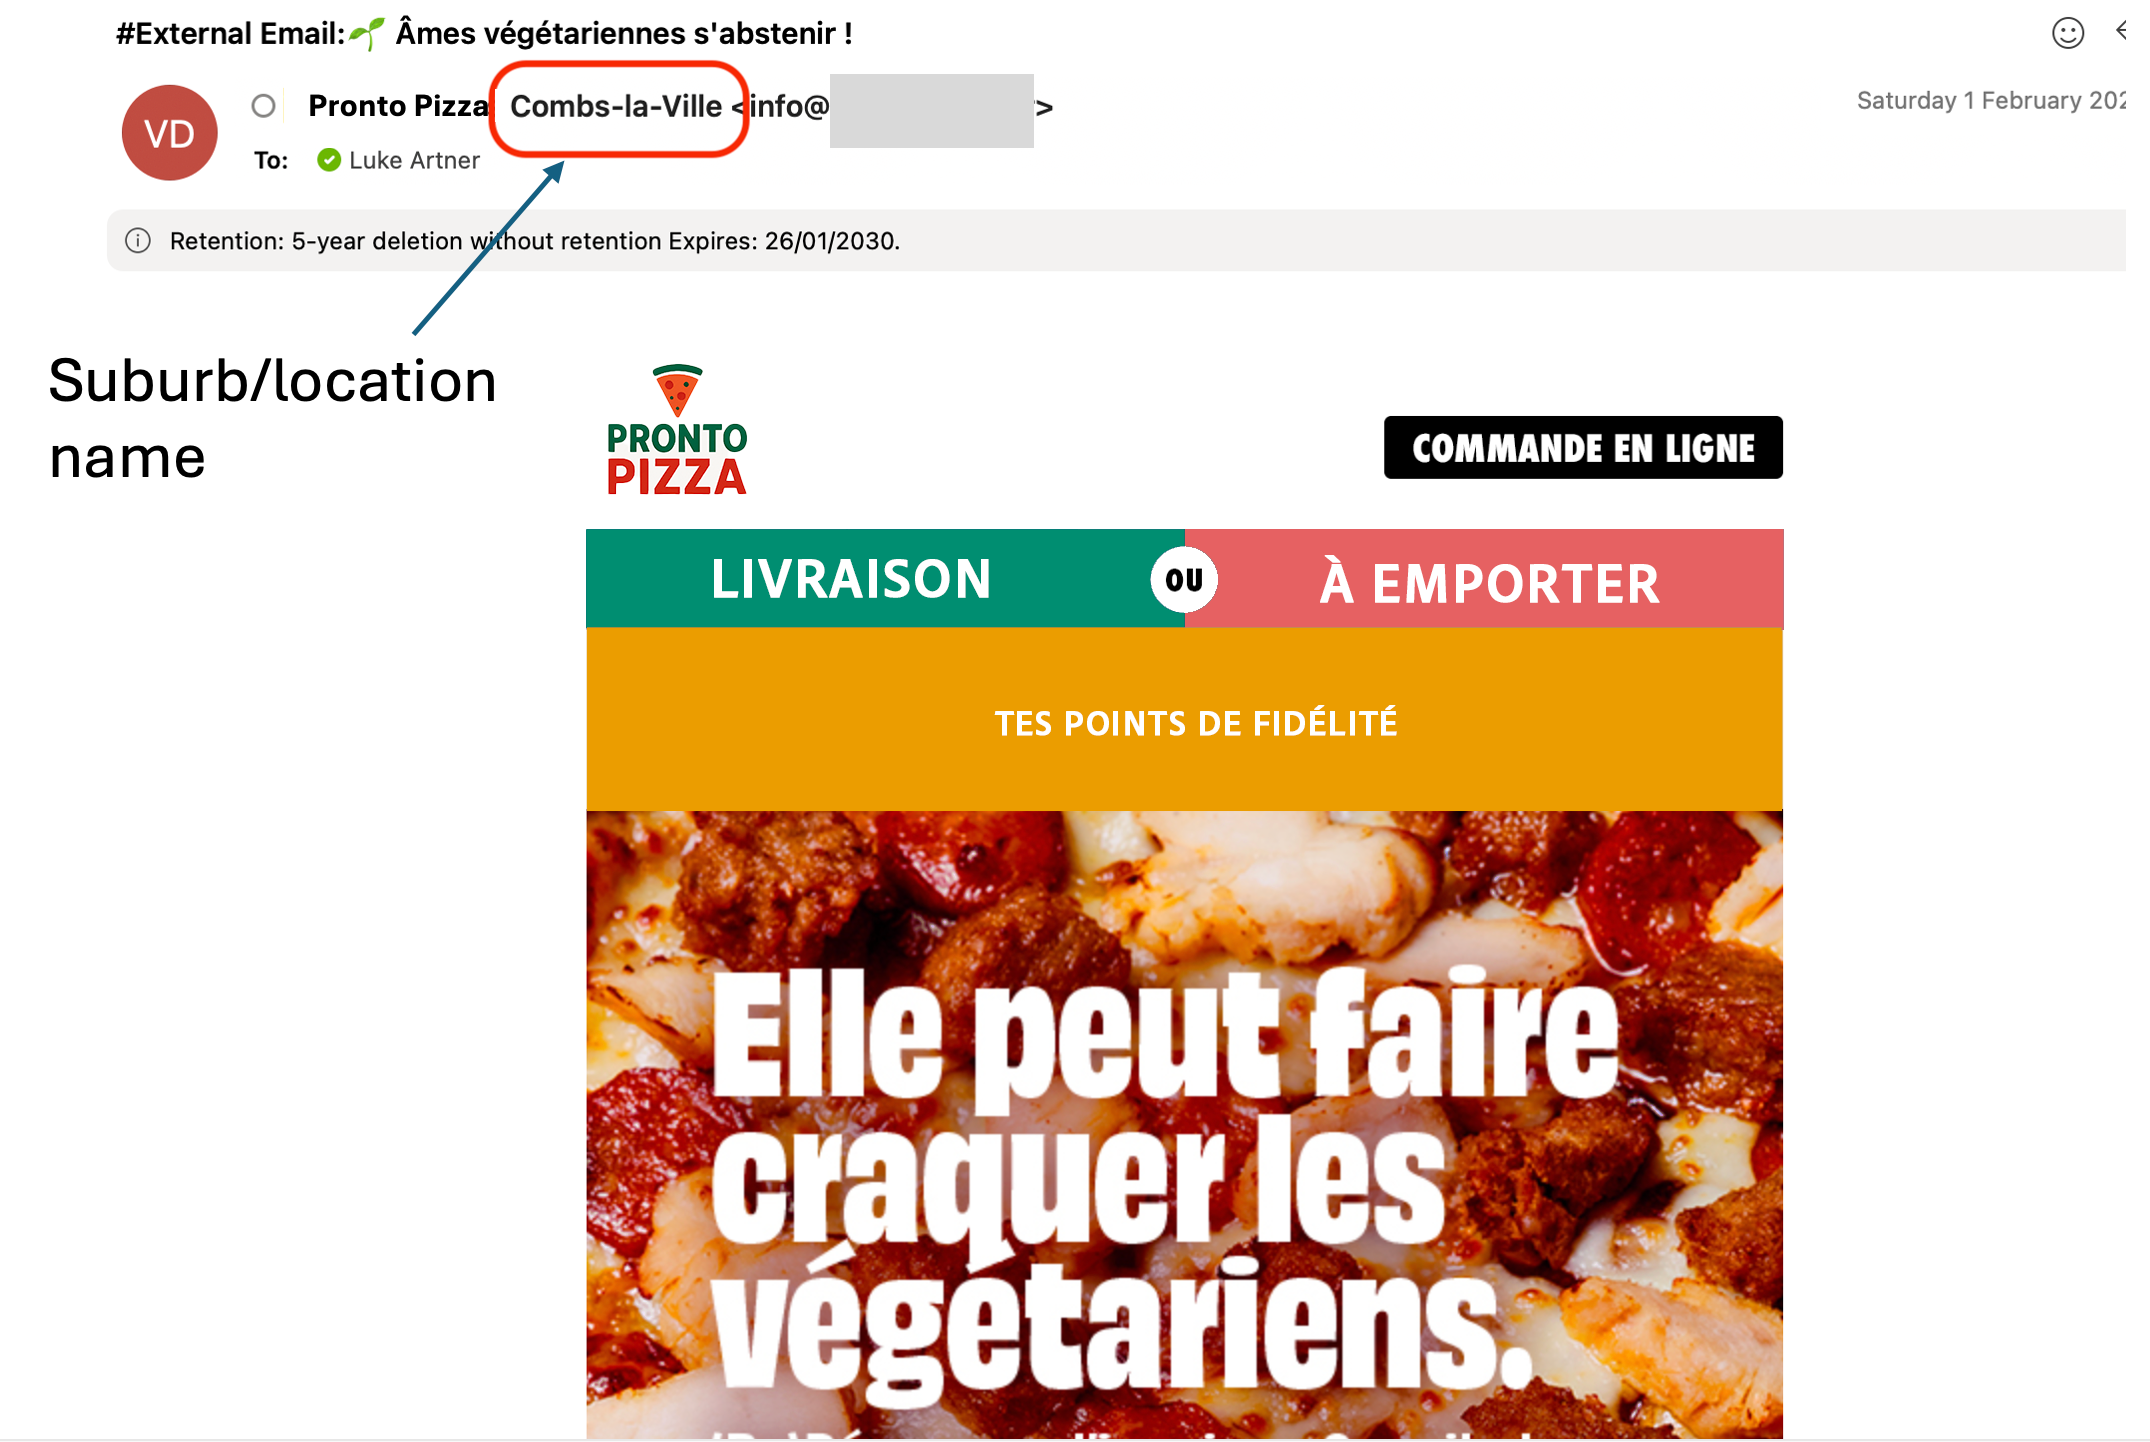
Being store specific in your sender details is a simple yet effective level of personalisation that customers see even before an email communication is opened. It might reference a store name or location.
For example, a franchise restaurant can include the location in their email sender name. Below is a sample email where a restaurant in France sends emails with their suburb in the sender address field.
To setup store level personalisation using partition data:
- If it does not already include, ensure your partition file has location-based information, with corresponding values against each store.
E.g. Column B in the excel file screenshot from the prior example recipient.partition.custom.STORE_NAME Where values would be location/city/suburb names
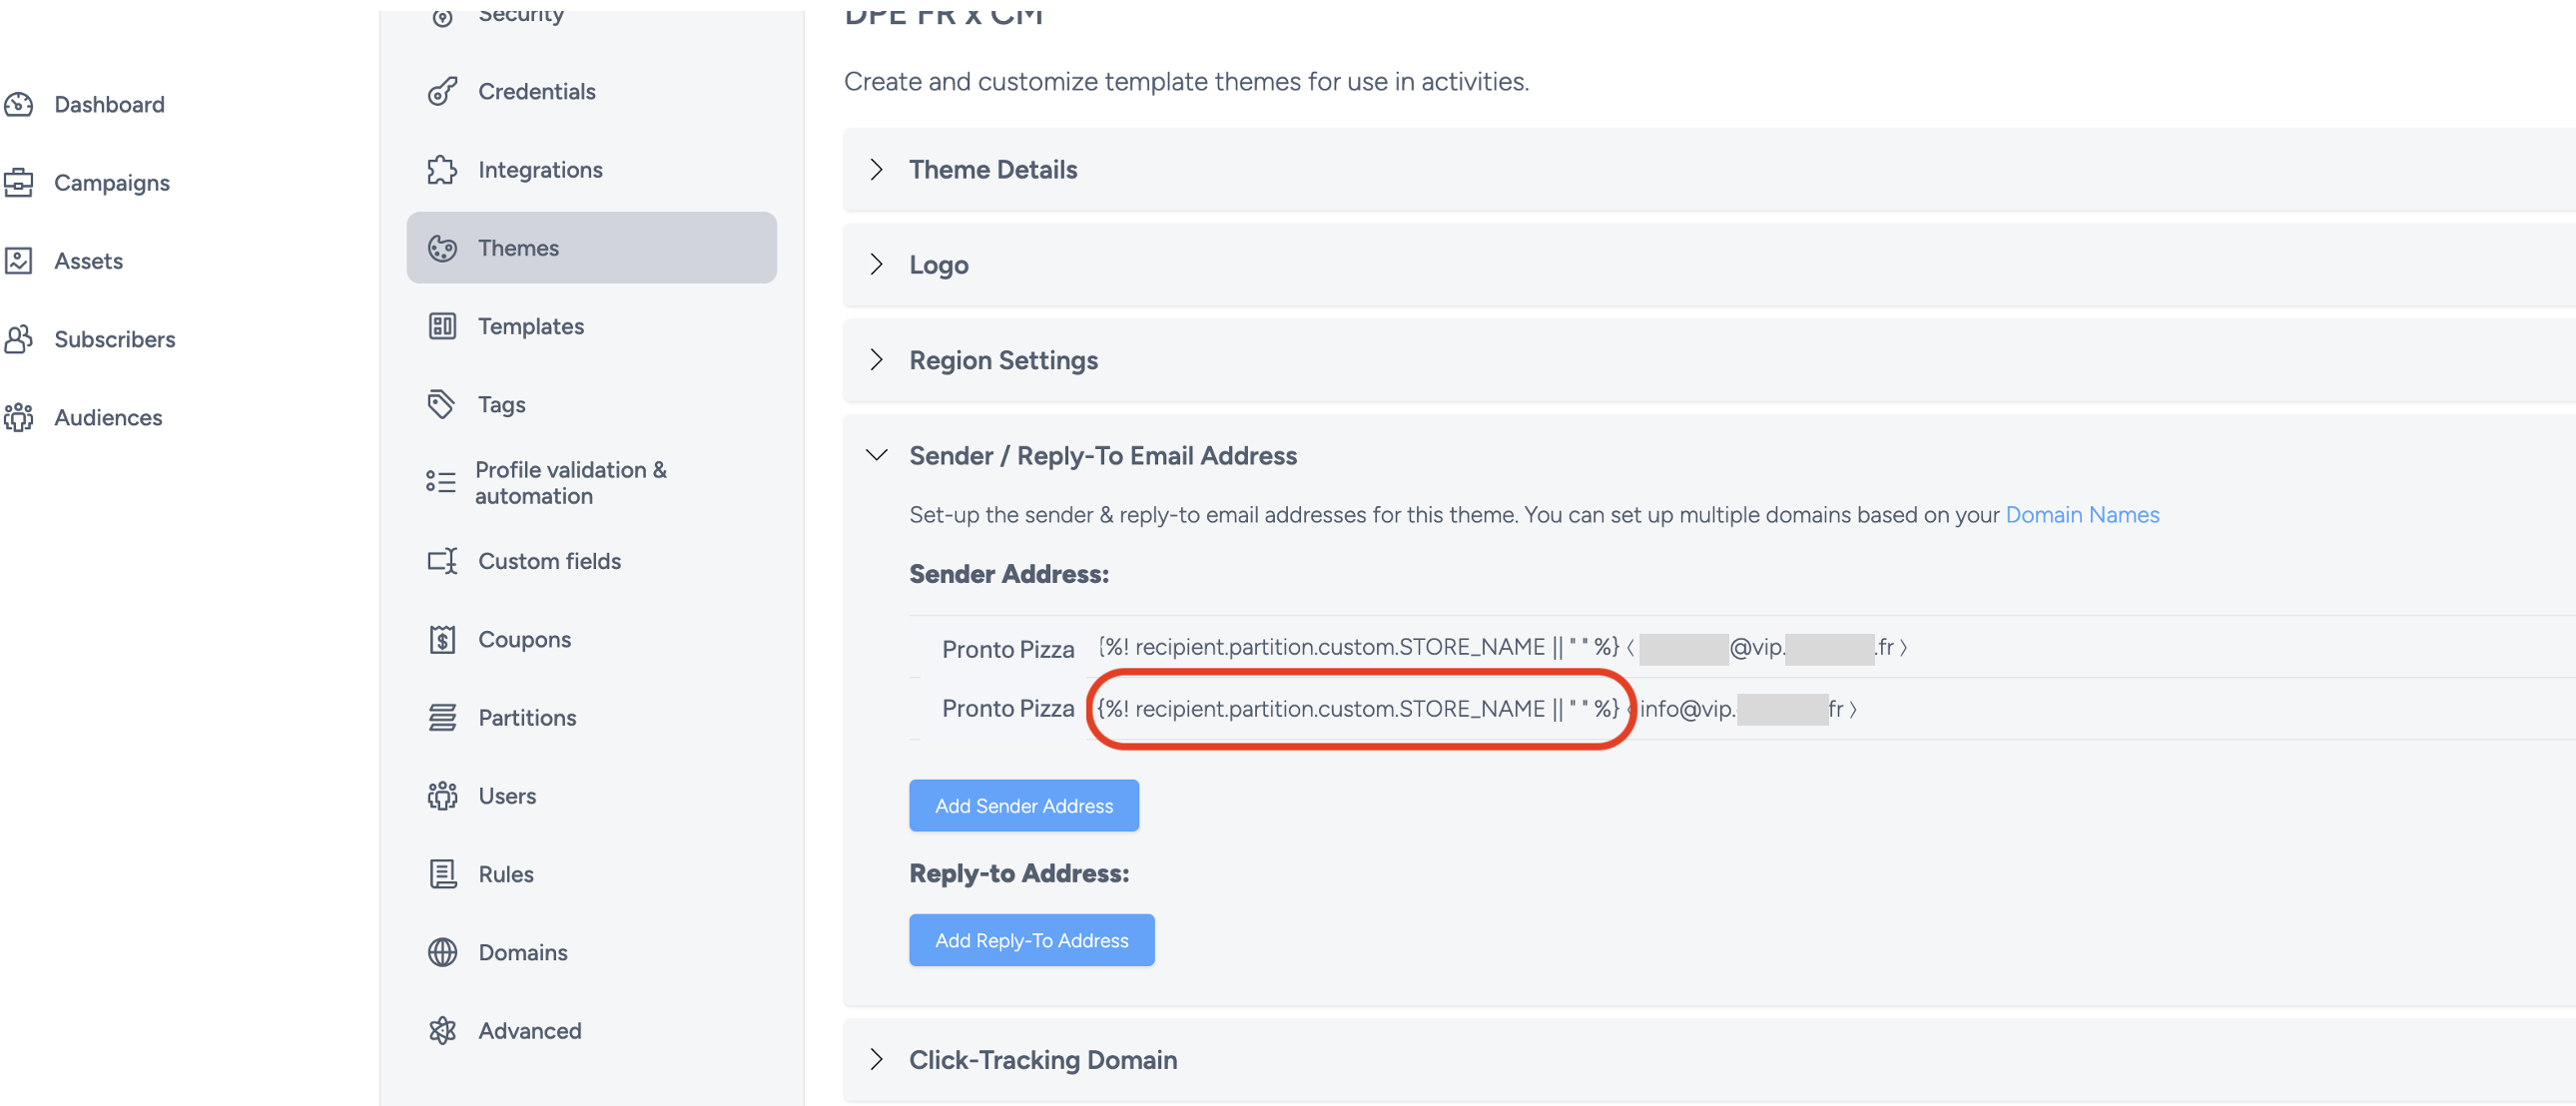
- In themes, click ‘Add a sender address’. In the display name field, include your personalisation tag. Eg, {%! recipient.partition.custom.STORE_NAME || “ “ %}

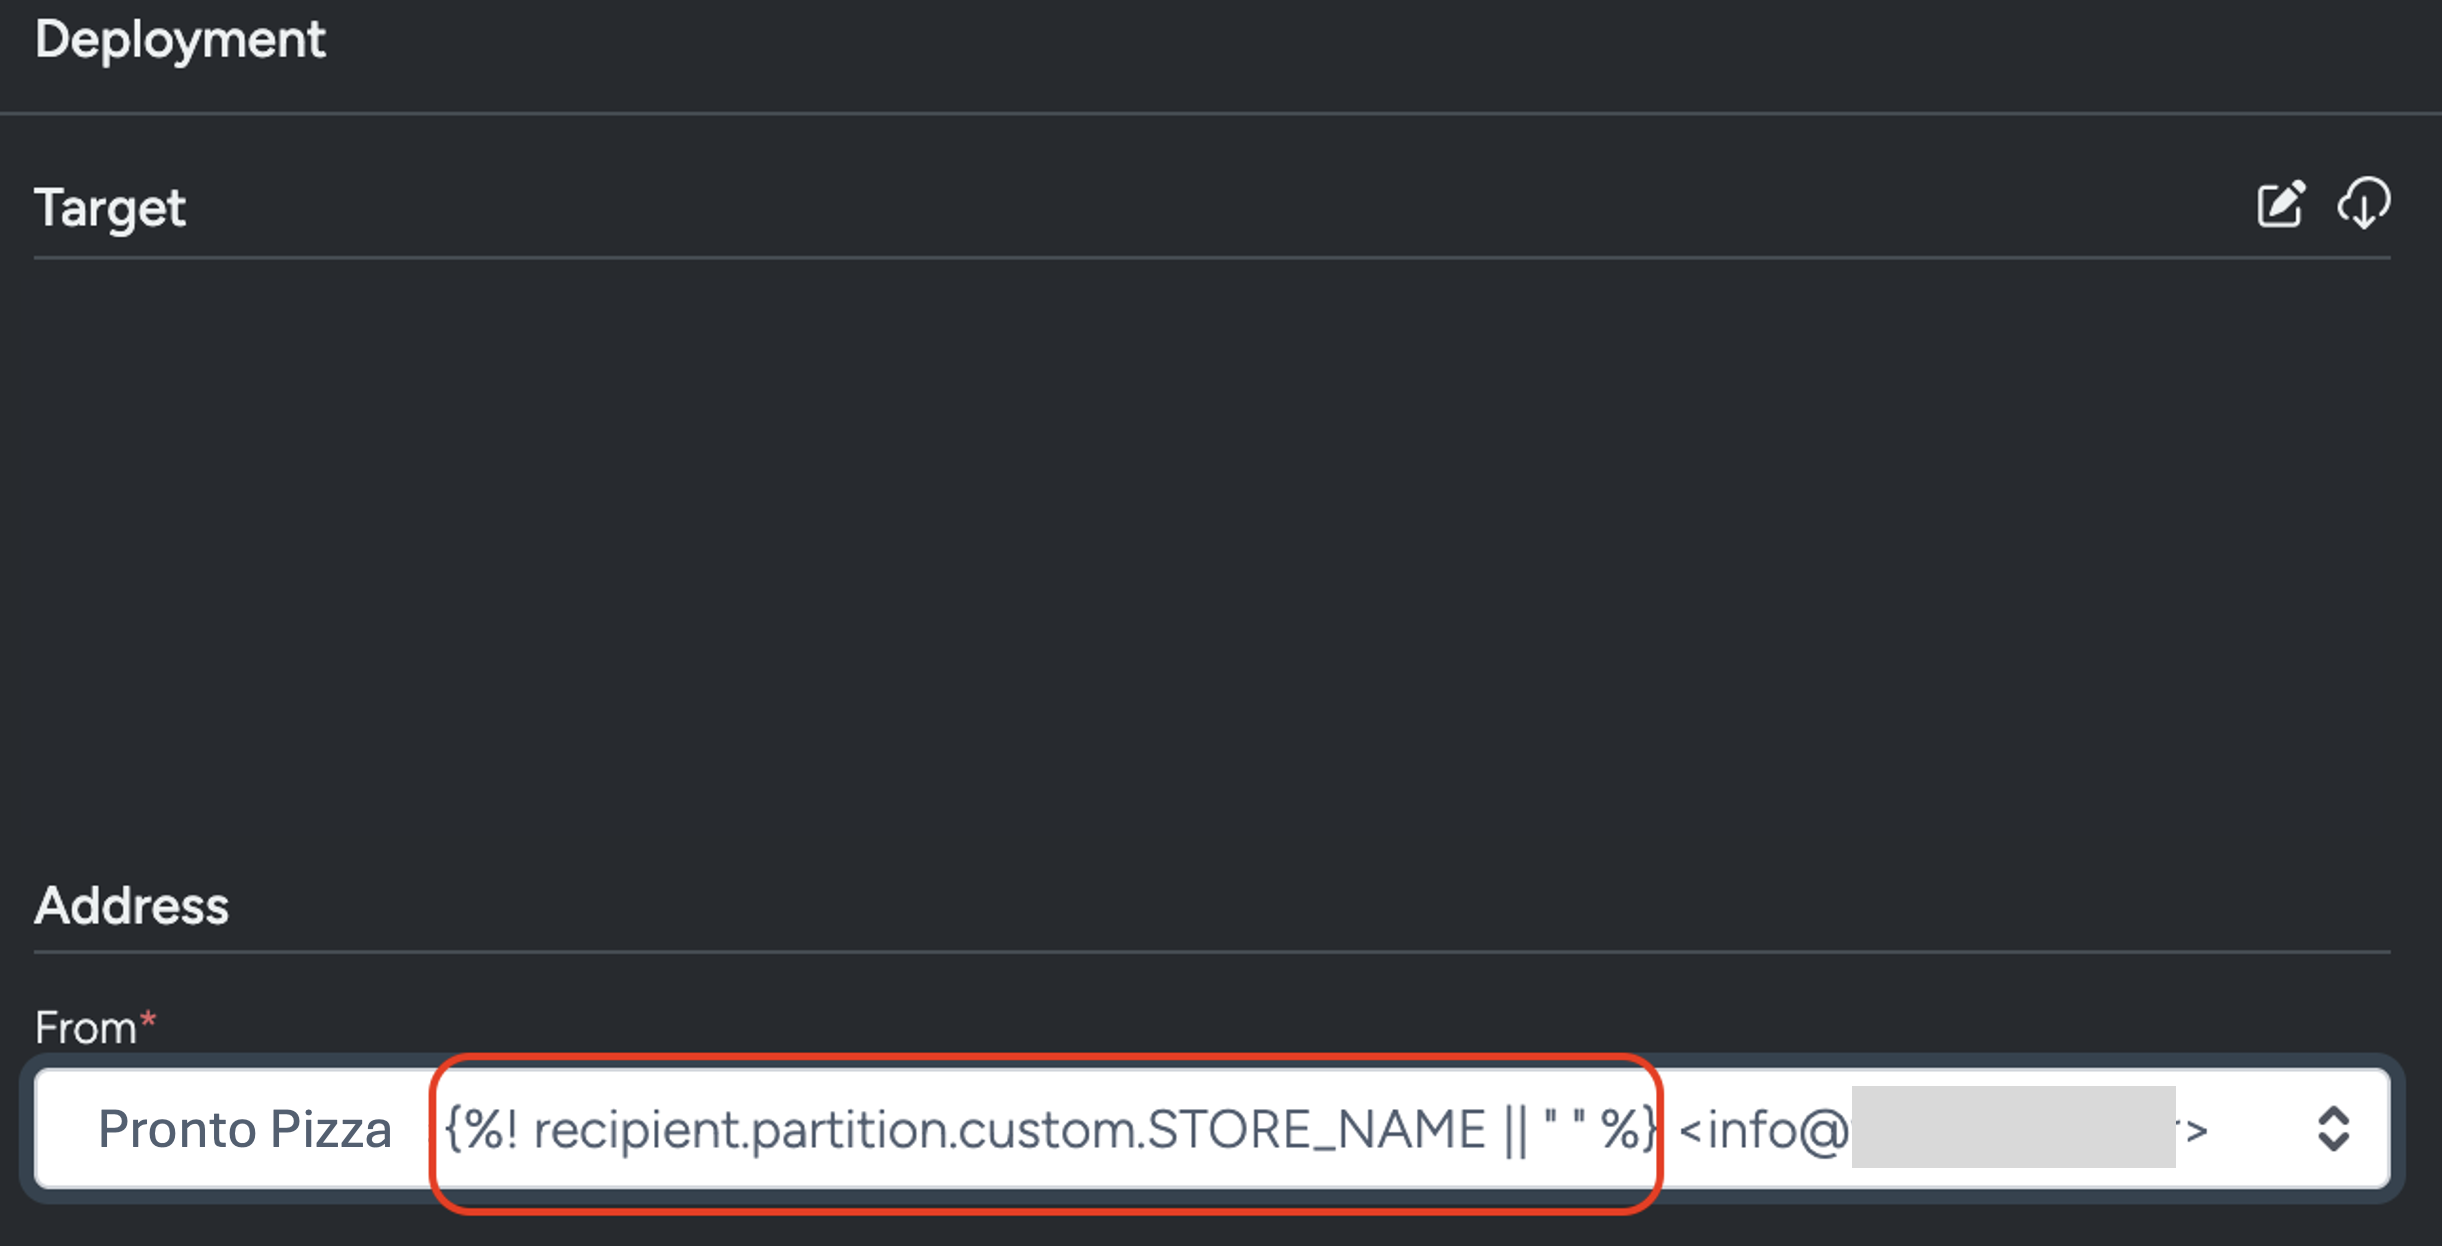
In the activity editor, under the Deployment tab, the ‘From’ address should now show the personalisation options.
Hint: If the new sender address doesn’t appear, you may need to refresh your activity with the latest changes. Click the theme icon in activity editor, and a refresh icon will appear on your corresponding theme. Click to apply changes.
You may also consider dedicated ‘reply to’ email addresses. This means when a customer replies to an email, the message is sent to a specific inbox. Your reply to addresses could be allocated by store, region or brand. The decision depends on how your organisation handles enquires.
Segmentation for active/inactive partitions
There may be an occasion where a shop/store in your network is closed for refurbishment. You can use partitions to ensure the store’s subscribers;
- don't get communicated to
- Or they're communicated to and referred to other stores nearby
This setup is achieved by:
- Adding a partition custom field E.g. Field name: Custom: storeStatus; where the value against each row or store is either closed or open
- Then your targeting can be edited to include only those who match this custom field and the value is open.
If you have additional questions or require further assistance on Partitions, do not hesitate to reach out to Taguchi Support