- Support Home
- Knowledge Base
- Triggers And Automation
- Basic Triggers
- Onboarding Journey - Welcome Trigger
Onboarding Journey - Welcome Trigger
Sending a ‘Welcome’ email to your subscribers is a great introduction for your newly acquired subscribers. You can choose to send a welcome trigger hourly, daily, weekly or monthly.
However, the recommended time frame is to send as soon as you acquire new subscribers as they’re warm upon entry. As such, you can choose to send the trigger hourly or daily.
Suggested Set-up
| Send Date / Time | User defined. |
| Repeat | If ‘Daily’, you can choose this to be at any time you feel is best suited to tap your subscribers. If ‘Hourly’, you can start at any time, and it will trigger by the hour 24x7. |
| Target Expression | subscribed list X last hour and not sent activity Yor subscribed list X last 24 hours and not sent activity YLearn more about these target expressions |
Instructions
Step 1: Campaign Folder Set-up
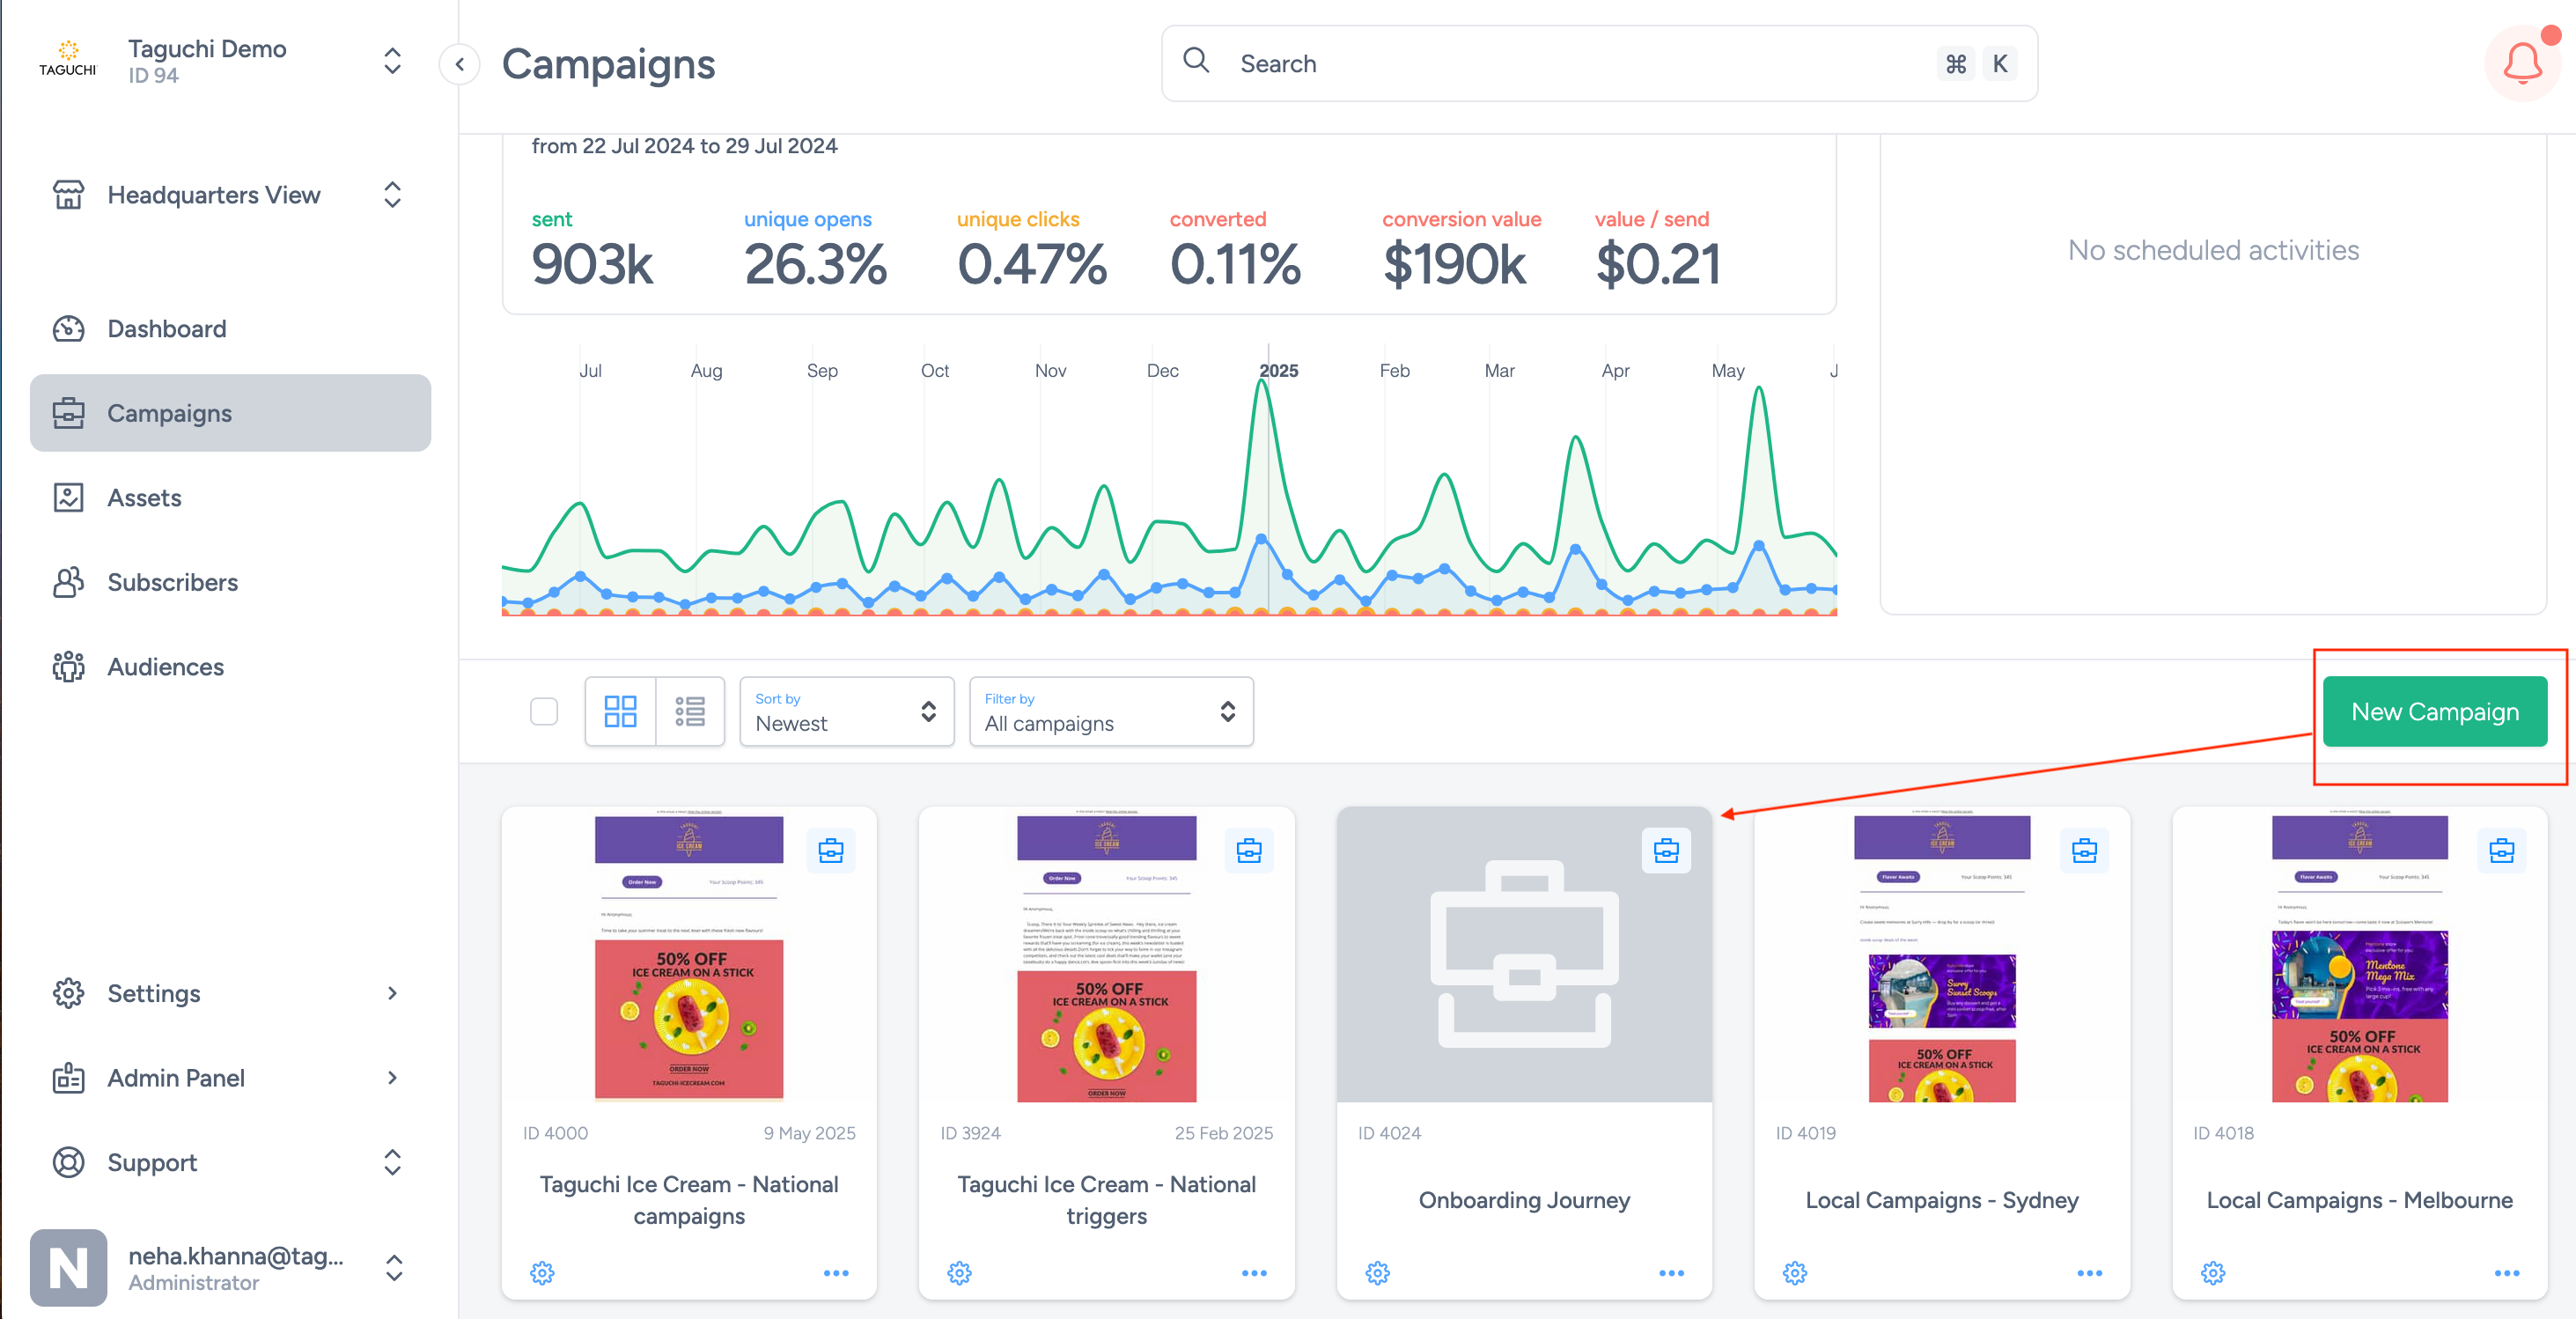
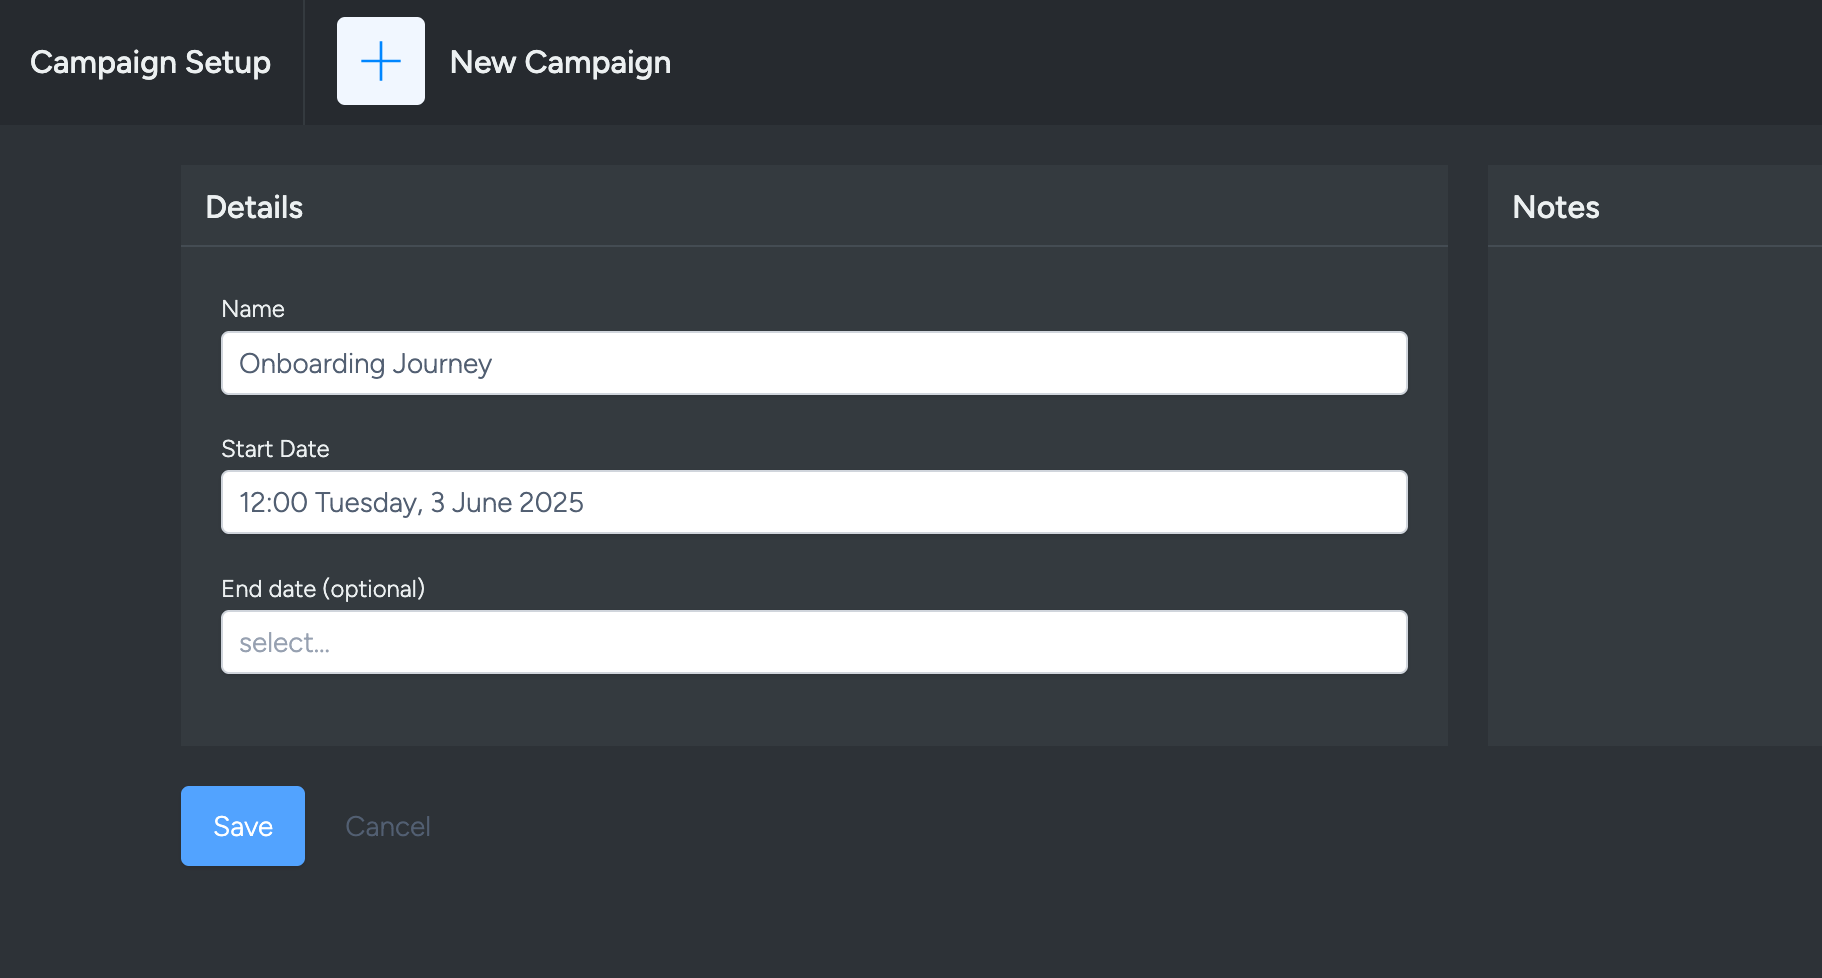
Begin by setting up a new campaign folder. You can call this folder “Onboarding Journey”. This folder can cover all your welcome activities. Whether it is a single email or a multi-channel journey, this dedicated folder can host it all.
To do this, click on the ‘New Campaign’ button in the Campaigns section of the platform to set up a new folder. A setup screen will appear. You can add the campaign folder name, start date and end date. You should definitely add a start date. However, an end date is not required to create the campaign folder.
Step 2: Create a New Activity
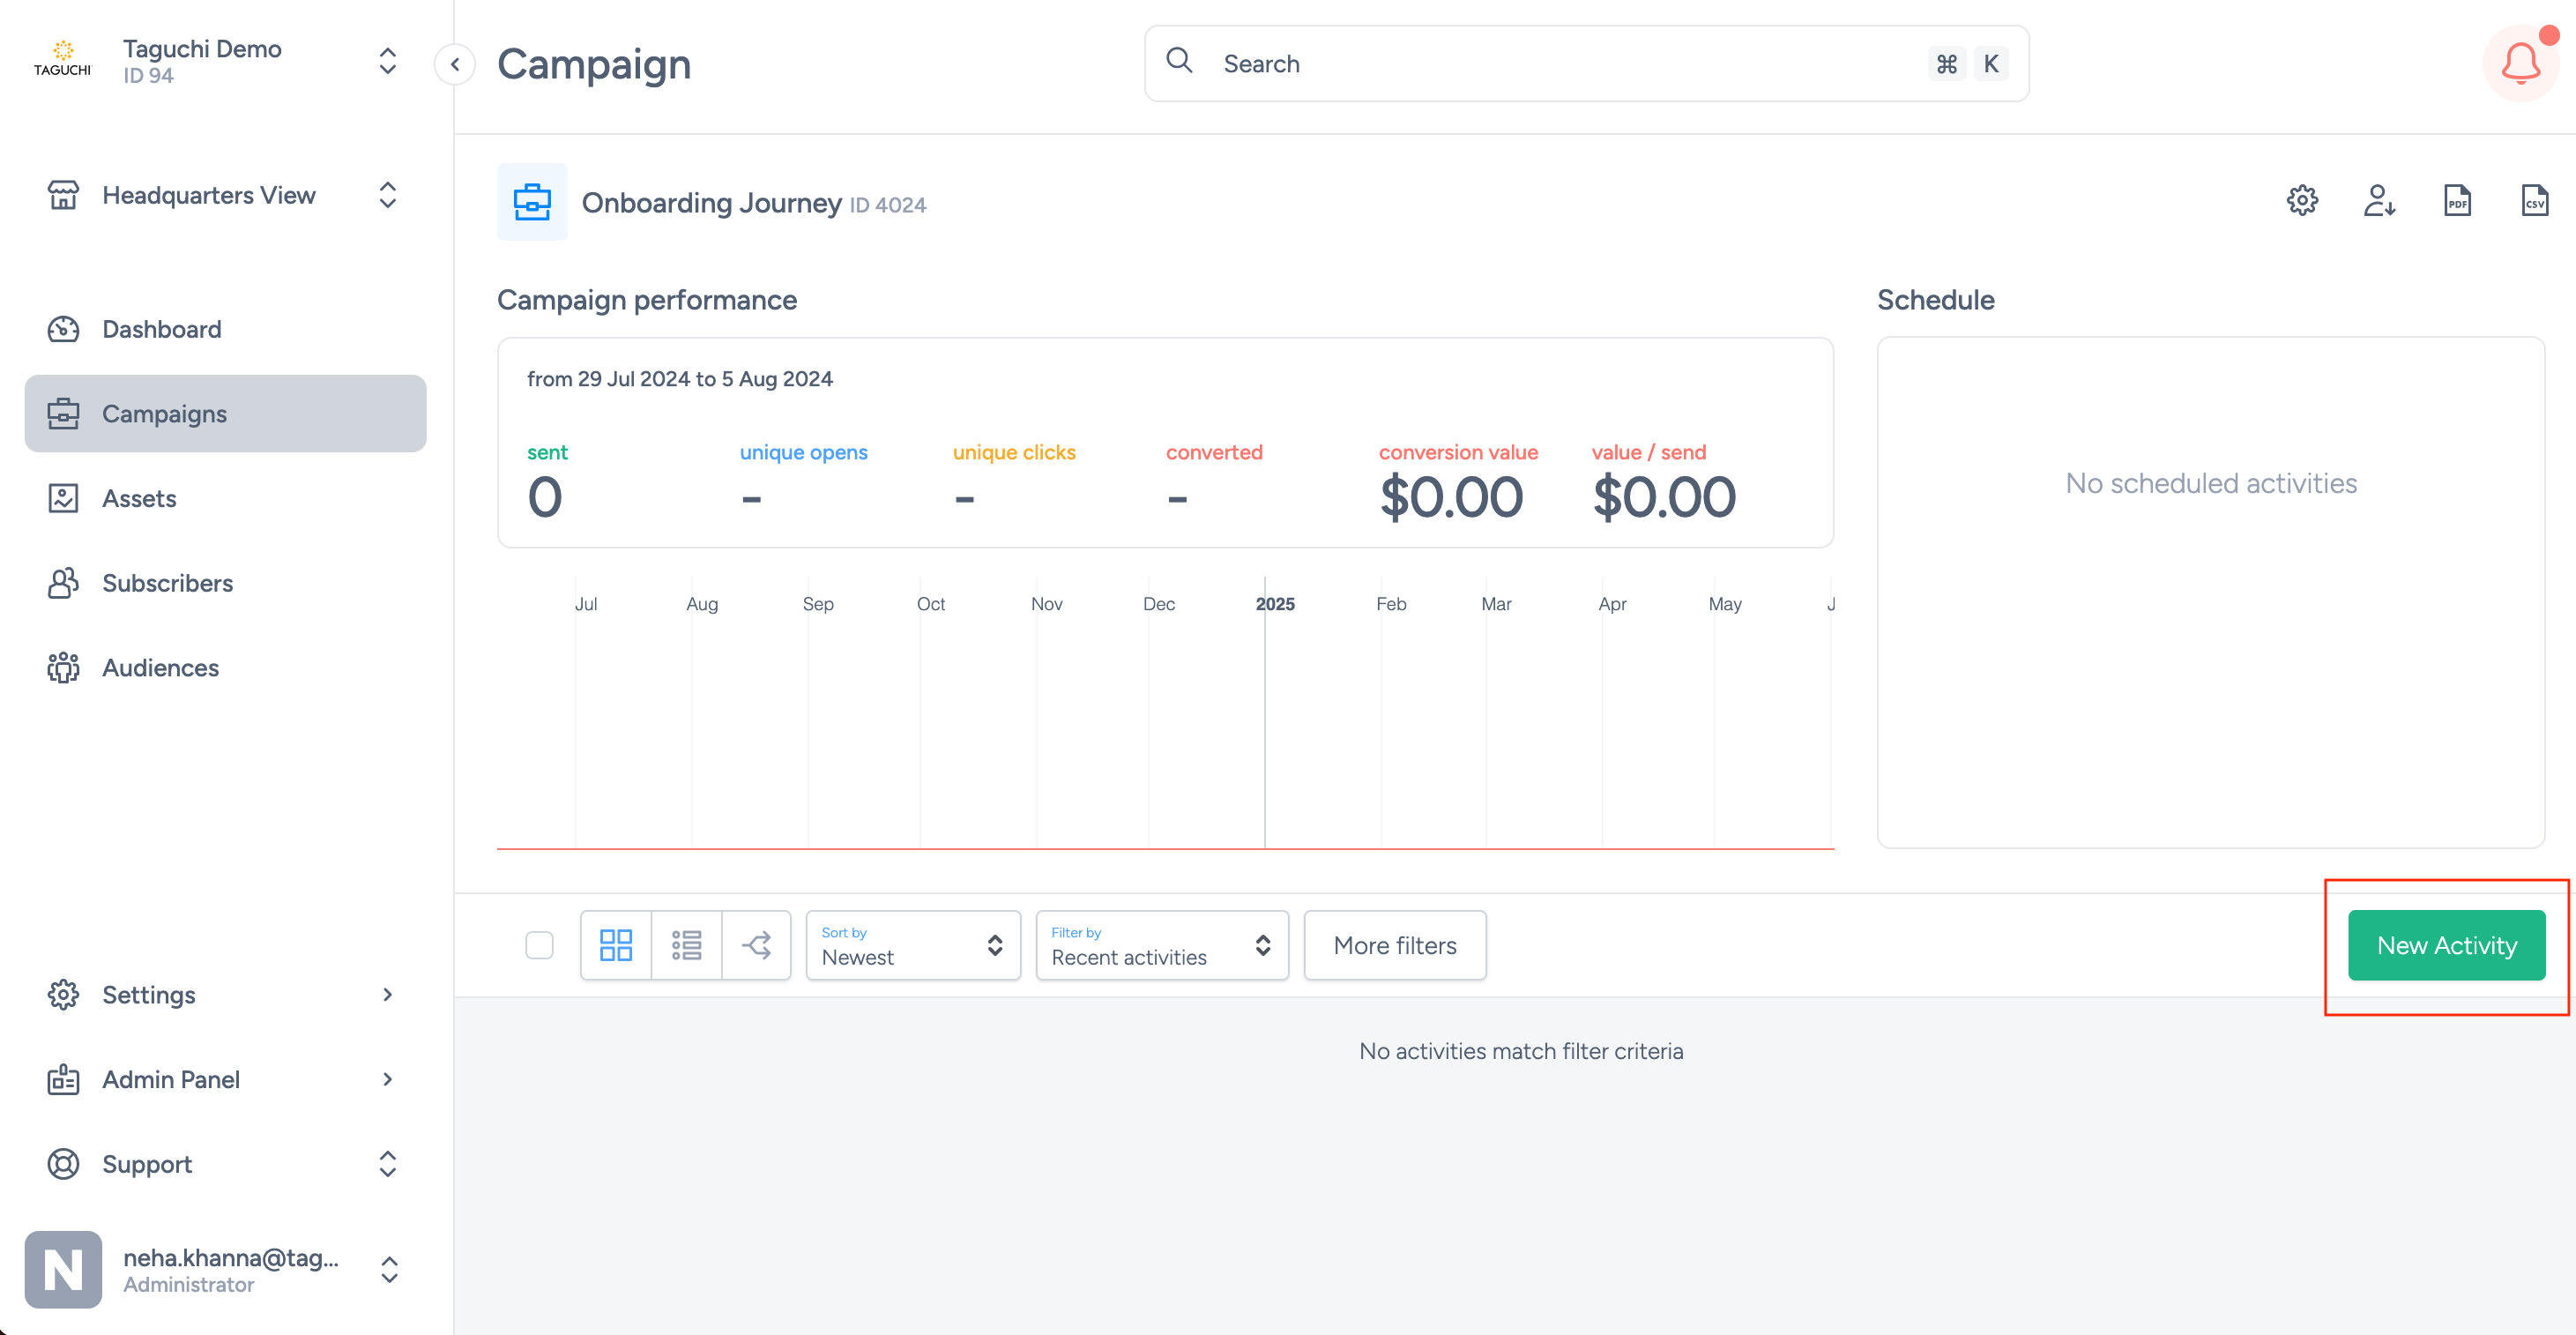
Either create a new activity or edit an existing activity. We recommend keeping your triggers separate from other emails in their own campaign folder as suggested above.
If you are setting up a new activity, click the ‘New Activity’ button in a campaign folder to set up a new activity. A setup screen will appear. If you are editing an existing activity, simply navigate to the setup screen by either clicking ‘setup’ in the activity card actions or the manual cog icon on the right-hand side of the activity header.

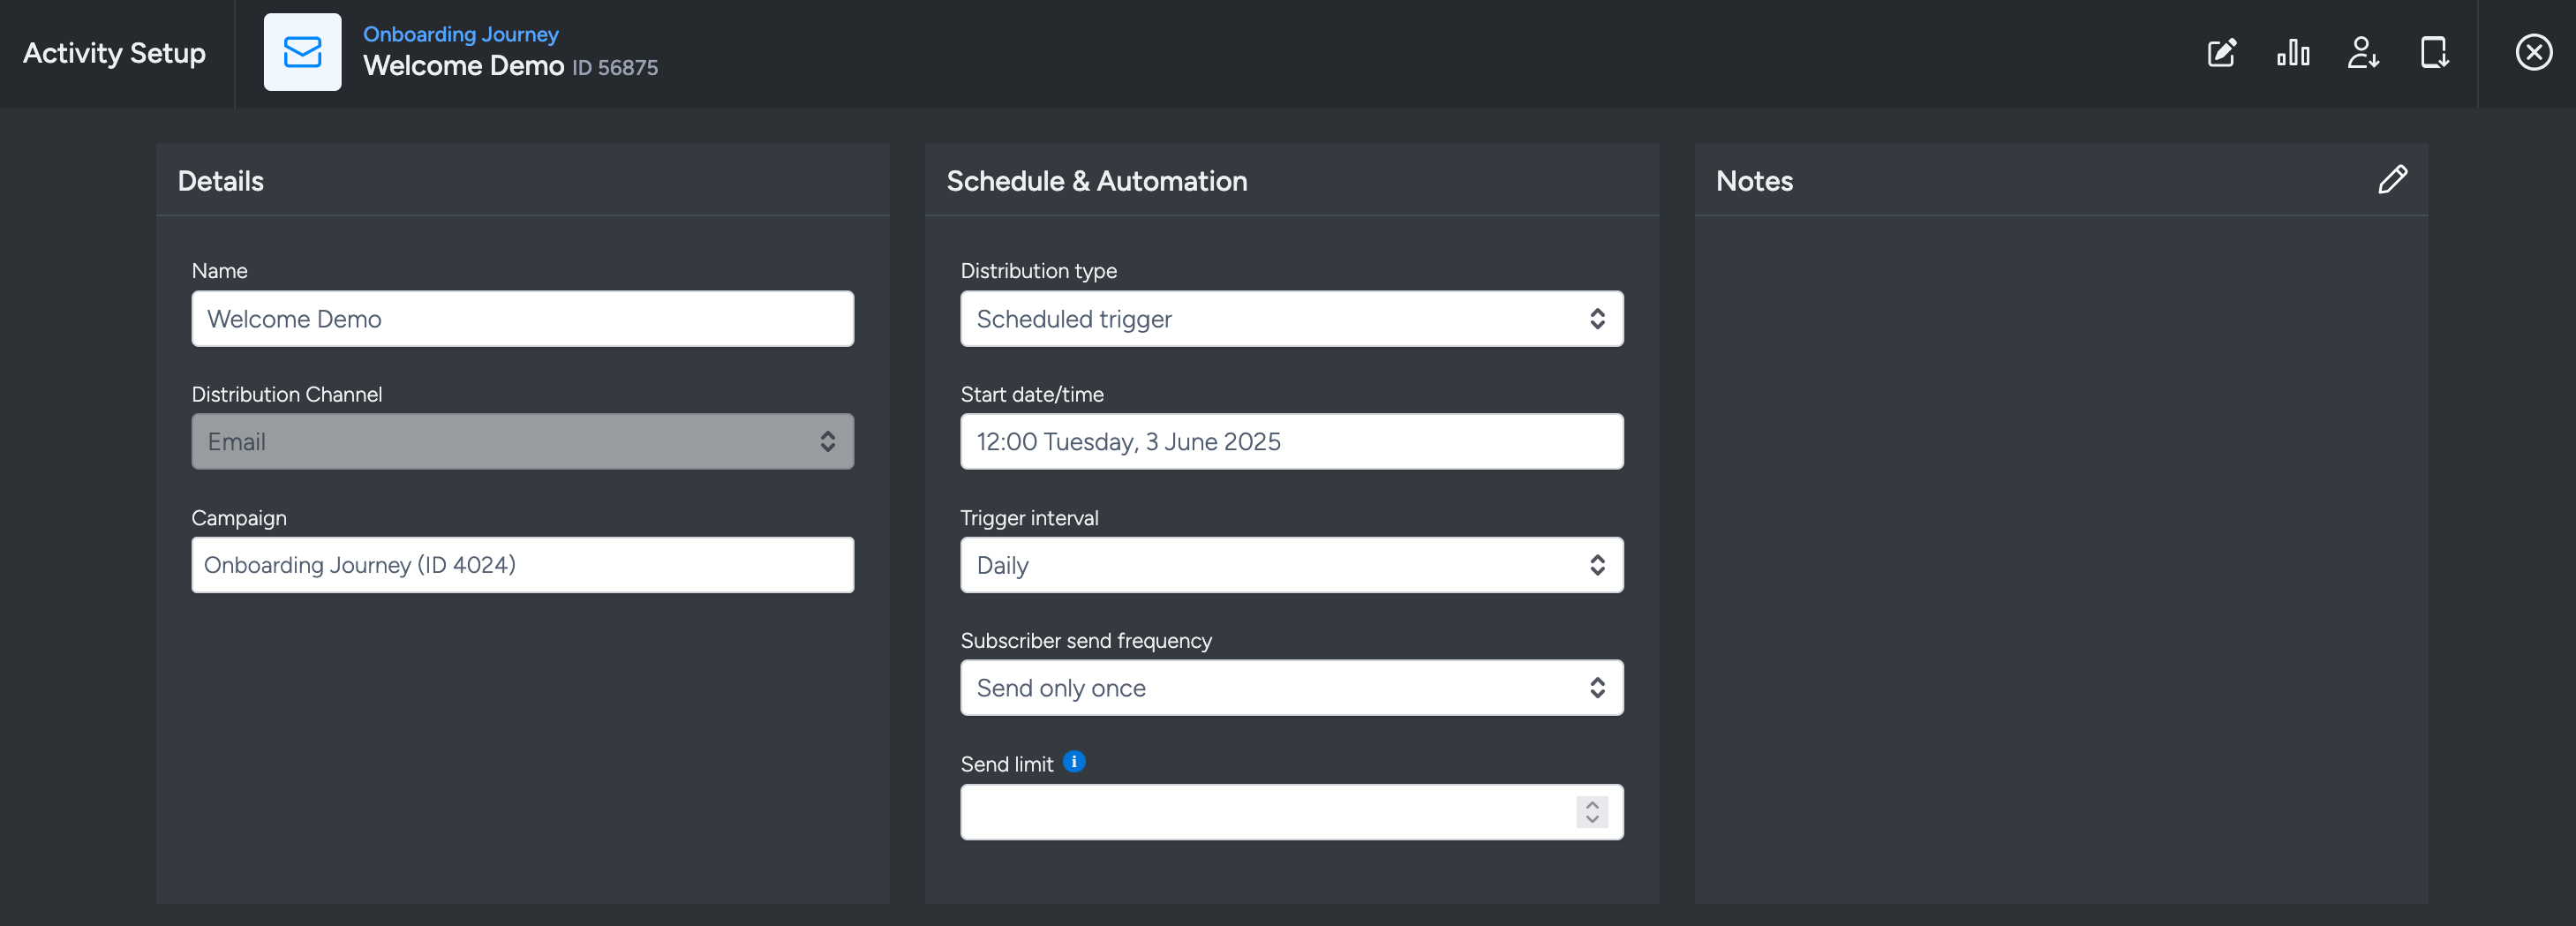
The setup screen will appear with activity options, where you can set the following:
- Distribution type: Scheduled trigger; since you are scheduling this to go out at a certain date and time.
- Date: Select your own date and time for when you wish the trigger to start. The most important part is the time as this will be used by the repetition option to determine when to send the trigger each hour if you select ‘Hourly’ or at which hour of the day if you select ‘Daily’.
- Trigger interval: Choose ‘Hourly’, ‘Daily’, ‘Weekly’ or ‘Monthly’ depending on your intended trigger schedule.
- Subscriber send frequency: Pick between ‘send only once’ or ‘send once’ every day/weeks/months/year. We recommend ‘send only once’ as you want this email sent once per subscriber.
- Send limit: Use this if you want to limit how many recipients receive the activity each time. If left blank, no limit applies. For example, if set to 500 but your target list has 1000 subscribers, the activity won’t send.
Note: Send limit should only be used for triggers and not immediate or scheduled broadcasts. Avoid if targeting numbers are unpredictable.
Save your changes by clicking the save button.
Step 3: Edit Activity Content
Begin editing your activity content. View the V5 User Guide for tips on creating your activity content.
This is a great time to try multivariate or a/b split testing to optimize performance.
Step 4: Set Target Expression
In the same setup & target section of the activity, there’s a text field to add your target expression. Paste the appropriate target expression:
subscribed list X last 24 hours and not sent activity Y
This targets subscribers added in the last 24 hours on list X who have not received activity Y yet.
- Replace X with your subscriber list ID (usually your master list).
- Replace Y with the current activity ID.
Paired with the ‘Daily’ repetition option, this triggers once daily to newly acquired subscribers.
For an hourly trigger, use:
subscribed list X last hour and not sent activity Y
This targets subscribers added in the last hour.
If you set a frequent repetition, always exclude subscribers who have already received the activity by including
not sent activity Yin the expression to avoid repeated sends.
For more target expression options, refer to the Target Expression Reference.
Step 5: Approve and Deploy
- Approve your activity to initiate the trigger. If scheduled for the future, it will start broadcasting at the set date/time. Click 'Approve' to see a confirmation modal showing your target expression, revision ID, and schedule.
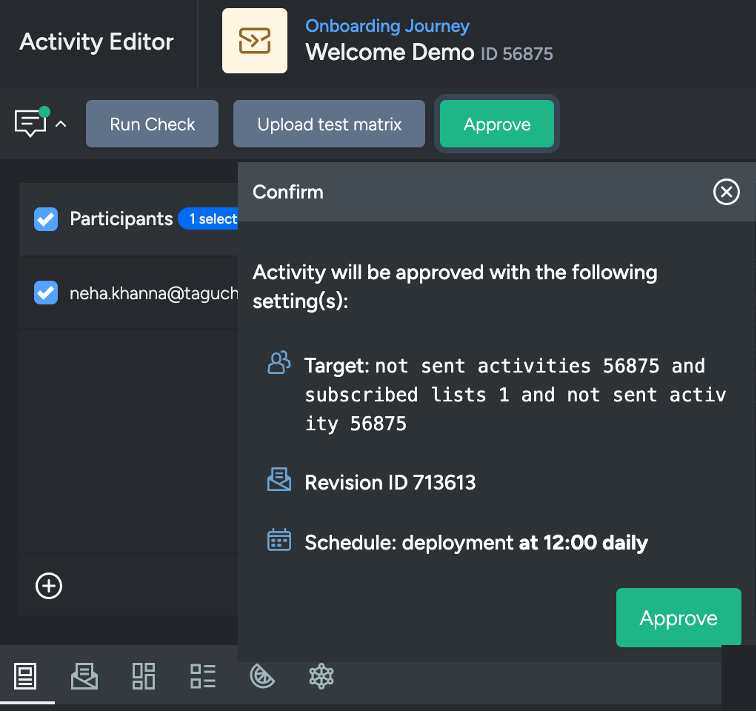
- After approval, click 'Confirm Deployment' in the activity panel to finalize your deployment including throttle limits.
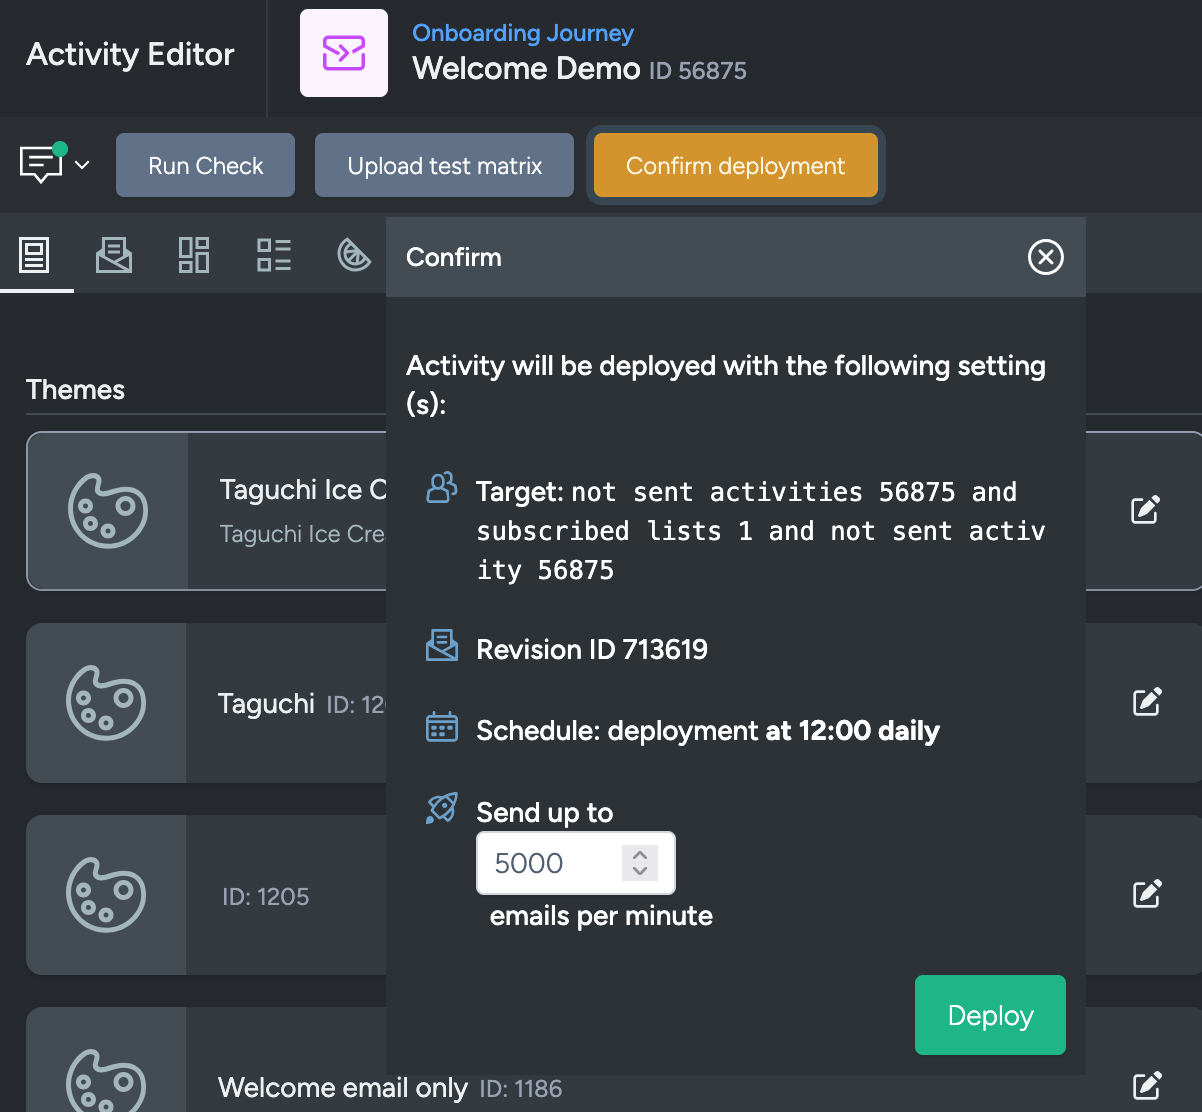
- Once deployed, 'Cancel Deployment' and 'Suspend' buttons appear. You’ll see the throttle rate and pending sends count.

Several sample triggers are available, please refer to the Trigger Examples.
