- Support Home
- Knowledge Base
- Triggers And Automation
- Customer Engagement
- Customer Engagement - Post-purchase Feedback Trigger
Related articles
Need some help?
If you have questions or can't find what you're looking for, we're here for you.
Taguchi Support is available Monday to Friday, 9am - 5:30pm AEDT.
Create New TicketTaguchi Certified Training
Join our free and live online training sessions. You'll benefit from a better understanding of the platform's features and functionality. Plus with Taguchi Certified Rewards, every session you attend, you're not just learning - you're earning your way to some fantastic rewards.
About Taguchi Certified RewardsAPI Version 5
Did you know Taguchi has an API that supports all of the functionality provided by the admin interface and more?
Explore API Documentation
Thanks for your feedback!
Customer Engagement - Post-purchase Feedback Trigger
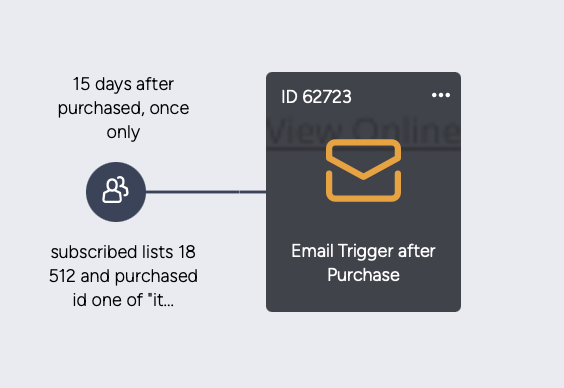
Sending a follow-up email to subscribers who performed a specific action.
For example, you have five products whose id or serial number are as follows:
- item1
- item2
- item3
- item4
- item5
You may choose to send an email to a subscriber who purchased one of these products a couple of days ago.
For this, we'll be using an event-based trigger based on the conditions above.
Suggested Set-up & targeting rules
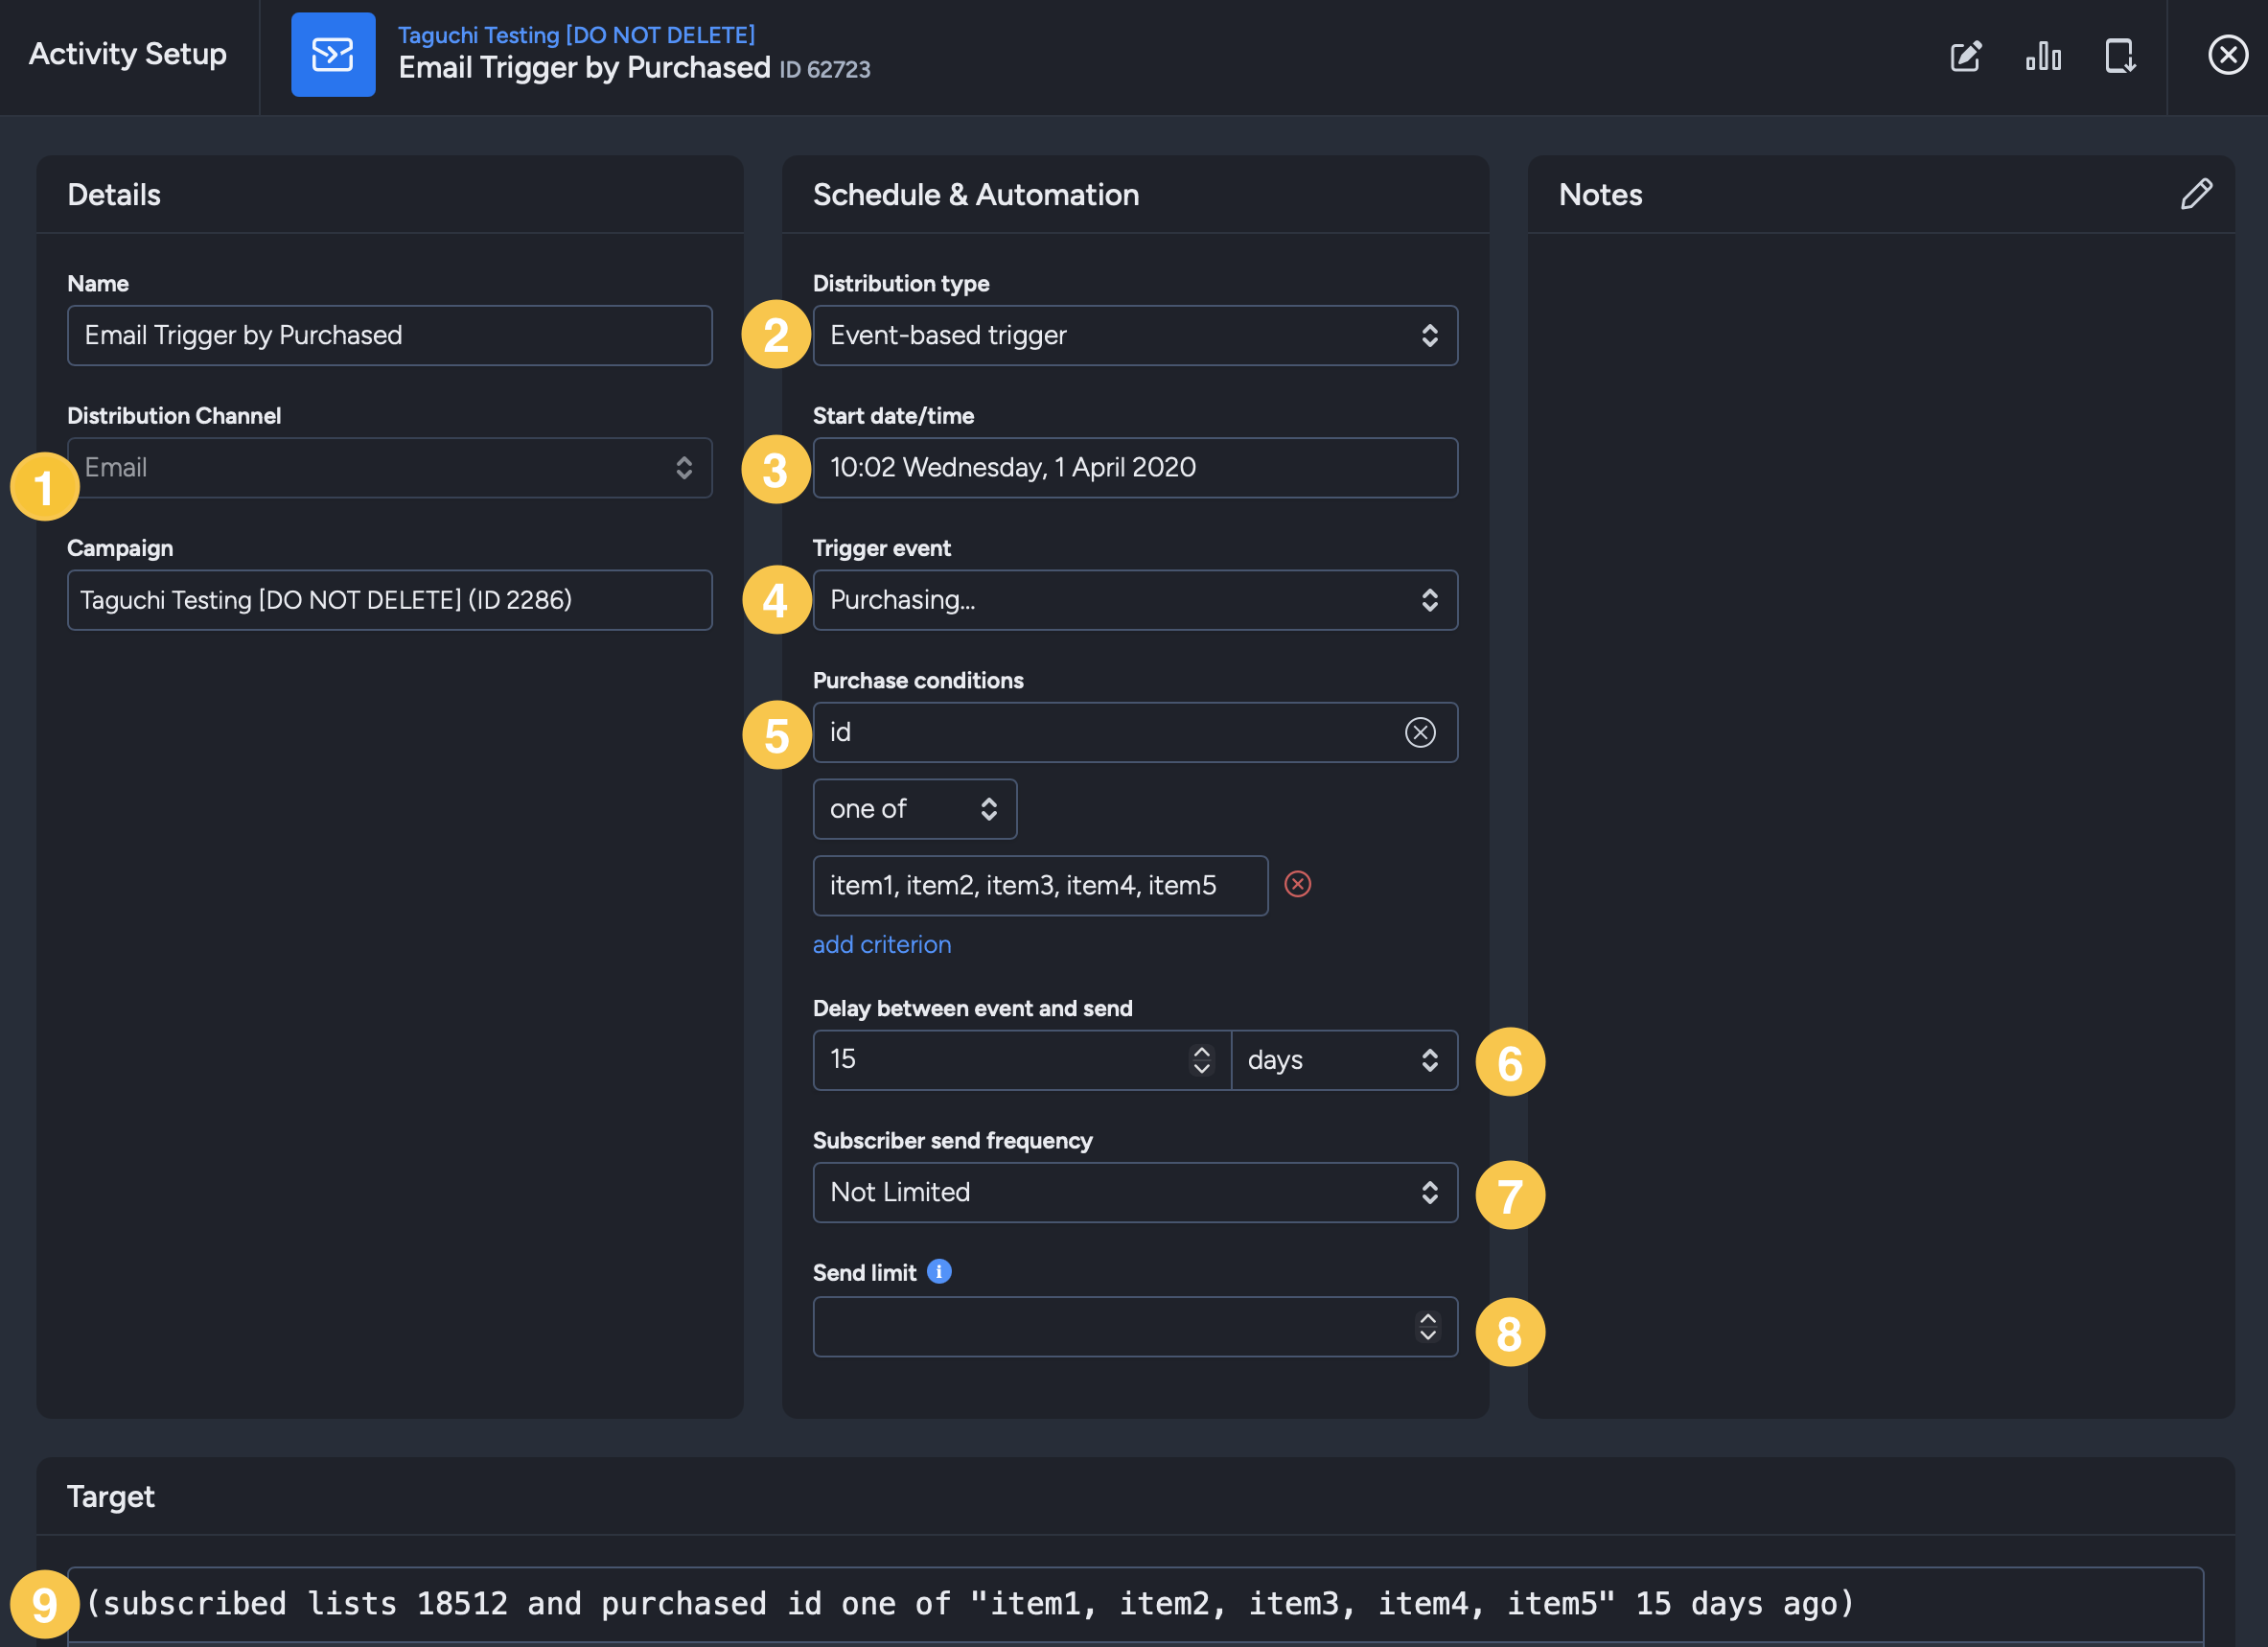
Channel: Email
Distribution Type: Select 'Event-based' trigger.
Start date/time: Select the date and time you want the trigger to start sending.
Trigger event: Select the event that triggers the send of the email, in this case you would select ‘purchasing’.
Purchase conditions: Set your target expression condition which in this case would be the items IDs that will trigger the activity to broadcast.
Delay between event and send: This determines how long after the trigger event the activity will be sent (e.g a subscriber purchased item1 1st of April, choosing a delay of '1 day' will cause the event-based trigger activity to be sent the next day - 2nd of April). In this case, we set it to 15 days after the item/s listed were purchased.
Subscriber Send Frequency: In this field, you can pick an option if it's 'not limited', 'send only once' or 'send once' every day/weeks/months/year.
Send Limit: You can use this field if you know how many recipients an activity should be sent to each time and you don't want to send it if there are more recipients than expected. If you leave this field blank, then this send limit won't apply. For instance, if there are 500 in this field and it targets subscriber list X which includes 1000 subscribers, the activity will not be sent at all. Note: send limit should only be used for triggers and not immediate or scheduled broadcasts
Target expression: input your desired targeting into the builder. For example, if you want to make sure you are contacting only those subscribed to your newsletter list, and have purchased the item IDs above, your target expression would be something like:
subscribed lists X and purchased id one of "item1, item2, item3, item4, item5" 15 days ago
Save the changes you make by clicking the save button.
If you set a frequent repetition cycle, remember to exclude subscribers who have already received the activity, otherwise the trigger will continue to send to the same subscribers. You can do this by adding
not sent activity X last Y daysto the target expression (where X is the activity ID).
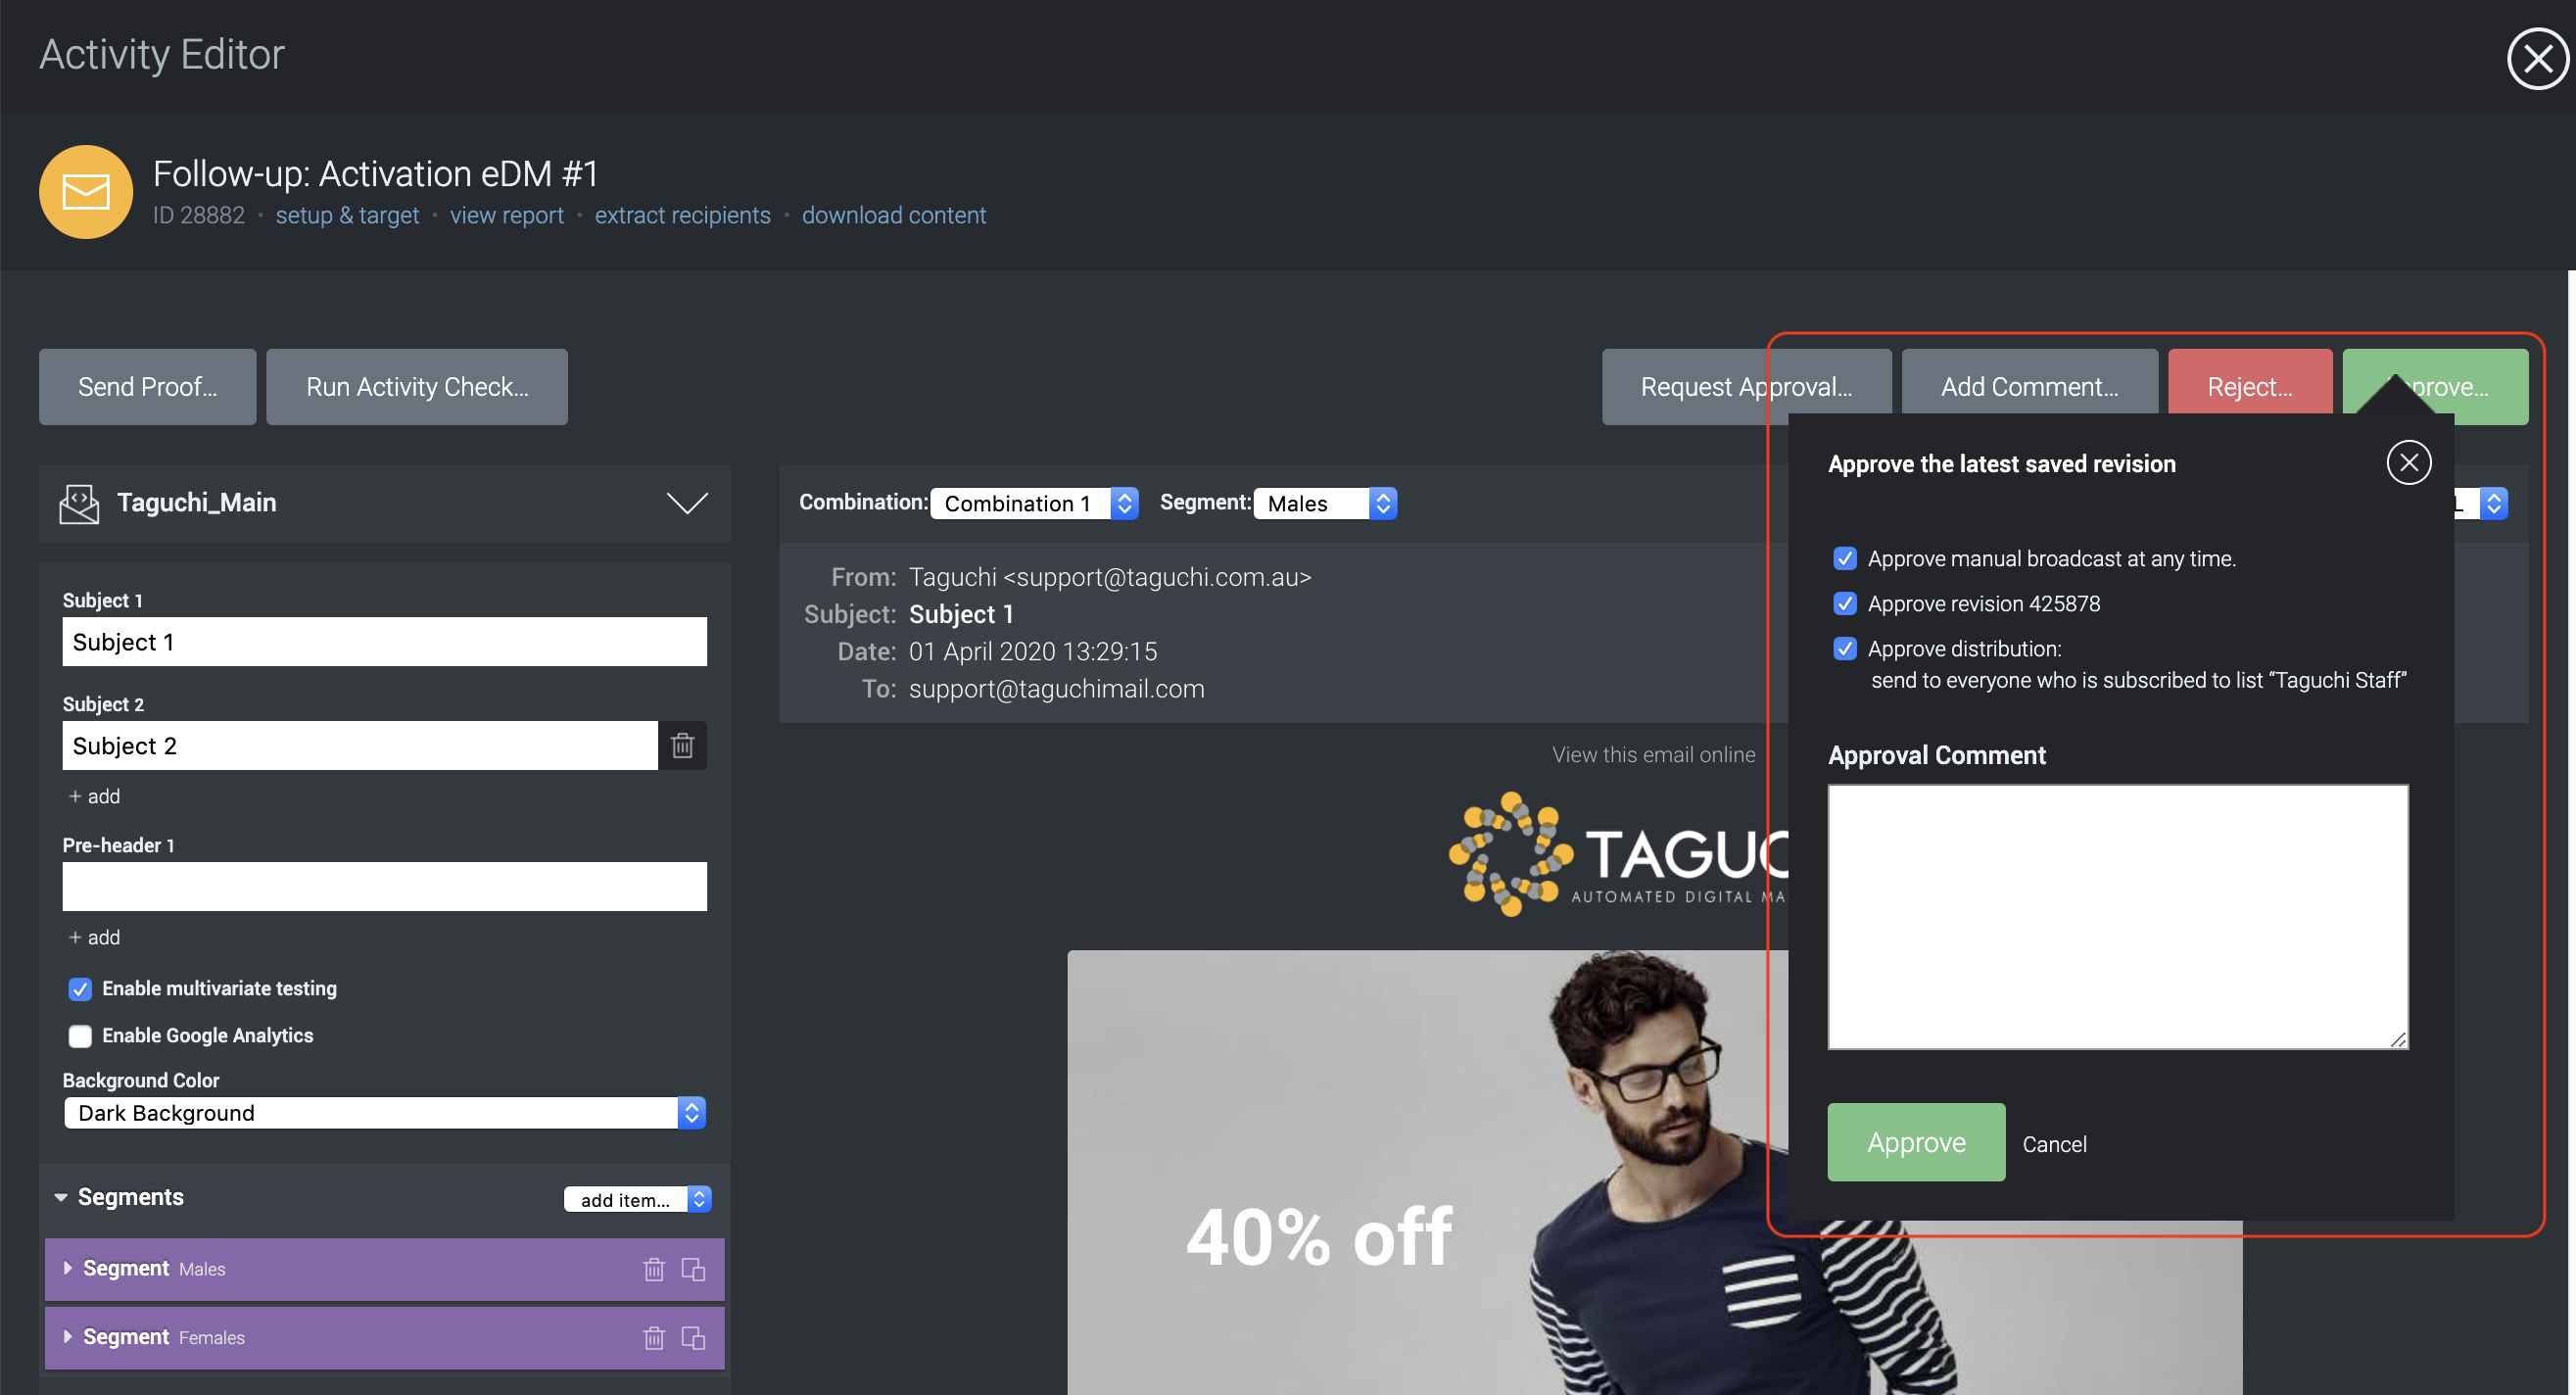
Approve and Deploy
Approve and deploy your activity to initiate the trigger by clicking the 'Approve' button.
A small box will appear. Confirm the revision, and schedule details and click approve.
Click on the 'Confirm Deployment' button

After you've clicked the button, a pop-up will appear where you can confirm your email target, approved revision ID, schedule and set the throttle rate.

- Once scheduled, the following box should appear at the top of your activity editor.
