- Support Home
- Knowledge Base
- Campaigns And Activities
- Content
- Edit images with Taguchi's in-built image editor.
Related articles
Need some help?
If you have questions or can't find what you're looking for, we're here to help.
Taguchi Support is available 24 hours a day, Monday to Friday.
Create New TicketTaguchi Certified Training
Join our free and live online training sessions. You'll benefit from a better understanding of the platform's features and functionality. Plus with Taguchi Certified Rewards, every session you attend, you're not just learning - you're earning your way to some fantastic rewards.
About Taguchi Certified RewardsAPI Version 5
Did you know Taguchi has an API that supports all of the functionality provided by the admin interface and more?
Explore API Documentation
Thanks for your feedback!
Edit images with Taguchi's in-built image editor.
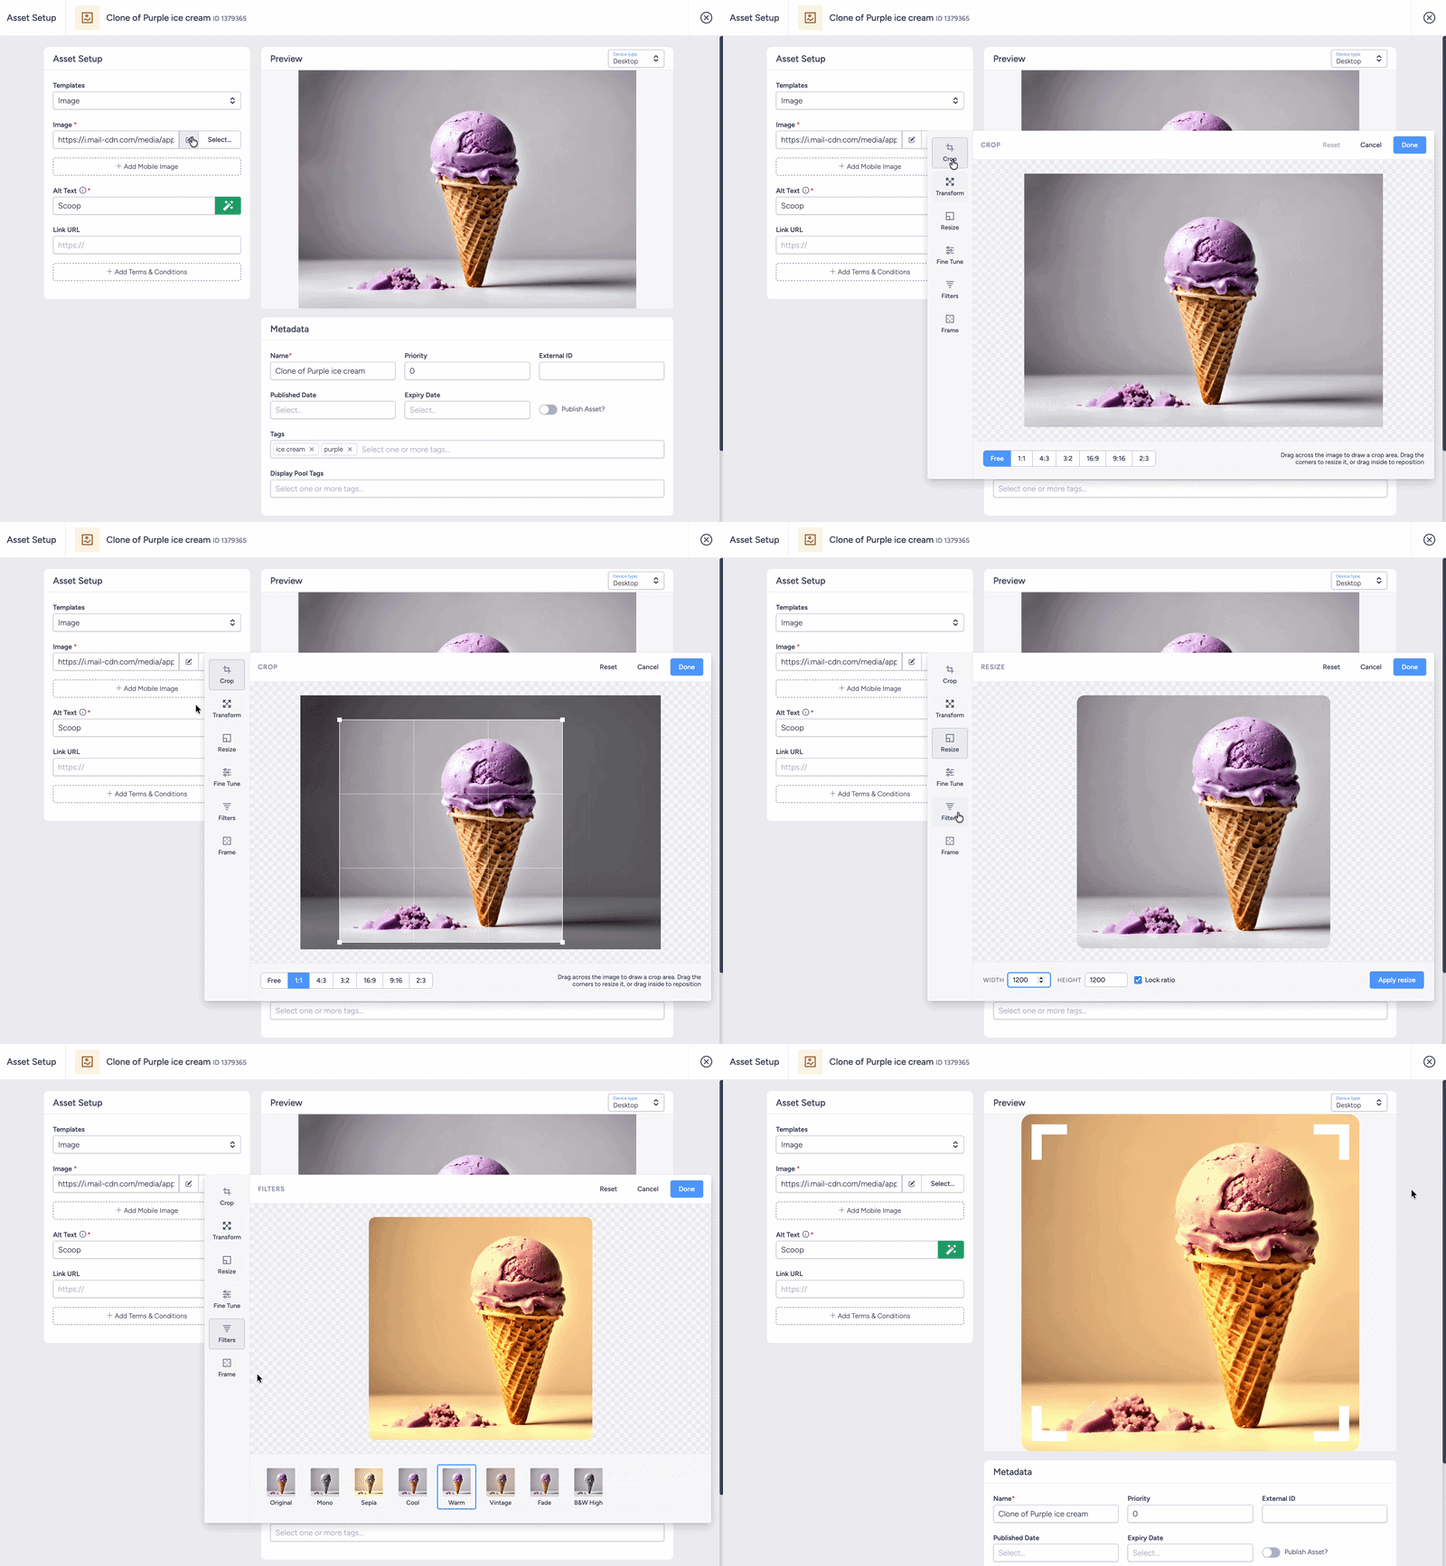
The image editor lets you modify images directly within Taguchi — no external tools required. You can crop, resize, fine-tune, add filters and add frames to any image uploaded via an image field.
Availability
- Works on any image uploaded using an image field.
- Works anywhere in Taguchi — not just inside the activity editor.
- Does not support animated GIFs — the image editor is unavailable for animated GIF files.
How to Open the Image Editor
- Select an image field within your activity or content block.
- Upload or select an existing image.
- Click the Edit Image button that appears alongside the image field.
The image editor will open with the selected image ready to edit.
Image Editor Tools
Crop
Use the crop tool to trim unwanted areas from the image. Drag the crop handles to define the region you want to keep, then apply the crop.
Transform
Rotate, flip or add rounded corners to your image. You can set a specific radius for the image.
Resize
Adjust the dimensions of the image. You can set specific pixel dimensions or scale the image proportionally.
Fine-Tune
Fine-tuning controls let you adjust visual properties such as brightness, contrast, saturation and sharpness to get the image looking exactly right.
Filters
Apply a preset filter to change the overall look and feel of the image. Filters are a quick way to create a consistent visual style.
Frames
Add a decorative frame or border around your image to make it stand out within your email content.
Saving Your Changes
Once you are happy with your edits, click Apply (or Save) to confirm your changes. The updated image will replace the original in the field.
To discard your edits, click Cancel to close the image editor without saving.
If you have additional questions or require further assistance with the image editor, please contact Taguchi Support.