- Support Home
- Knowledge Base
- Triggers And Automation
- Retention And Win Back
- Lapsing Trigger
Related articles
Need some help?
If you have questions or can't find what you're looking for, we're here to help.
Taguchi Support is available 24 hours a day, Monday to Friday.
Create New TicketTaguchi Certified Training
Join our free and live online training sessions. You'll benefit from a better understanding of the platform's features and functionality. Plus with Taguchi Certified Rewards, every session you attend, you're not just learning - you're earning your way to some fantastic rewards.
About Taguchi Certified RewardsAPI Version 5
Did you know Taguchi has an API that supports all of the functionality provided by the admin interface and more?
Explore API Documentation
Thanks for your feedback!
Lapsing Trigger
A lapsing trigger is used to re-engage lapsed customers, subscribers who have not purchased within a defined period (e.g. 6 months) or who are at risk of becoming inactive.
This trigger helps identify customers who are starting to lapse so they can be targeted before they fully disengage. It can also include subscribers who have not received any recent marketing activity, depending on your setup.
Common use cases include re-engaging lapsed customers with category-based recommendations aligned to previous purchase behaviour, along with incentives such as discounts or free shipping.
This trigger uses conversion data. If your organisation does not have conversion data set up, this trigger will fail. Learn more about setting up conversion data within Taguchi.
Suggested Set-up
| Send Date / Time | User defined. |
| Repeat | Select 'Daily' to evaluate lapsed customers once per day. |
| Target Expression | purchased and not purchased last 6 months and not sent activity X last 6 monthsLearn more about these target expressions |
Instructions
Begin by either setting up a new activity, or editing an existing activity. We recommend keeping your triggers separate from other emails in their own campaign folder.
If you are setting up a new activity, click the 'New Activity' button in a campaign folder to set up a new activity. A setup screen will appear.
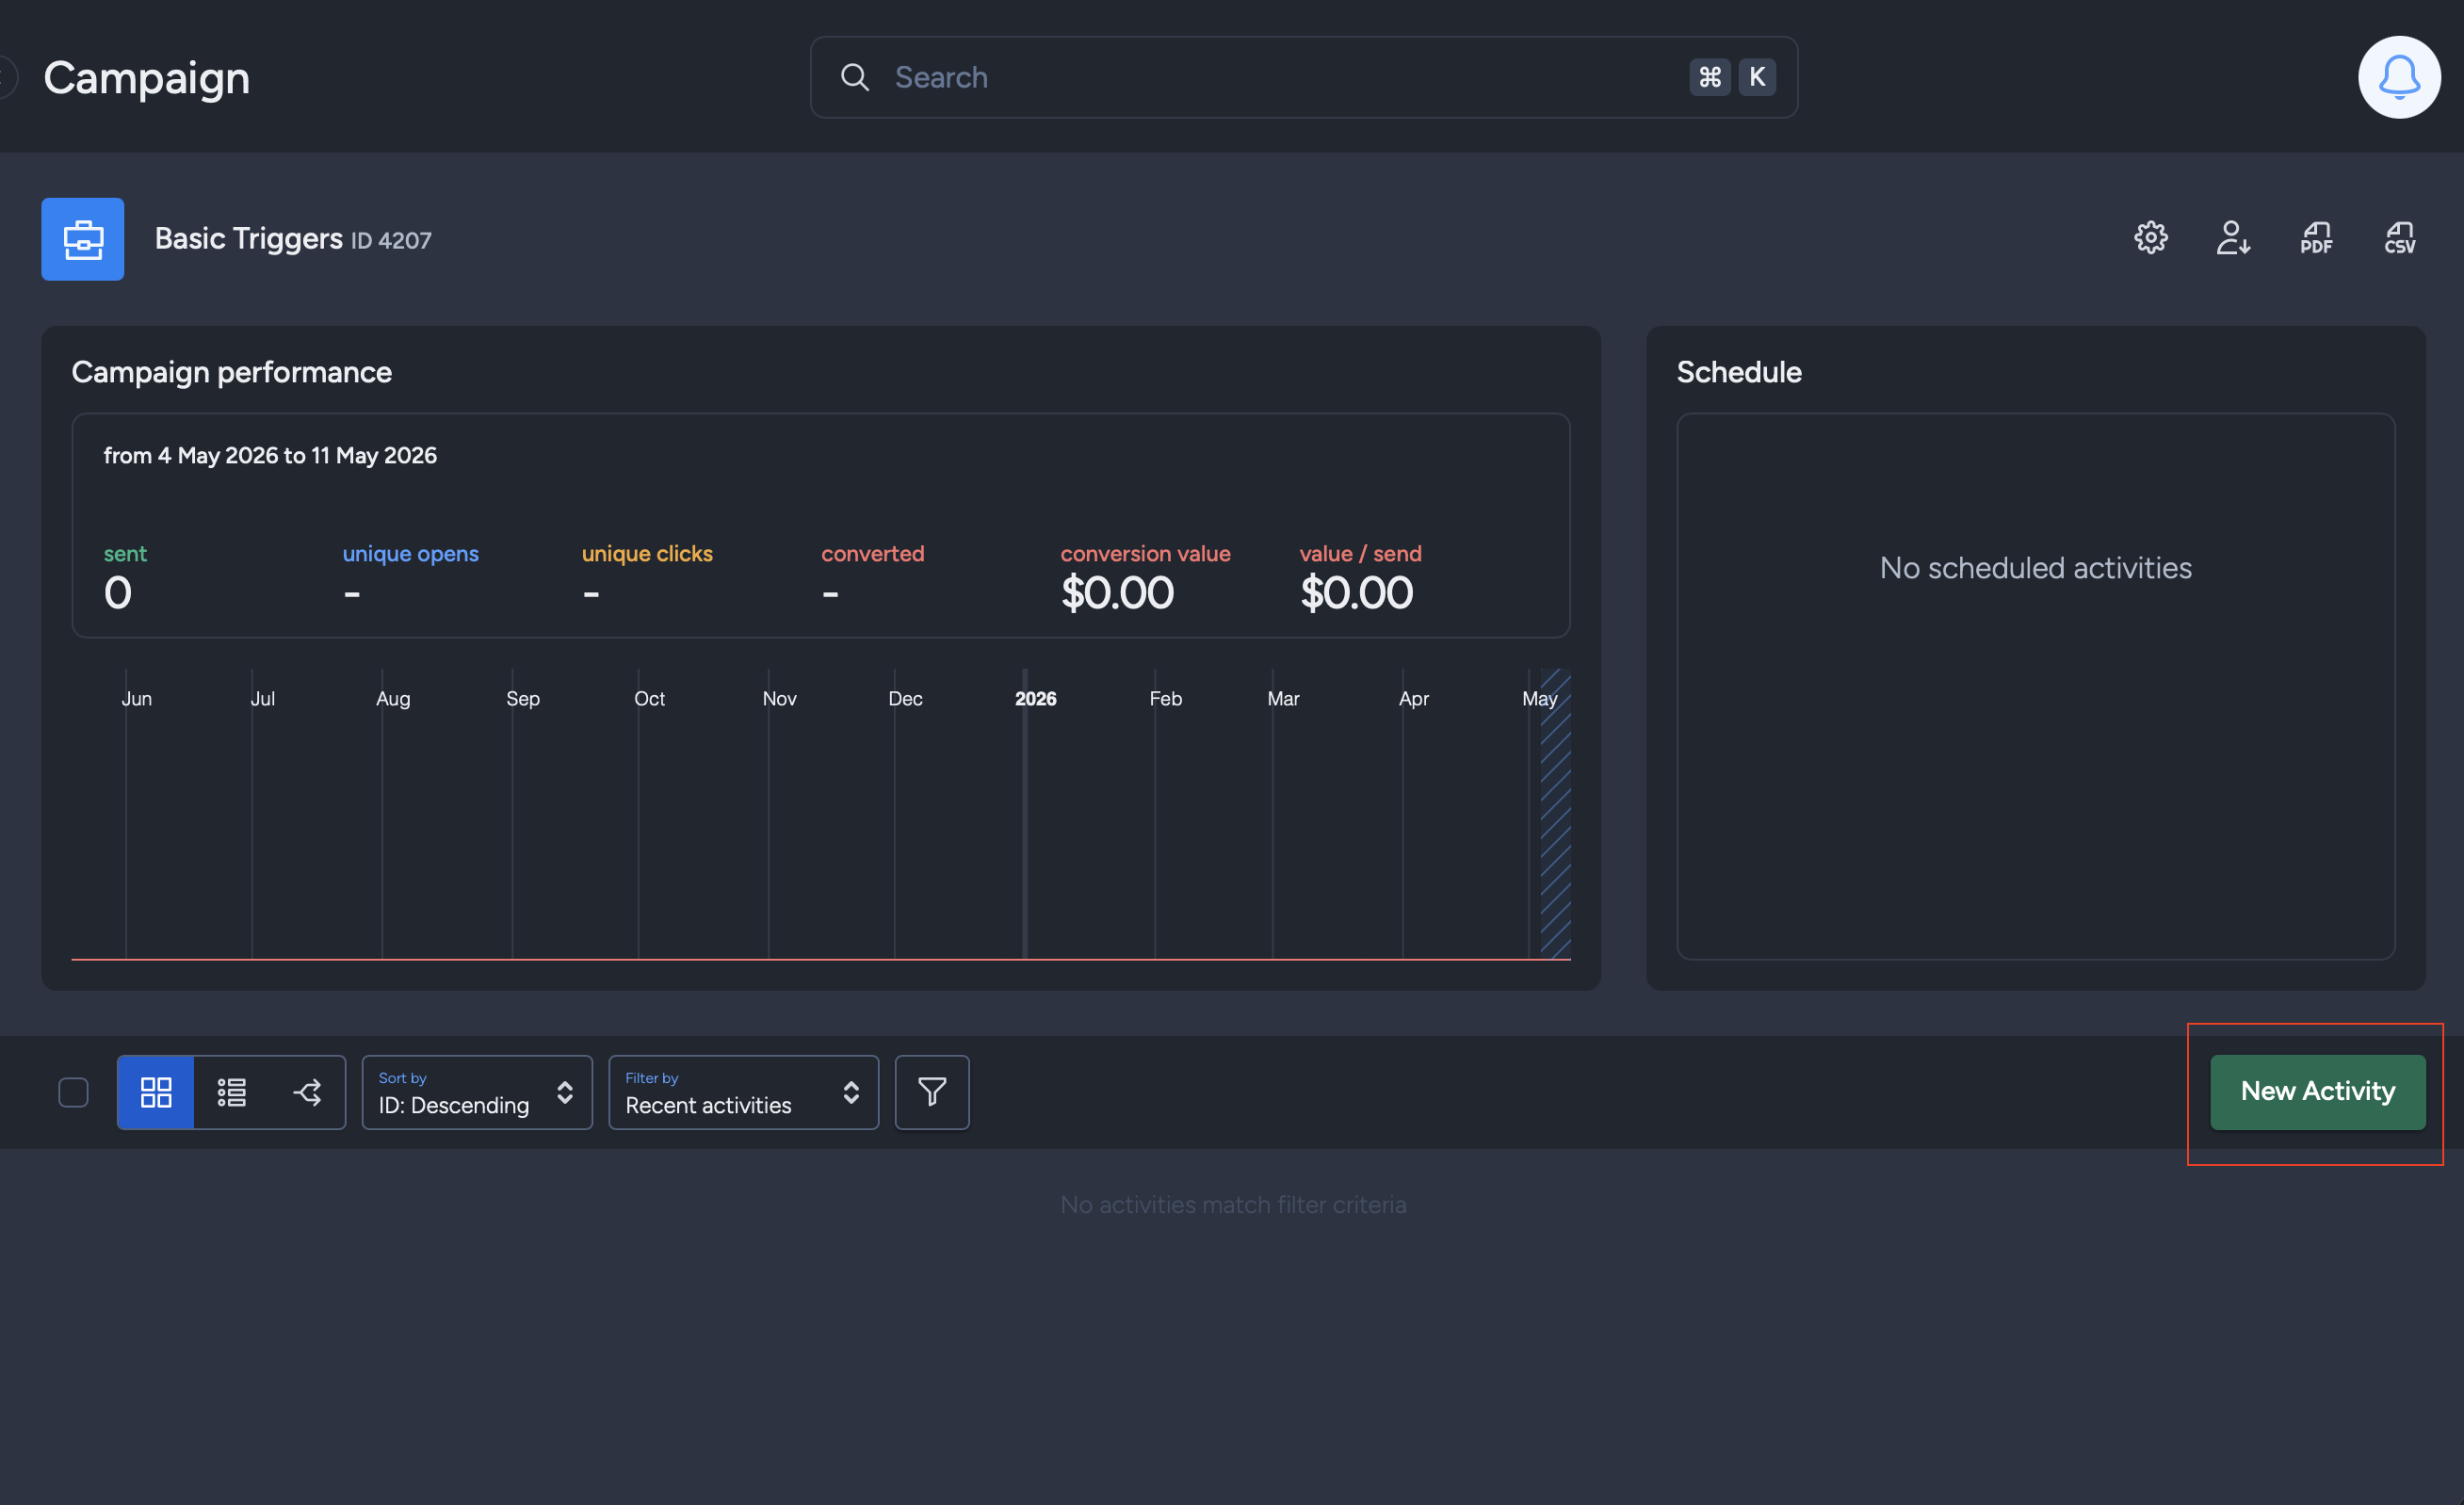
If you are editing an existing activity, simply navigate to the setup screen by either clicking the 'gear' icon in the activity card actions or within the activity header.

The setup screen will appear with activity options. From here you can set the following options:
- Distribution Type: Scheduled trigger
- Date: Select your own date and time for when you wish the trigger to start. The most important part is the time as this will be used by the repetition option to determine when to send the trigger each hour.
- Trigger Interval: Choose 'Hourly', 'Daily', 'Weekly' or 'Monthly' depending on your intended trigger schedule.
- Subscriber Send Frequency: Choose how often a subscriber can receive this trigger (commonly 'send only once' for lapsed re-engagement)
- Send Limit: You can use this field if you know how many recipients an activity should be sent to each time and you don't want to send it if there are more recipients than expected. If you leave this field blank, then this send limit won't apply. For instance, if there are 500 in this field and it targets subscriber list X which includes 1000 subscribers, the activity will not be sent at all.
Note: send limit should only be used for triggers and not immediate or scheduled broadcasts
Save the changes you make by clicking the save button.
Step 2: Edit Activity Content
Lapsed customer campaigns typically focus on re-engagement messaging such as:
- “We miss you” messaging
- Relevant product or category-based recommendations based on purchase history
- Discounts or special comeback offers
- Loyalty or rewards reminders
You may also use multivariate testing or A/B split testing to compare different message variations.
Step 3: Set Target Expression
Click on the 'gear' icon within the activity header, the target expression builder will appear. Simply paste the following target expression into the input field at the top:
purchased and not purchased last 6 months and not sent activity X last 6 months
This targets lapsed customers who have previously purchased but have not purchased in the last 6 months and have not already been sent this trigger in the last 6 months (replace X with the activity ID of this trigger). You can change the date range from months, to days, to years.
To also exclude subscribers who have not received any recent marketing activity:
purchased and not purchased last 6 months and not sent any last 6 months
You can adjust the timeframe depending on how your organisation defines a “lapsed customer”.
For more information on target expressions and more lapsing target expression options, please refer to the Target Expression Reference.
Approve and Deploy
Approve and deploy your activity to initiate the trigger. If you have scheduled a date/time in future, it will commence broadcasting the trigger on that date/time.
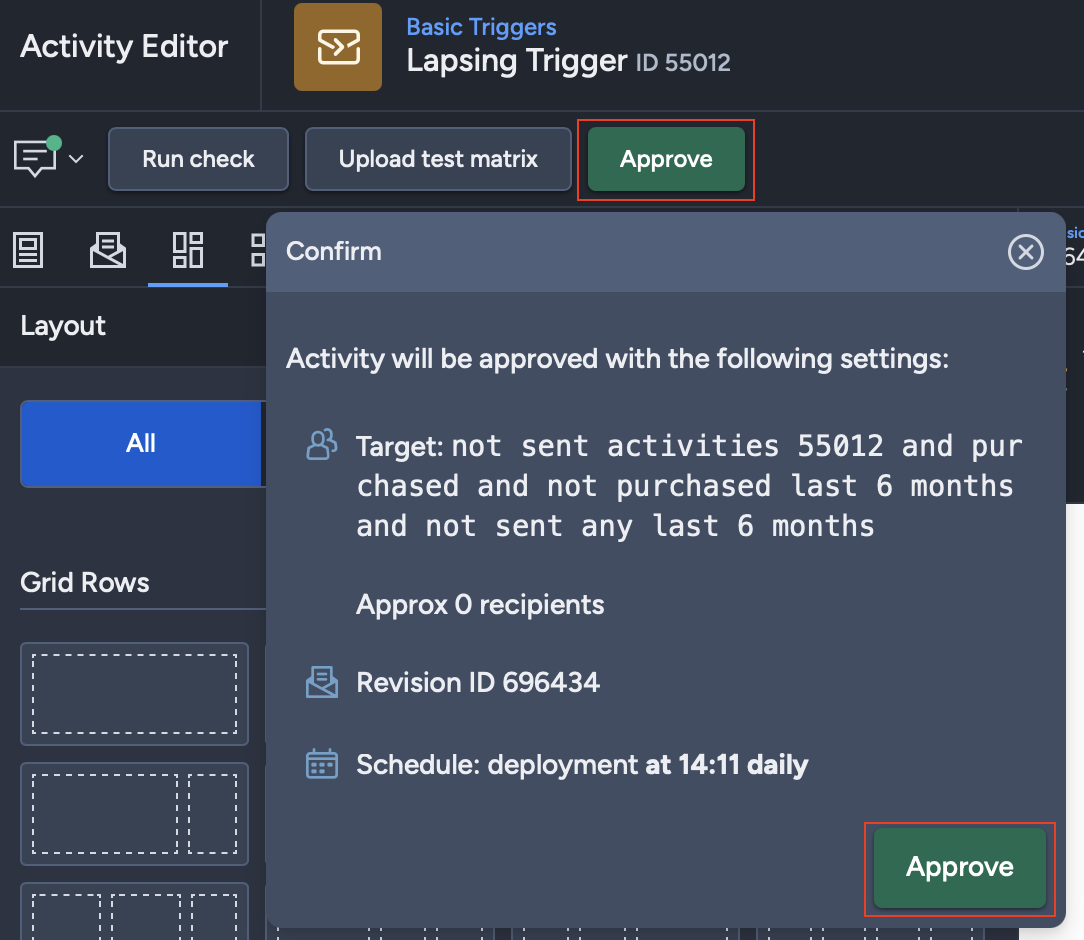
- Click on 'Approve' to approve the activity. A pop-up modal will appear showing your target expression, revision ID and your schedule.
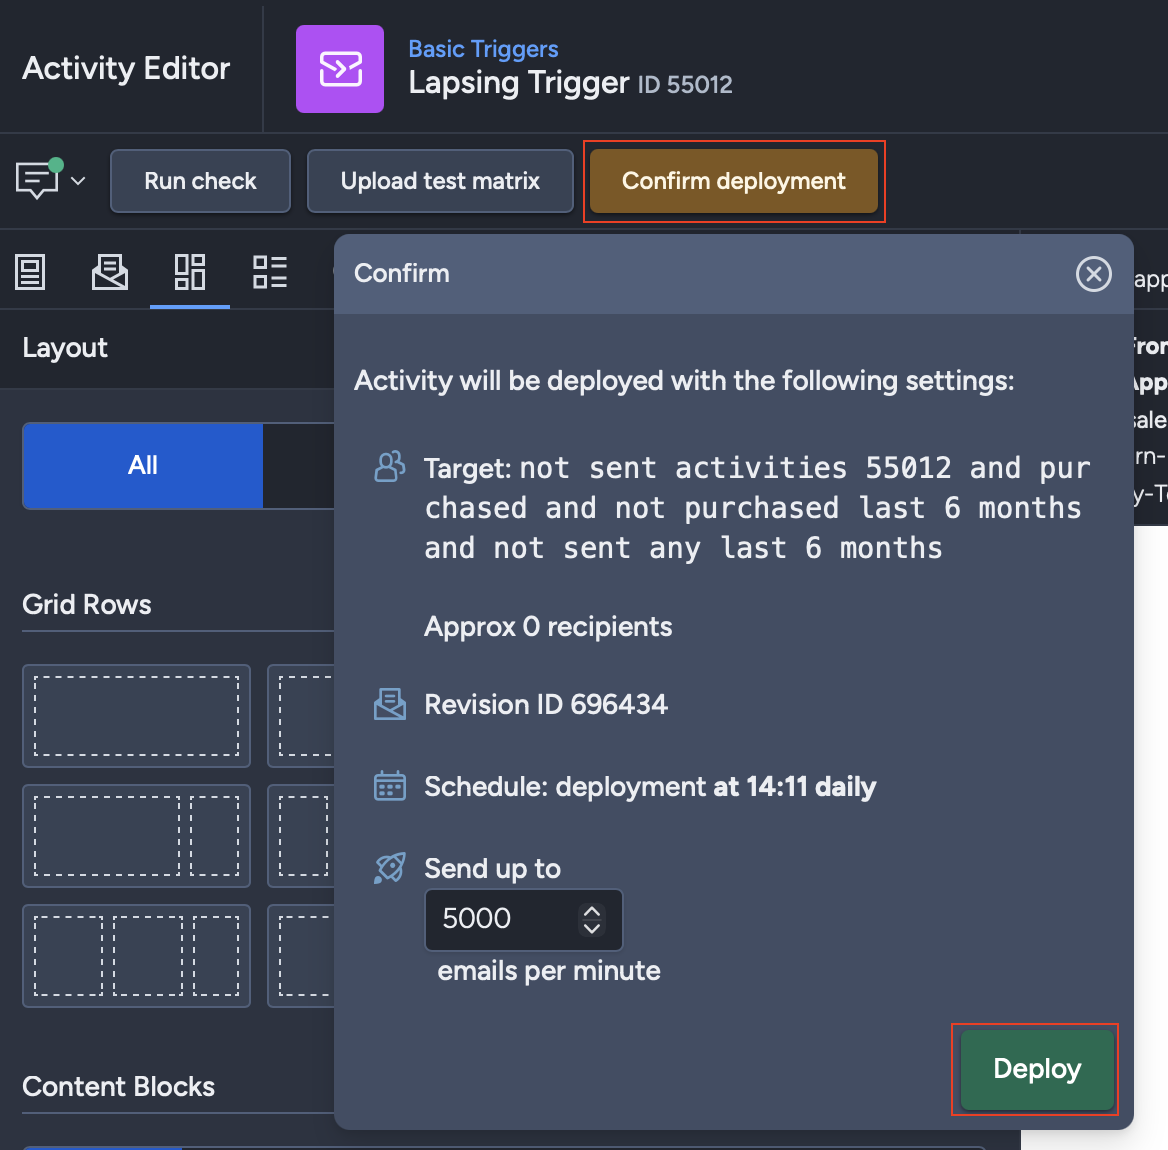
- Once approved, a 'Confirm Deployment' button should appear in the activity panel. Click on the button to confirm your target expression, revision ID, schedule and the throttle limit.
- After it's been deployed, two red buttons showing 'Cancel Deployment' and 'Suspend' should appear. The throttle rate will be displayed together with the number of sends that have yet to be broadcasted.

If you have additional questions or require further assistance regarding Lapsing Trigger, do not hesitate to reach out to Taguchi Support