- Support Home
- Knowledge Base
- Subscriber Management
- Subscriber Profiles
- Setting up Custom Fields in Taguchi
Setting up Custom Fields in Taguchi
"Custom fields" are customised data fields that you can use to tailor your campaigns to individual recipients. They are typically created when you have specific data requirements that are not covered by the standard fields provided by Taguchi. These fields can be used to personalise content and segment your campaigns based on recipient’s information, providing a more personalised and relevant communication.
Before introducing new custom fields via an import into a subscriber list, you will need to create these custom fields in the Custom Field area of Taguchi.
To create and manage custom fields, you must have Database Permissions. Refer to this link on Different User types and Role privileges
Step 1: Creating custom fields
- Go to Settings > Custom Fields
- To create a new custom field, click on the green Add new field button

Step 2: Setting up the Custom Field
- The Custom Field Setup is then displayed. There are two types of custom fields, static type and calculated type.
- First, input values as following:
- Field name – the name of the custom field
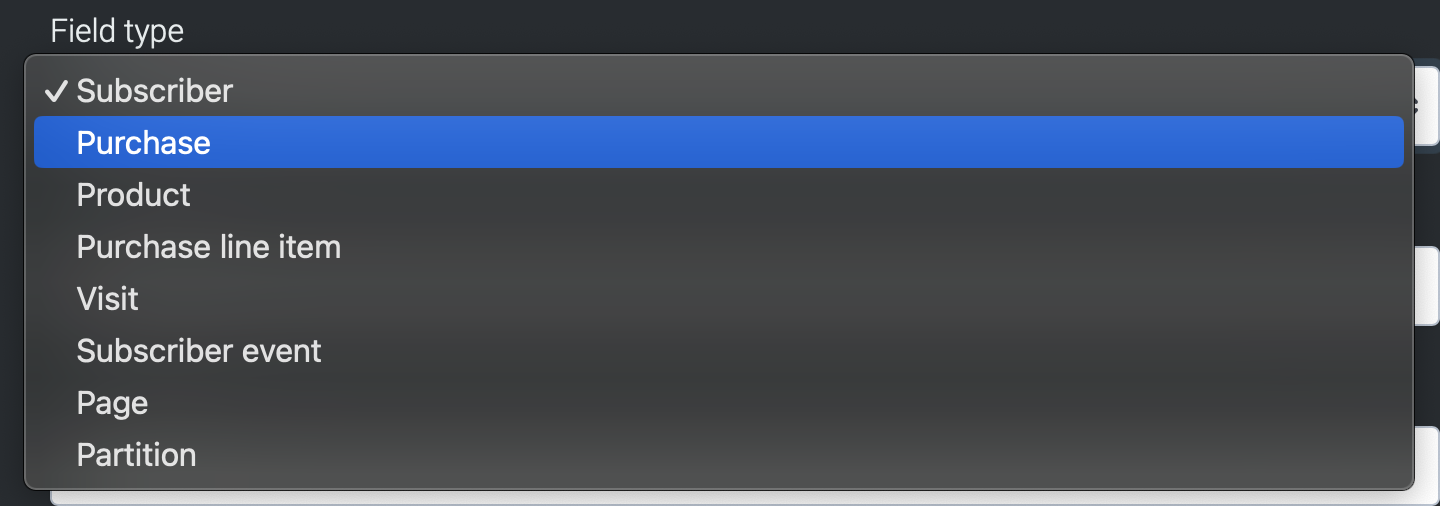
- Field type
- Subscriber - allows you to store and manage information related to individual subscribers. This could include their contact details, preferences
- Purchase - used to capture information related to a specific purchase made by a subscriber. It might include details such as the order number, purchase date, or the total amount spent.
- Product - used to store information about individual products or items. This could include the product name or type.
- Product Line Item - used to capture data related to individual items within a purchase. It can include details like the product name, quantity, price.
- Visit - used to store data associated with a subscriber's visit to a website or a physical store. This might include the visit date, duration, or the pages visited.
- Subscriber Event - used to track specific events or interactions initiated by a subscriber. This could include event names, timestamps, or details about the events.
- Page - used to capture data related to specific web pages. This might include the page title or an URL.
- Partition - used to categorise units that facilitate data segmentation and organization. This might include customized groupings of subscribers based on their purchase behavior, geographical location, or preferences
Group name – to categorise and easily locate custom fields in related categories on subscriber profiles. This feature is primarily for user interface clarity and doesn't affect the functionality or values of the fields. For instance, assigning the Group name Security Awareness will gather all associated custom fields in the customer profile and target expression for easier management and access.
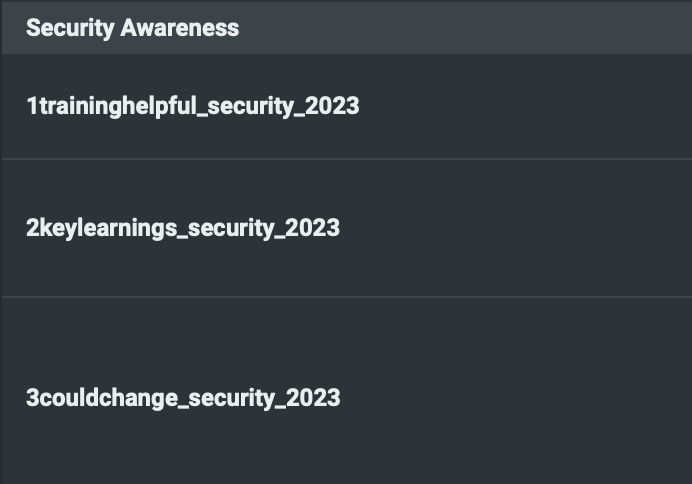
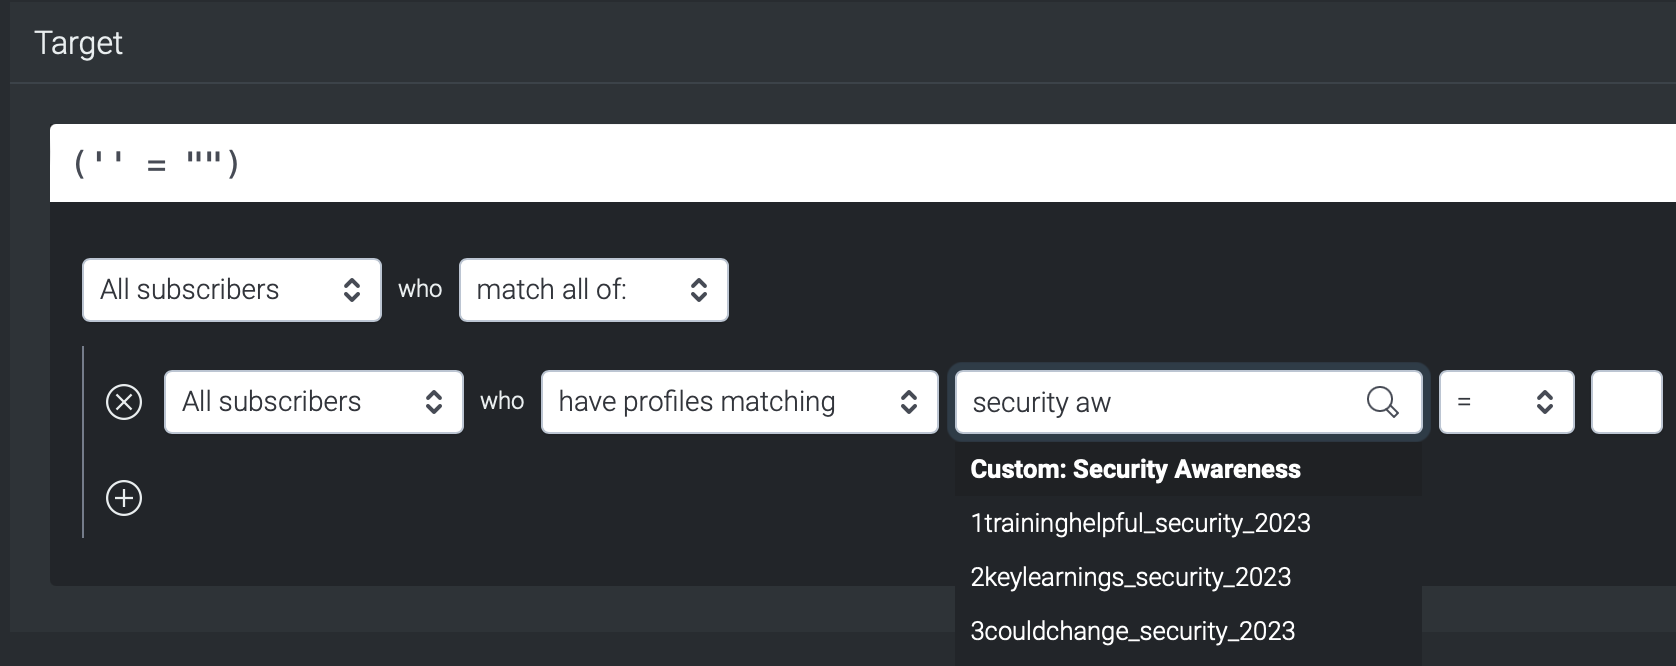
Description – a brief description on what the the custom field is and used for. (e.g. the type and format of values stored in the custom field) This feature is primarily for user interface clarity and doesn't affect the functionality or values of the fields, and is visible in the Customer profile as well as target expression. Example shown as below.
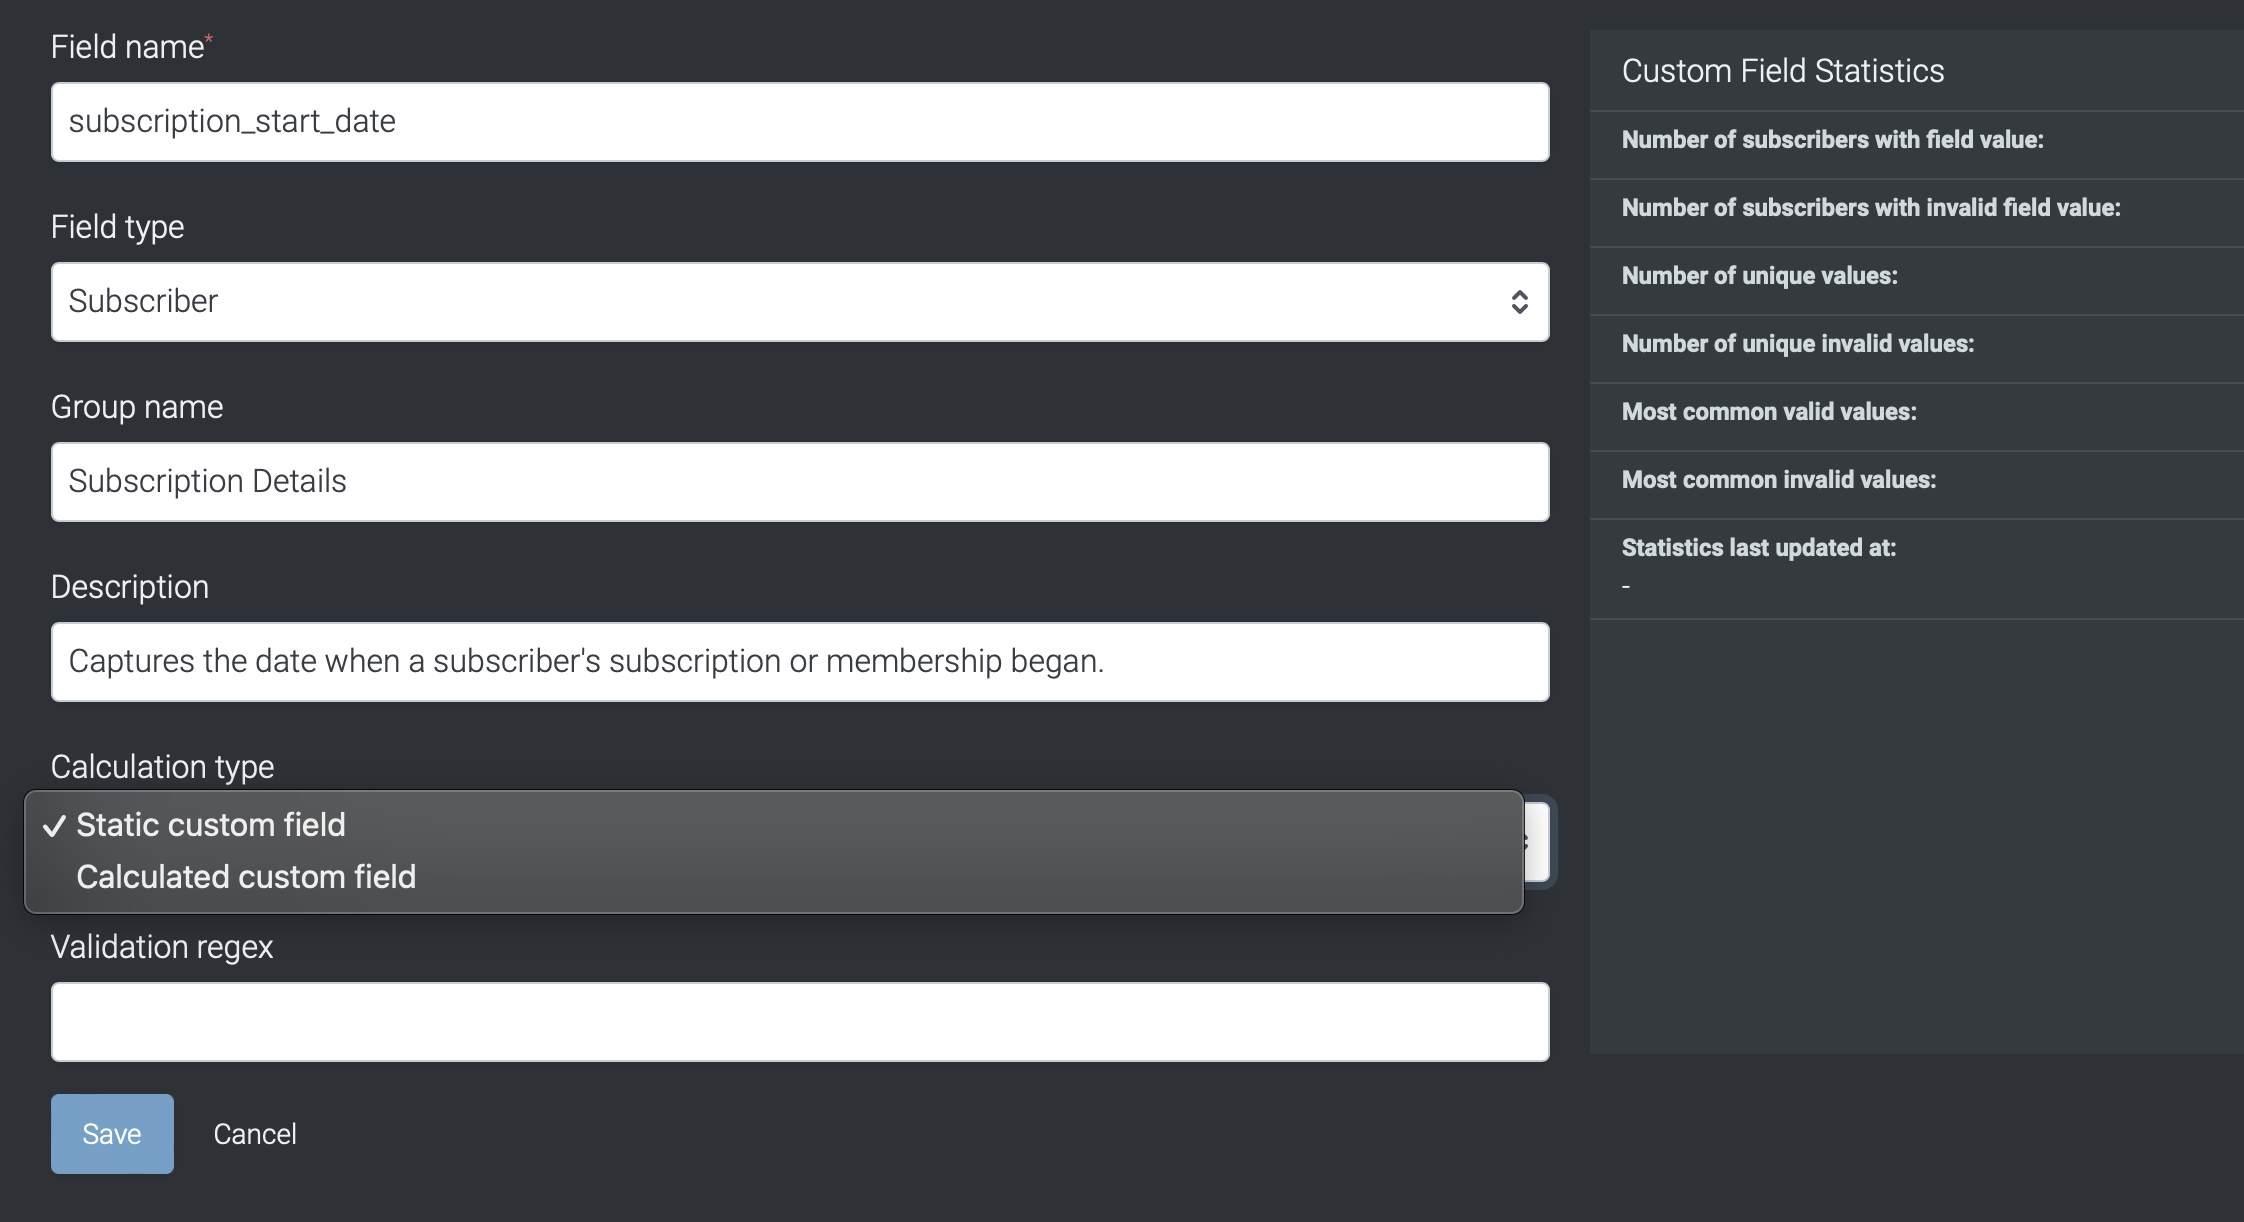
Calculation type - There are two types of Custom fields, Static and Calculated. Static Custom Fields store predefined information with enforced validation rules (regex) and optional input, while Calculated Custom Fields require configuration of target expressions, rules, and have periodic updates based on criteria, clearing or replacing values as needed.
Static custom field
Stores specific, predefined information that have validation rules enforced through a regulated expression (regex).The validation regex is optional and can be left blank.
Below is an example of a Validation regex pattern for a custom field representing a date of birth in the "YYYY-MM-DD" format: ^\d{4}-\d{2}-\d{2}$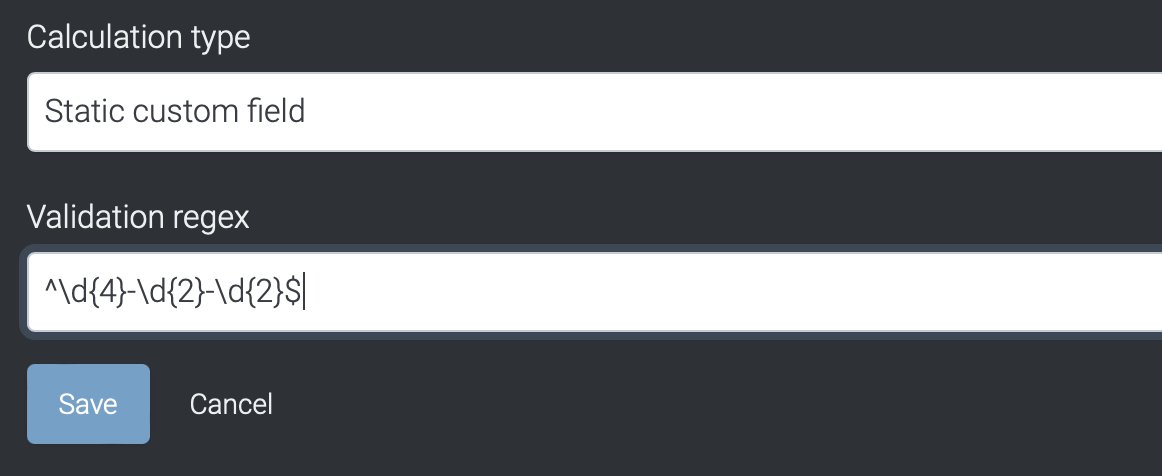
This simplified pattern breaks down as follows:
^ and $: Indicates the start and end of the string.
  \d{4}: Represents the year portion and expects exactly four digits.
  \d{2}: Represents the month and day portions. Each \d{2} expects exactly two digits.
      -: Expects a hyphen "-" between the year, month, and day.
Refer to this article on POSIX Regular Expression Operators which could assist you in perform various matching operations using regular expressions. (regex)
Calculated Custom Field (CCF)
A Calculated Custom Fields (CCF) is a dynamic feature in Taguchi that automates the calculation and updating of subscriber data based on specific rules and target expressions. This functionality enhances real-time data segmentation, tagging, and personalization, allowing you to effectively manage and utilize subscriber information.
Check out our CCF templates to explore various configured templates!
To configure a CCF, you'll need to input the following parameters in addtional to the ones mentioned above:
Target Expressions: Criteria or conditions used to filter subscriber data. For instance, a target expression might identify subscribers who have not made any purchases in the last three months.
Refer to this link to find out target expression references!
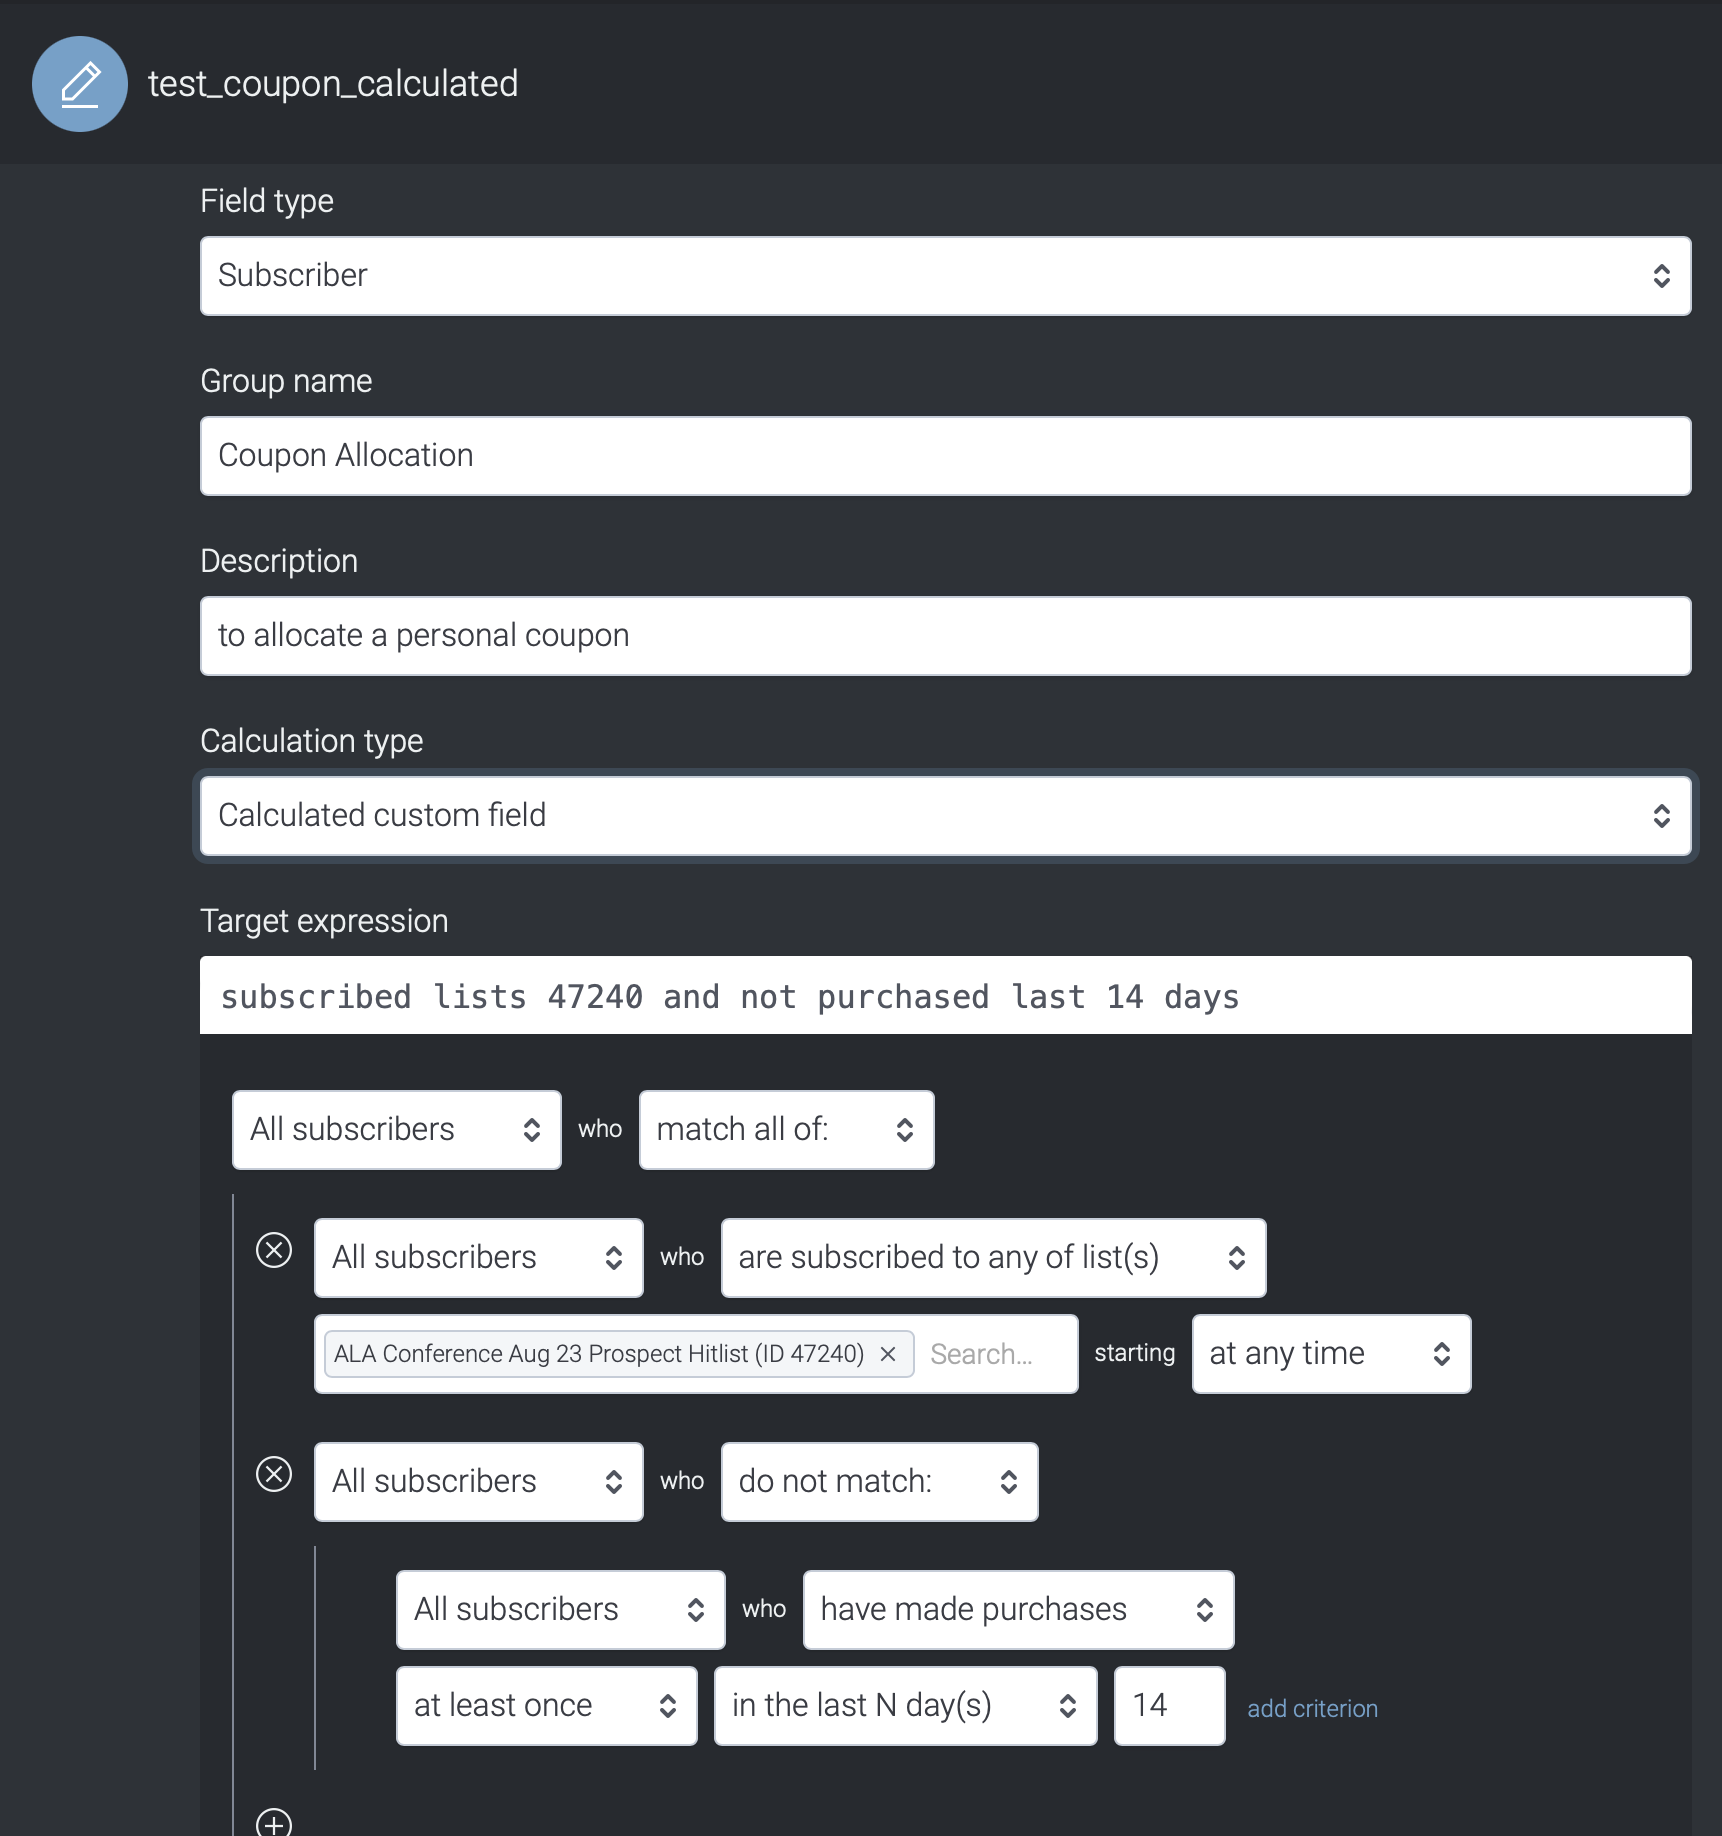
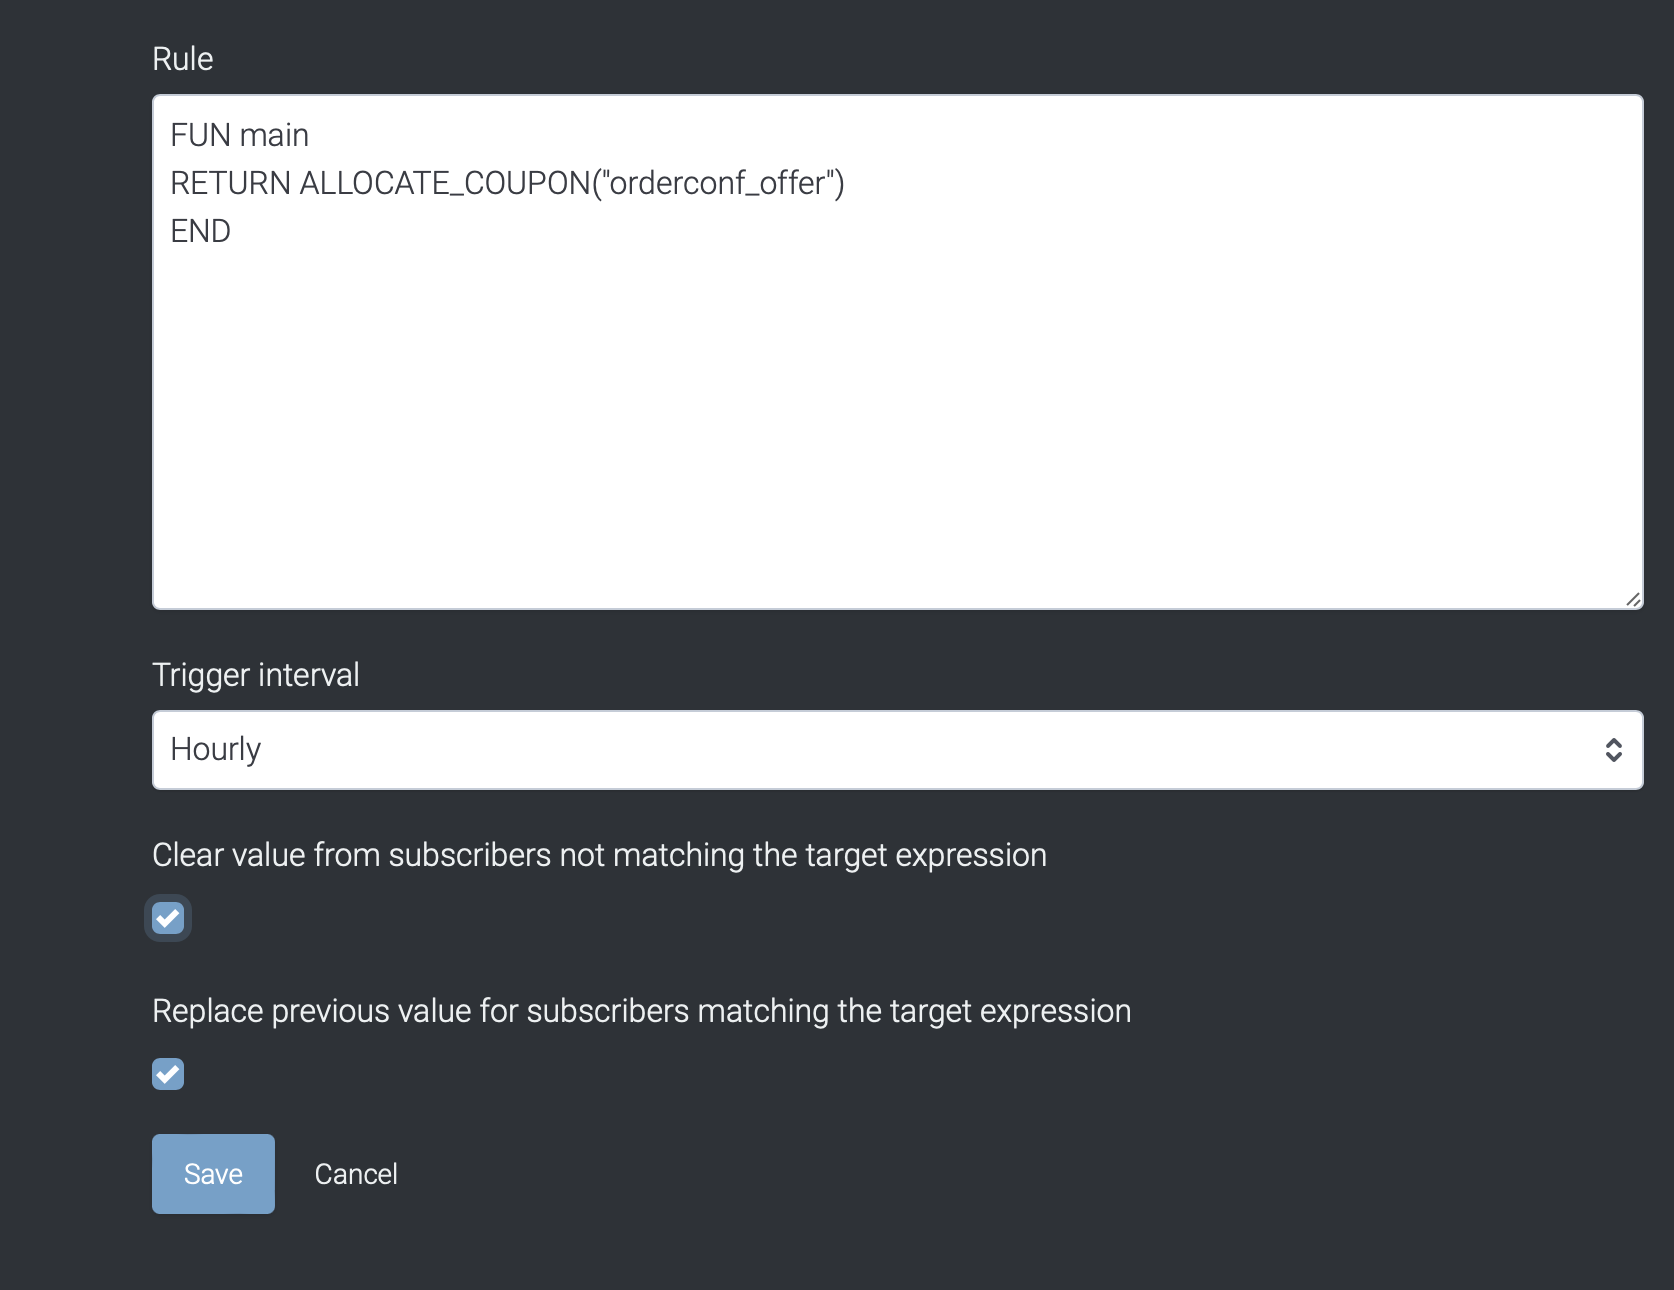
Rules: Define how the CCF calculates or derives its values based on the target expressions. These rules are scripts that automatically tag or categorize subscribers based on whether their data meets the target expression criteria. Refer to this article to find out the different use cases using CCF rules.
For additional guidance on creating CCF rules, you can contact Taguchi Support.
Trigger Interval: Determines how often the CCF updates its values. Choose Once for a one-time calculation or Daily for ongoing updates.
- Recommendation: For testing, select Once. For regular use, opt for Daily updates rather than hourly, as frequent updates may delay the "Statistics last updated at" timestamp.
- Note: A CCF set to trigger 'Once' will not recalculate automatically after its initial execution. To trigger recalculation, set the interval to 'Monthly' or 'Hourly,' save, then revert to 'Once' and save again.
Clear Value from Subscribers Not Matching: This option removes or clears the custom field value for subscribers whose data no longer meets the target expression criteria during recalculation.
Replace Previous Value for Subscribers Matching: This ensures that subscribers whose data matches the target expression criteria receive an updated custom field value upon recalculation. Subscribers will retain their assigned value unless their data no longer meets the criteria.
Stop Recalculating: To halt a CCF from recalculating, change the field type from "Calculated Custom Field" to "Static."
Note: The "Statistics last updated at" timestamp indicates the last update date but does not reflect ongoing recalculations. Changing the field type to "Static" stops further recalculations, regardless of the timestamp displayed.
Click Save to create the custom field.
Check out this link to find out the Best Practices when creating Custom Fields.
For detailed examples and use cases of Calculated Custom Fields, refer to the Calculated Custom Field Use Cases documentation.
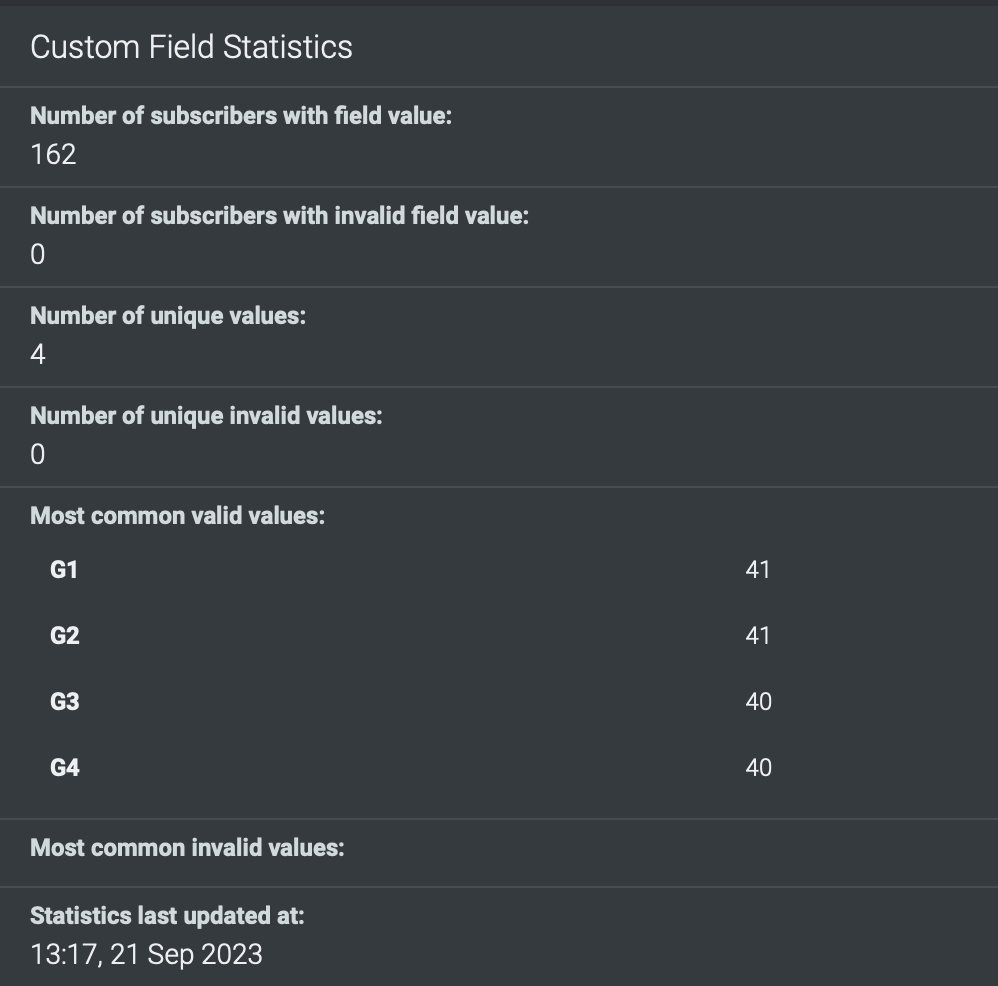
Custom Field Statistics
- Provides a snapshot of subscriber data, including valid and invalid field values, unique value counts, common valid and invalid values, and the timestamp of the last update.
- The Most common valid values data will only appear when the custom field has finished calculating, and is tagged with subscriber profiles containing the respective values."
Manage Custom fields
- Once you click Save you will return to the Custom Fields page. Here you can view and manage all your custom fields.
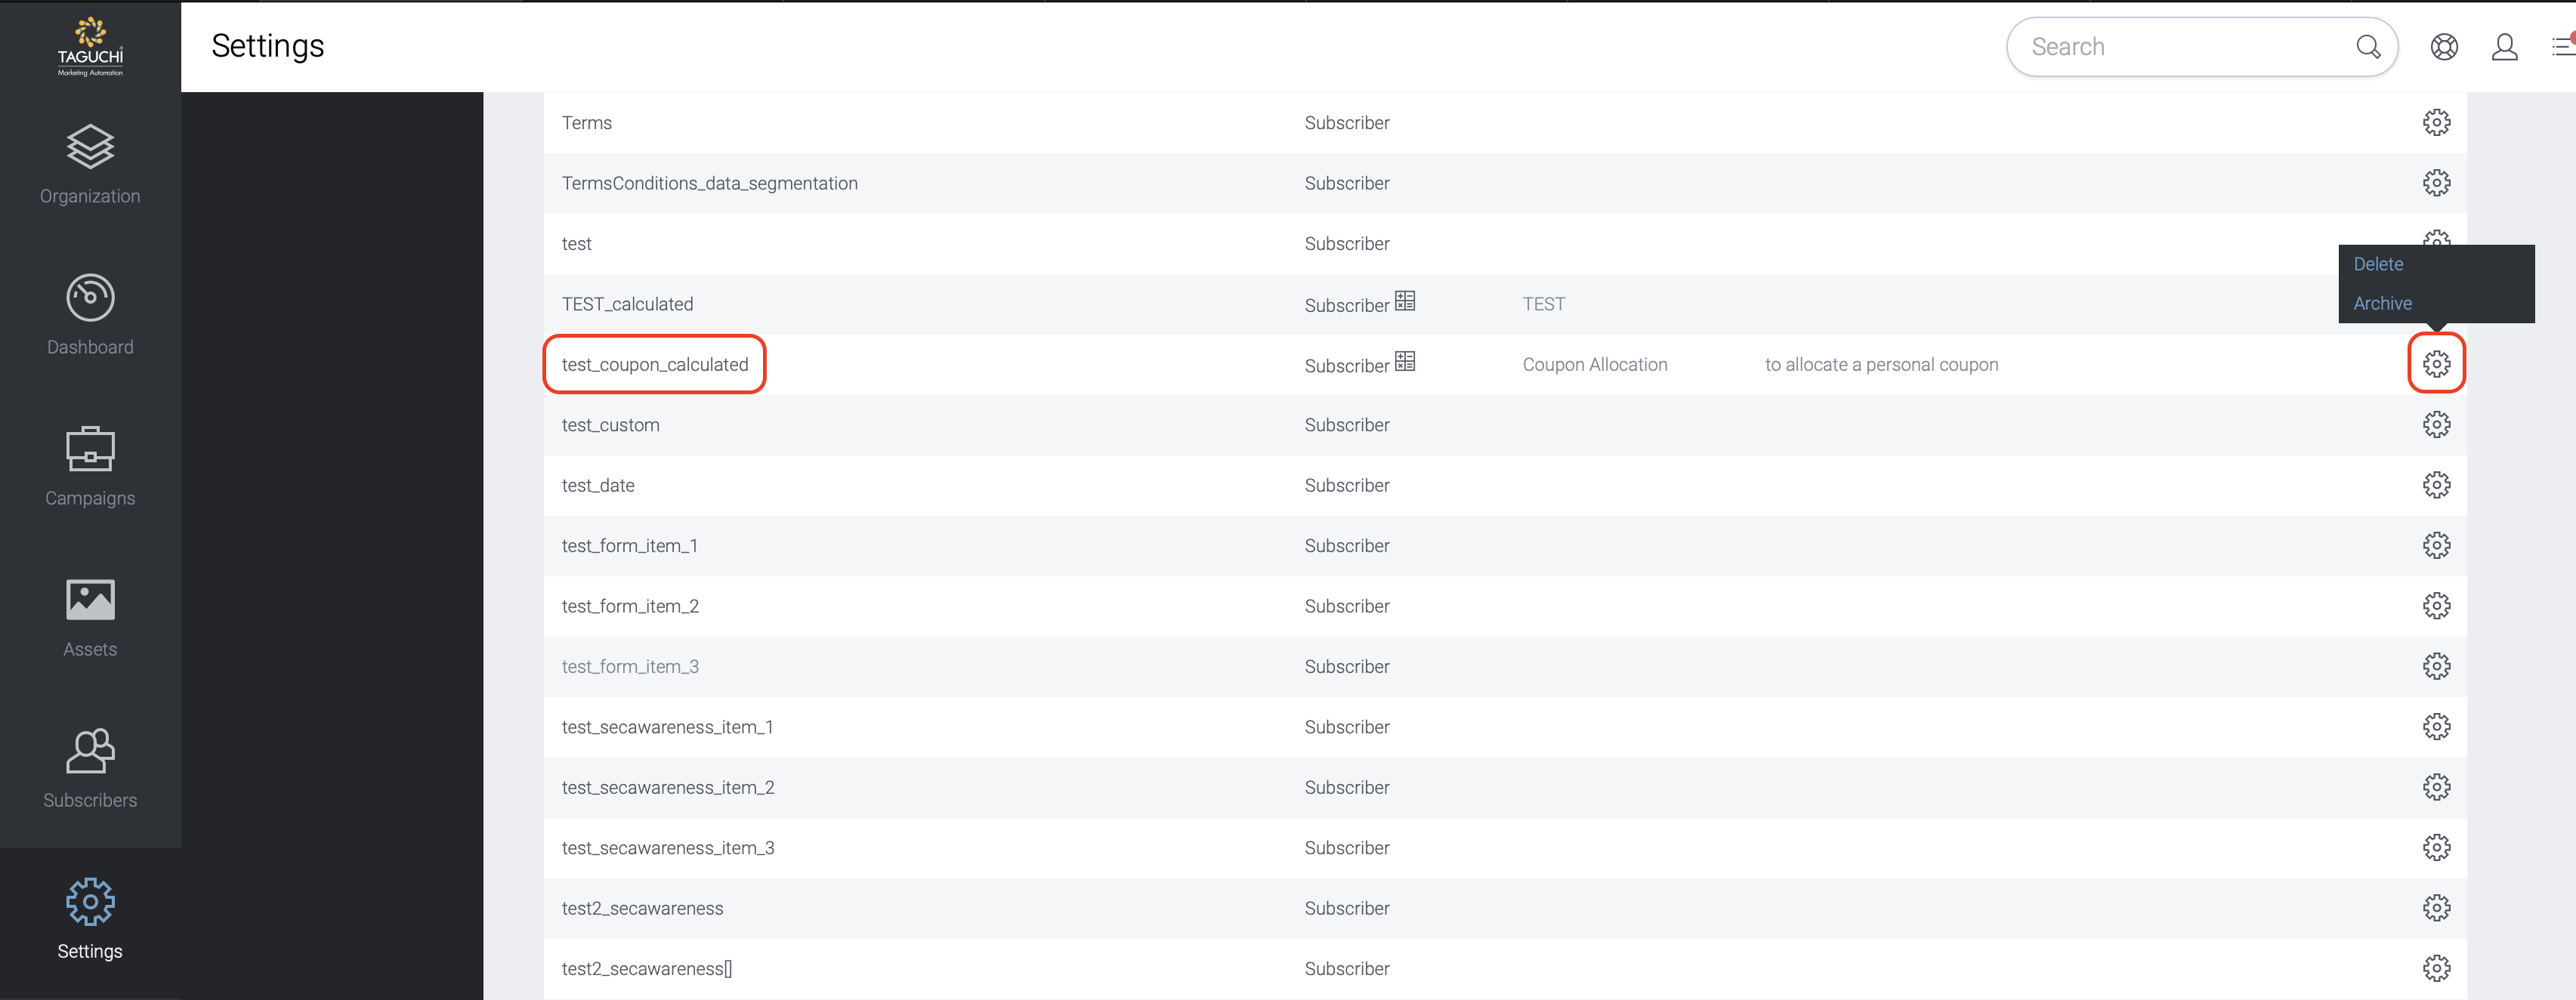
- To manage a custom field, click on the gear icon located at the end of the row. From here, you can choose to delete or archive the field.
- Delete - removes custom field from this page, but does not remove custom fields (and values) from subscriber profiles. Keep in mind that deleting the custom field renders it unusable in target expressions, although it remains tagged to the profile.
- Archive - removes custom field from this page, but does not remove custom fields from subscriber profiles. Please contact Taguchi Support if you would like to un-archive a custom field.
Step 3: Bulk Creation and Update of Custom Fields
- Custom fields can be uploaded or downloaded in bulk using the upload or download button.
Uploading Custom Fields in Bulk
To bulk create custom fields, start off by creating a CSV file containing the following column headers (please note headers must be formatted exactly as below):
- Group Name
- Field Type
- Field Name
- Description
- Important Formatting Notes:
- All values within the column must be in lowercase. For example, use subscriber instead of Subscriber.
- Double-check for any non-allowable values or errors in formatting by consulting the full list of custom fields, which can be downloaded.
Tip: You can download the full list of custom fields to see what values are needed and in what format. Ensure all fields are in lowercase and properly formatted before uploading again.
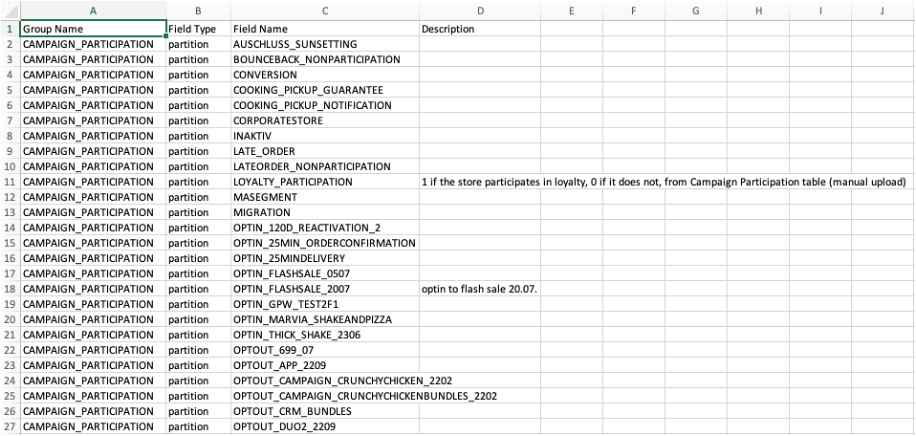
Just like the steps in creating a single custom field, input a value for the above headers. Each row represents a different custom field.
Once you have updated the file and saved as a CSV, click the upload button in the Custom Fields page.


Downloading custom fields in bulk
- To download custom fields in bulk, click on the download button in the Custom Fields page.

- A CSV file will automatically be downloaded to your computer.
- In addition to using this file for your own auditing purposes, this file can be used to make bulk changes to existing custom fields.
- It is important to note that only the group name and description can be updated. The field name and field type cannot be changed.
Reviewing Custom fields
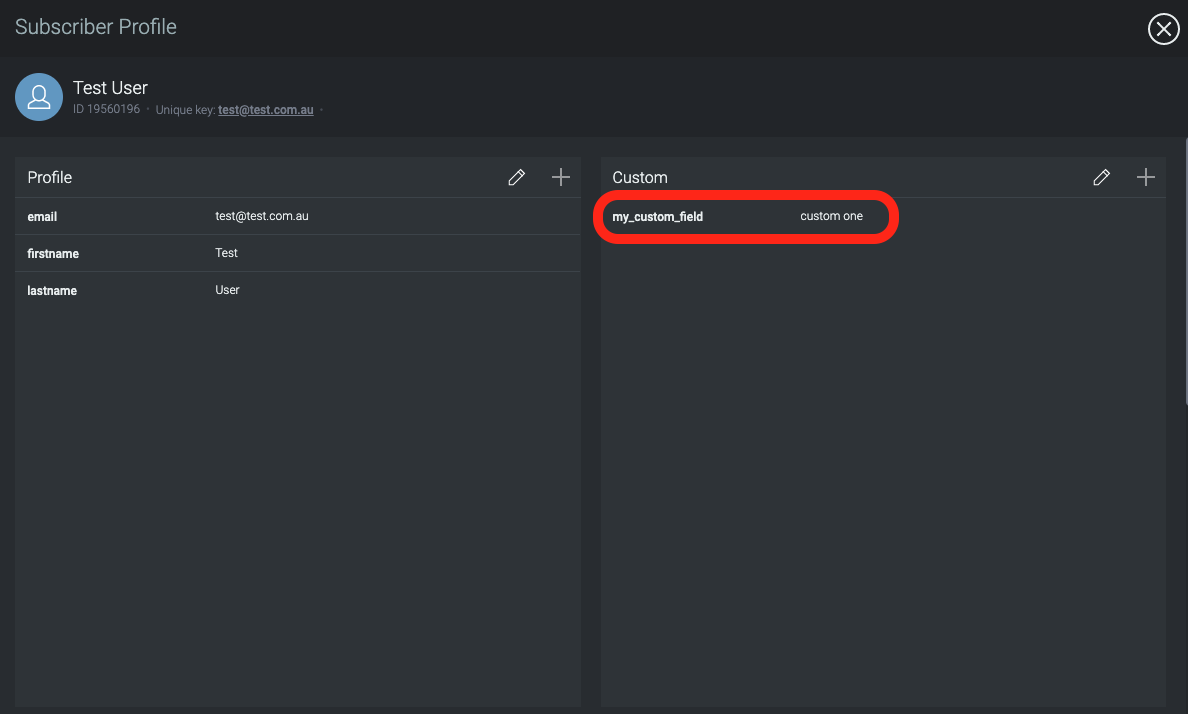
To check if the custom field and its value has been applied successfully, you could check a relevant subscriber's profile or alternatively you can export the subscriber list and check the exported file to see if the new custom field and value has been appended to the relevant subscriber's data.
Additionally, you may generate an extract using the target expression 'cf:your custom field' ilike '%' to view all subscriber profiles containing values from this custom field.
If you have additional questions or require further assistance regarding Custom Fields, do not hesitate to reach out to Taguchi Support
